Saud Faisal

Software Engineer at Subtlelabs with over 5 years of experience in developing high-performance websites and ERP systems for both private and government sectors. Successfully delivered 30+ projects using Python, Django, and React.js.

Python object image

How to Check if an Object Has an Attribute in Python

I can’t tell you how many times I’ve run into this scenario: I’m working on a Python project, confidently accessing an object’s attribute, and boom—AttributeError crashes my program. Sound familiar? This happens all the time when you’re dealing with different object types. Maybe you’re working with user accounts where some users have premium features and others don’t. Or perhaps you’re building an API that receives varying data structures. Whatever the case, knowing how to safely check for attributes is essential. Let me walk you through the different ways I handle this in my own code. Why Bother Checking for Attributes? Here’s a real scenario I dealt with recently: I was building a user management system where regular users had basic info (name, email), but premium users had additional fields like subscription_type and discount_rate. If I tried to access user.subscription_type a regular user object, Python would throw an AttributeError and my whole application would crash. Not ideal, especially in production! That’s why we need to check first. The Different Ways to Check (And When I Use Each) 1. hasattr() – My Go-To Method Honestly, this is what I use 90% of the time. It’s clean, simple, and does exactly what you need: I love hasattr() because it’s readable. When someone else looks at my code, they immediately understand what I’m doing. 2. getattr() – Check and Grab in One Go Sometimes you don’t just want to check if an attribute exists—you want to use it right away. That’s where getattr() shines: I find this super useful when I’m setting up configuration objects or dealing with optional features. Instead of writing an if-statement, I just provide a sensible default. 3. Try-Except – When You Need More Control Sometimes I need to do something more complex when an attribute doesn’t exist. That’s when I reach for try-except: This approach is great when the attribute access itself might trigger some side effects, or when you want to log the missing attribute for debugging. 4. dir() – For When You’re Exploring To be honest, I mostly use dir() When I’m debugging or exploring an unfamiliar library: It’s not something I put in production code, but it’s invaluable during development. A Real Example from My E-commerce Project Let me show you how I used these techniques in an actual project. I was building a shopping cart system with different user tiers: The beauty here is that process_order() it doesn’t need to know what type of cart it’s dealing with. It just checks for the capability and acts accordingly. Works for Methods and Properties Too By the way, these techniques aren’t just for regular attributes. They work perfectly with methods and properties: What I’ve Learned Over Time After years of Python development, here are my rules of thumb: When to use what: Things to avoid: Here’s a mistake I made early on: Wrapping Up Learning to check for attributes properly has saved me countless hours of debugging and prevented so many crashes. The key takeaway? Choose the right tool for the job: Start with hasattr() For most cases, it’s Pythonic, readable, and gets the job done. You can always refactor to something more complex if you need to. What’s your preferred method? Have you run into any tricky situations with attribute checking? I’d love to hear about them in the comments!

How to Check if an Object Has an Attribute in Python Read More »

python dictionaries

Unlocking Python Dictionaries: A Beginner’s Guide to Adding New Keys

Think of a dictionary as a real-life address book. You don’t flip through every page to find someone; you look up their name (key) to instantly get their address (value). Dictionaries work the same way, storing data in key: value pairs for lightning-fast retrieval. But what happens when you get a new friend and need to add them to your address book? You just added a new entry! Similarly, in Python, you often need to add new keys to a dictionary. This blog post will guide you through the different ways to do just that, making you a dictionary master in no time. Method 1: The Straightforward Way – Using Square Brackets [] This is the most common and intuitive method. The syntax is simple: my_dictionary[new_key] = new_value If the new_key doesn’t exist, Python happily adds it to the dictionary. If it does exist, Python updates its value. It’s a two-in-one operation! Example: See? It’s as easy as assigning a value to a variable. Method 2: The Safe Bet – Using the .get() Method Sometimes, you’re not sure if a key exists. You might want to add a key only if it’s not already present. Using [] directly would overwrite the existing value, which might not be what you want. This is where the .get() method shines. While .get() it is primarily used for safe retrieval, we can use the logic it provides to conditionally add a key. Example: This method prevents accidental data loss. Method 3: The Powerful Update – Using the .update() Method What if you need to add multiple keys at once? The .update() method is your best friend. It can merge another dictionary or an iterable of key-value pairs into your original dictionary. Example 1: Merging Two Dictionaries Example 2: Using an Iterable Just like the [] method, if any of the new keys already exist, .update() will overwrite their values. Method 4: The Modern Approach – Using the “Walrus Operator” := (Python 3.8+) This is a more advanced technique, but it’s elegant for specific scenarios. The Walrus Operator := allows you to assign a value to a variable as part of an expression. It’s useful when you want to check a condition based on the new value you’re about to add. Example: Note: This is a more niche use case, but it’s good to know it exists! A Real-World Example: Building a Shopping Cart Let’s tie it all together with a practical example. Imagine you’re building a simple shopping cart for an e-commerce site. Output: This example shows how you can use all three primary methods in a cohesive, real-world scenario. Summary: Which Method Should You Use? Now you’re equipped to dynamically build and modify dictionaries in your Python projects. Go forth and code! Remember, the key to mastering dictionaries is practice.

Unlocking Python Dictionaries: A Beginner’s Guide to Adding New Keys Read More »

Flatten a List of Lists in Python

How to Flatten a List of Lists in Python

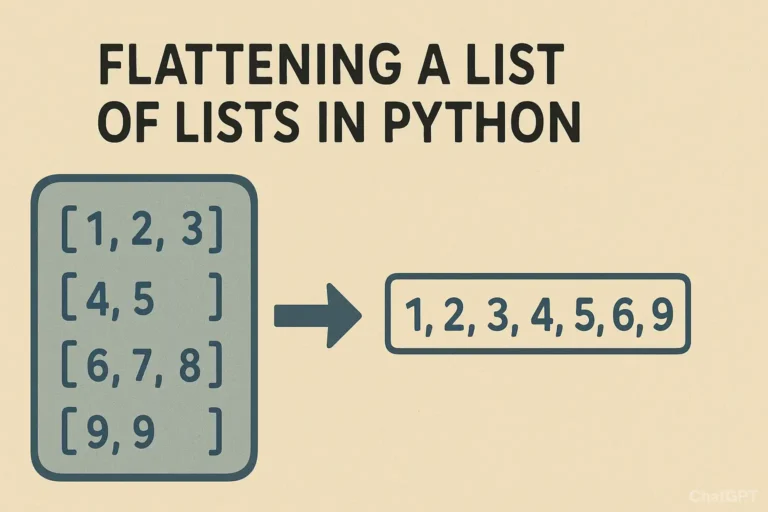
You open one list, only to find another list inside, and then another. In programming, we call this a “list of lists.” While this is a powerful way to organize data, there are countless times when you just need a simple, single-level list to work with. The process of converting this nested structure into a single list is called “flattening.” Imagine you’re cleaning up a cluttered desk. You have several piles of papers (the lists of lists), and you need to put all the papers into a single, neat stack (the flat list) to feed through a scanner. That’s exactly what flattening a list does! Example of a List of Lists: list_of_lists = [[1, 2, 3], [4, 5], [6, 7, 8, 9]] Our goal is to turn this into: flat_list = [1, 2, 3, 4, 5, 6, 7, 8, 9] Let’s explore the most effective ways to achieve this in Python, from the classic methods to the modern, elegant one-liners. Method 1: The Classic For-Loop This method is perfect for understanding what’s happening under the hood. We use a nested loop: one loop to go through each sub-list, and an inner loop to go through each item inside those sub-lists. # Our nested data list_of_lists = [[‘Alice’, ‘Bob’], [‘Charlie’, ‘Diana’], [‘Eve’]] # Start with an empty list to hold our results flat_list = [] # Outer loop: iterate through each sub-list (e.g., [‘Alice’, ‘Bob’]) for sublist in list_of_lists:     # Inner loop: iterate through each item in the current sub-list     for item in sublist:         # Append the item to our final flat_list         flat_list.append(item) print(flat_list) # Output: [‘Alice’, ‘Bob’, ‘Charlie’, ‘Diana’, ‘Eve’] Why use this method? Method 2: The itertools.chain() The itertools.chain() function efficiently treats a series of lists as one continuous sequence, making it very fast. import itertools list_of_lists = [[10, 20], [30], [40, 50, 60]] # The asterisk (*) unpacks the list_of_lists into separate arguments flat_list = list(itertools.chain(*list_of_lists)) print(flat_list) # Output: [10, 20, 30, 40, 50, 60] Why use this method? Method 3: List Comprehension Developers love list comprehensions. They create lists in a single, expressive line, and many consider them the most ‘Pythonic’ way to flatten a list. list_of_lists = [[‘Red’, ‘Blue’], [‘Green’], [‘Yellow’, ‘Purple’, ‘Orange’]] # Read it as: “For each sublist in list_of_lists, give me each item in that sublist.” flat_list = [item for sublist in list_of_lists for item in sublist] print(flat_list) # Output: [‘Red’, ‘Blue’, ‘Green’, ‘Yellow’, ‘Purple’, ‘Orange’] Why use this method? A Real-World Example: Consolidating Weekly Tasks Let’s say you’re building a simple to-do list application. Your data for the week might be stored as a list of daily task lists. weekly_tasks = [     [‘Email client’, ‘Write report’],        # Monday     [‘Team meeting’, ‘Buy groceries’],       # Tuesday     [‘Gym’, ‘Read book’],                    # Wednesday ] # You want a single list of all tasks for the week to calculate the total number. all_tasks = [task for day in weekly_tasks for task in day] print(f”Total tasks this week: {len(all_tasks)}”) print(“All tasks:”, all_tasks) # Output: # Total tasks this week: 6 # All tasks: [‘Email client’, ‘Write report’, ‘Team meeting’, ‘Buy groceries’, ‘Gym’, ‘Read book’] This flat list is now much easier to work with if you want to search for a specific task, count all tasks, or assign priorities across the entire week. Deeply nested lists — recursive flattening If your nesting depth is unknown (e.g., lists inside lists inside lists…), use a recursive approach. Be careful to treat strings as atomic (so they don’t get iterated character-by-character). from collections.abc import Iterable def flatten_deep(seq): for item in seq: if isinstance(item, Iterable) and not isinstance(item, (str, bytes)): yield from flatten_deep(item) else: yield item deeply_nested = [[[1, 2], [3, 4]], [[5, 6]], 7, [‘eight’, [‘nine’]]] print(list(flatten_deep(deeply_nested))) # [1, 2, 3, 4, 5, 6, 7, ‘eight’, ‘nine’] Note: This handles arbitrary depths. If you only need to flatten one level, prefer the simpler methods above. Summary: Which Method Should You Choose? Method Pros Cons Best Use Case For-loop – Very clear and beginner-friendly– Easy to add custom logic (filters, transformations) – Verbose– More lines of code When you need readability or conditional flattening List comprehension – Concise & expressive– Considered the most “Pythonic”– Readable for experienced developers – Harder to read with complex conditions– Can get messy in long one-liners Everyday use for simple flattening itertools.chain.from_iterable() – Very fast– Memory-efficient (iterator-based)– Scales well to large datasets – Requires import– Less obvious for beginners Large datasets or performance-critical tasks Recursive function (deep flatten) – Handles arbitrarily nested lists– Flexible (can adapt to skip/transform items) – More complex to implement– Slightly slower than shallow methods– Recursion depth limit in Python For most situations, the list comprehension is the recommended choice. It’s a perfect but when it comes to multiple conditions, then use append because the code will become messy, you can’t figure it out later. So next time you find yourself with a nested list, don’t unpack it manually, let Python do the heavy lifting and flatten it with ease Comment below if you like or have any queries

How to Flatten a List of Lists in Python Read More »

merging-dictionaries-Python

How to Merge Dictionaries Efficiently in Python

Hello Python enthusiasts! Today we will deep dive into one of the most common operations in Python programming: merging dictionaries. Whether you’re working with configuration settings, API responses, or data processing, you should know how to efficiently combine dictionaries. Why Dictionary Merging Matters Dictionaries are fundamental data structures in Python that store key-value pairs. In real-world applications, you often need to combine data from multiple sources. For example: Let’s explore the various ways to merge dictionaries, from traditional methods to modern Pythonic approaches. Method 1: The Update() Method (In-Place Modification) The most straightforward way to merge dictionaries is using the update() method: # Basic dictionary merging with update() dict1 = {‘a’: 1, ‘b’: 2} dict2 = {‘c’: 3, ‘d’: 4} dict1.update(dict2) print(dict1) # Output: {‘a’: 1, ‘b’: 2, ‘c’: 3, ‘d’: 4} Important Note: This method adds value in the first dictionary but does not return a new dictionary. Real-world Example: User Settings # Default application settings default_settings = { ‘theme’: ‘light’, ‘language’: ‘en’, ‘notifications’: True } # User-specific settings user_settings = { ‘theme’: ‘dark’, ‘timezone’: ‘UTC+1’ } # Merge user settings with defaults default_settings.update(user_settings) print(default_settings) # Output: {‘theme’: ‘dark’, ‘language’: ‘en’, ‘notifications’: True, ‘timezone’: ‘UTC+1’} Method 2: Dictionary Unpacking (Python 3.5+) Python 3.5 introduced a clean, expressive way to merge dictionaries using the ** unpacking operator: dict1 = {‘a’: 1, ‘b’: 2} dict2 = {‘c’: 3, ‘d’: 4} merged_dict = {**dict1, **dict2} print(merged_dict) # Output: {‘a’: 1, ‘b’: 2, ‘c’: 3, ‘d’: 4} Handling Key Conflicts When dictionaries have overlapping keys, the last dictionary’s values take precedence: dict1 = {‘a’: 1, ‘b’: 2} dict2 = {‘b’: 20, ‘c’: 3} merged_dict = {**dict1, **dict2} print(merged_dict) # Output: {‘a’: 1, ‘b’: 20, ‘c’: 3} Real-world Example: Configuration Management # Base configuration base_config = { ‘database_host’: ‘localhost’, ‘database_port’: 5432, ‘debug_mode’: False } # Environment-specific configuration production_config = { ‘database_host’: ‘db.production.com’, ‘debug_mode’: False } # Development overrides dev_overrides = { ‘debug_mode’: True, ‘log_level’: ‘DEBUG’ } # Merge configurations (later dictionaries override earlier ones) final_config = {**base_config, **production_config, **dev_overrides} print(final_config) # Output: {‘database_host’: ‘db.production.com’, ‘database_port’: 5432, # ‘debug_mode’: True, ‘log_level’: ‘DEBUG’} Method 3: The Union Operator (Python 3.9+) Python 3.9 introduced the most intuitive way to merge dictionaries using the | operator: dict1 = {‘a’: 1, ‘b’: 2} dict2 = {‘c’: 3, ‘d’: 4} # Merge using union operator merged_dict = dict1 | dict2 print(merged_dict) # Output: {‘a’: 1, ‘b’: 2, ‘c’: 3, ‘d’: 4} # You can also use the |= operator for in-place merging dict1 |= dict2 print(dict1) # Output: {‘a’: 1, ‘b’: 2, ‘c’: 3, ‘d’: 4} Data Aggregation Method # Here is an example of Sales data from different regions north_sales = {‘january’: 5000, ‘february’: 6000, ‘march’: 5500} south_sales = {‘march’: 7000, ‘april’: 8000, ‘may’: 7500} east_sales = {‘may’: 9000, ‘june’: 8500, ‘july’: 9200} # Aggregate all sales data all_sales = north_sales | south_sales | east_sales print(all_sales) # Output: {‘january’: 5000, ‘february’: 6000, ‘march’: 7000, # ‘april’: 8000, ‘may’: 9000, ‘june’: 8500, ‘july’: 9200} Method 4: Using dict() Constructor You can also use the dict() constructor with unpacking: dict1 = {‘a’: 1, ‘b’: 2} dict2 = {‘c’: 3, ‘d’: 4} merged_dict = dict(dict1, **dict2) print(merged_dict) # Output: {‘a’: 1, ‘b’: 2, ‘c’: 3, ‘d’: 4} Advanced Merging with Custom Function For dictionaries containing other dictionaries, you might need a deep merge: def deep_merge(dict1, dict2): result = dict1.copy() for key, value in dict2.items(): if (key in result and isinstance(result[key], dict) and isinstance(value, dict)): result[key] = deep_merge(result[key], value) else: result[key] = value return result # Example usage user_profile = { ‘personal’: {‘name’: ‘Alice’, ‘age’: 30}, ‘preferences’: {‘theme’: ‘dark’} } user_updates = { ‘personal’: {‘age’: 31, ‘city’: ‘New York’}, ‘preferences’: {‘language’: ‘en’} } merged_profile = deep_merge(user_profile, user_updates) print(merged_profile) # Output: {‘personal’: {‘name’: ‘Alice’, ‘age’: 31, ‘city’: ‘New York’}, # ‘preferences’: {‘theme’: ‘dark’, ‘language’: ‘en’}} Performance Considerations Best Practices Conclusion Merging dictionaries in Python has evolved significantly, with each new Python version bringing more elegant solutions. Here’s a quick summary: Choose the method that best fits your Python version and specific use case. I hope this guide helps you improve dictionary merging in Python. Practice these techniques with your own projects, and you’ll find them becoming second nature in no time!

How to Merge Dictionaries Efficiently in Python Read More »

Scroll to Top