python

merging-dictionaries-Python

How to Merge Dictionaries Efficiently in Python

Hello Python enthusiasts! Today we will deep dive into one of the most common operations in Python programming: merging dictionaries. Whether you’re working with configuration settings, API responses, or data processing, you should know how to efficiently combine dictionaries. Why Dictionary Merging Matters Dictionaries are fundamental data structures in Python that store key-value pairs. In real-world applications, you often need to combine data from multiple sources. For example: Let’s explore the various ways to merge dictionaries, from traditional methods to modern Pythonic approaches. Method 1: The Update() Method (In-Place Modification) The most straightforward way to merge dictionaries is using the update() method: # Basic dictionary merging with update() dict1 = {‘a’: 1, ‘b’: 2} dict2 = {‘c’: 3, ‘d’: 4} dict1.update(dict2) print(dict1) # Output: {‘a’: 1, ‘b’: 2, ‘c’: 3, ‘d’: 4} Important Note: This method adds value in the first dictionary but does not return a new dictionary. Real-world Example: User Settings # Default application settings default_settings = { ‘theme’: ‘light’, ‘language’: ‘en’, ‘notifications’: True } # User-specific settings user_settings = { ‘theme’: ‘dark’, ‘timezone’: ‘UTC+1’ } # Merge user settings with defaults default_settings.update(user_settings) print(default_settings) # Output: {‘theme’: ‘dark’, ‘language’: ‘en’, ‘notifications’: True, ‘timezone’: ‘UTC+1’} Method 2: Dictionary Unpacking (Python 3.5+) Python 3.5 introduced a clean, expressive way to merge dictionaries using the ** unpacking operator: dict1 = {‘a’: 1, ‘b’: 2} dict2 = {‘c’: 3, ‘d’: 4} merged_dict = {**dict1, **dict2} print(merged_dict) # Output: {‘a’: 1, ‘b’: 2, ‘c’: 3, ‘d’: 4} Handling Key Conflicts When dictionaries have overlapping keys, the last dictionary’s values take precedence: dict1 = {‘a’: 1, ‘b’: 2} dict2 = {‘b’: 20, ‘c’: 3} merged_dict = {**dict1, **dict2} print(merged_dict) # Output: {‘a’: 1, ‘b’: 20, ‘c’: 3} Real-world Example: Configuration Management # Base configuration base_config = { ‘database_host’: ‘localhost’, ‘database_port’: 5432, ‘debug_mode’: False } # Environment-specific configuration production_config = { ‘database_host’: ‘db.production.com’, ‘debug_mode’: False } # Development overrides dev_overrides = { ‘debug_mode’: True, ‘log_level’: ‘DEBUG’ } # Merge configurations (later dictionaries override earlier ones) final_config = {**base_config, **production_config, **dev_overrides} print(final_config) # Output: {‘database_host’: ‘db.production.com’, ‘database_port’: 5432, # ‘debug_mode’: True, ‘log_level’: ‘DEBUG’} Method 3: The Union Operator (Python 3.9+) Python 3.9 introduced the most intuitive way to merge dictionaries using the | operator: dict1 = {‘a’: 1, ‘b’: 2} dict2 = {‘c’: 3, ‘d’: 4} # Merge using union operator merged_dict = dict1 | dict2 print(merged_dict) # Output: {‘a’: 1, ‘b’: 2, ‘c’: 3, ‘d’: 4} # You can also use the |= operator for in-place merging dict1 |= dict2 print(dict1) # Output: {‘a’: 1, ‘b’: 2, ‘c’: 3, ‘d’: 4} Data Aggregation Method # Here is an example of Sales data from different regions north_sales = {‘january’: 5000, ‘february’: 6000, ‘march’: 5500} south_sales = {‘march’: 7000, ‘april’: 8000, ‘may’: 7500} east_sales = {‘may’: 9000, ‘june’: 8500, ‘july’: 9200} # Aggregate all sales data all_sales = north_sales | south_sales | east_sales print(all_sales) # Output: {‘january’: 5000, ‘february’: 6000, ‘march’: 7000, # ‘april’: 8000, ‘may’: 9000, ‘june’: 8500, ‘july’: 9200} Method 4: Using dict() Constructor You can also use the dict() constructor with unpacking: dict1 = {‘a’: 1, ‘b’: 2} dict2 = {‘c’: 3, ‘d’: 4} merged_dict = dict(dict1, **dict2) print(merged_dict) # Output: {‘a’: 1, ‘b’: 2, ‘c’: 3, ‘d’: 4} Advanced Merging with Custom Function For dictionaries containing other dictionaries, you might need a deep merge: def deep_merge(dict1, dict2): result = dict1.copy() for key, value in dict2.items(): if (key in result and isinstance(result[key], dict) and isinstance(value, dict)): result[key] = deep_merge(result[key], value) else: result[key] = value return result # Example usage user_profile = { ‘personal’: {‘name’: ‘Alice’, ‘age’: 30}, ‘preferences’: {‘theme’: ‘dark’} } user_updates = { ‘personal’: {‘age’: 31, ‘city’: ‘New York’}, ‘preferences’: {‘language’: ‘en’} } merged_profile = deep_merge(user_profile, user_updates) print(merged_profile) # Output: {‘personal’: {‘name’: ‘Alice’, ‘age’: 31, ‘city’: ‘New York’}, # ‘preferences’: {‘theme’: ‘dark’, ‘language’: ‘en’}} Performance Considerations Best Practices Conclusion Merging dictionaries in Python has evolved significantly, with each new Python version bringing more elegant solutions. Here’s a quick summary: Choose the method that best fits your Python version and specific use case. I hope this guide helps you improve dictionary merging in Python. Practice these techniques with your own projects, and you’ll find them becoming second nature in no time!

How to Merge Dictionaries Efficiently in Python Read More »

Python yield keyword concept illustration with generator function

Python’s yield Keyword: From Theory to Real-World Magic

Today, we’re going to break down yield into simple, digestible pieces. By the end of this article, you’ll not only understand what it does but also why it’s such a powerful tool for writing efficient and elegant Python code. The Problem: Why Not Just Use return? Let’s start with what we know. The return statement is straightforward: a function runs, computes a value, and return sends that value back to the caller. The function’s state is then completely wiped out. If you call it again, it starts from scratch. But what if you’re working with a massive dataset—like a file with millions of lines, or a continuous stream of data from a sensor? Using return to get all the data at once would mean loading everything into your computer’s memory. This can be slow, or worse, it can crash your program if the data is too large. We need a way to produce a sequence of results one at a time, on the fly, without storing the entire sequence in memory first. This is exactly the problem that generators and the yield keyword solve. The Simple Analogy: A Book vs. A Librarian Think of a function with return as printing a book. Now, think of a function with yield a helpful librarian who reads the book to you, one line at a time. This “lazy” or “on-demand” production of values is the core idea behind generators. Let’s see the example, Look at a traditional function using return: def create_squares_list(n): result = [] for i in range(n): result.append(i*i) return result # Using the function my_list = create_squares_list(5) # The ENTIRE list is built in memory here for num in my_list: print(num) # Output: 0, 1, 4, 9, 16 This works fine for n=5, but if n were 10 million, the result The list would consume a massive amount of memory. Now, let’s rewrite this as a generator function using yield: def generate_squares(n): for i in range(n): yield i*i # <– The magic keyword! # Using the generator function my_generator = generate_squares(5) # Nothing is calculated yet! print(my_generator) # Prints: <generator object generate_squares at 0x…> What’s happening here? The key takeaway is state suspension. The function doesn’t die after yield; it simply goes to sleep, waiting to be woken up again. This makes it incredibly memory-efficient. If you are Reading Large Files This is perhaps the most common and critical use case for generators. Imagine you have a massive server log file that is 50 GB in size. You can’t possibly load it all into memory. The Inefficient Way (Avoid this!): with open(‘huge_log_file.log’, ‘r’) as file: lines = file.readlines() # Loads all 50 GB into RAM! for line in lines: if ‘ERROR’ in line: print(line) The Efficient Generator Way (The Pythonic Way): def read_large_file(file_path): with open(file_path, ‘r’) as file: for line in file: # file objects are already generators! yield line # Now, we can process the file line by line for line in read_large_file(‘huge_log_file.log’): if ‘ERROR’ in line: print(line) In this efficient version, only one line is ever in memory at a time, no matter how big the file is. The for line in file idiom itself uses a generator under the hood, and our function just wraps it for clarity. While Generating an Infinite Sequence You can’t create an infinite list in memory—it’s impossible! But you can create a generator that produces values from an infinite sequence forever. Need a simple ID generator? def generate_user_ids(): id = 1000 while True: # This loop runs forever… but it’s a generator! yield id id += 1 id_generator = generate_user_ids() print(next(id_generator)) # 1000 print(next(id_generator)) # 1001 print(next(id_generator)) # 1002 # This can go on indefinitely, using almost no memory. Need a stream of Fibonacci numbers? def fibonacci(): a, b = 0, 1 while True: yield a a, b = b, a + b fib_gen = fibonacci() for i, num in enumerate(fib_gen): if i > 10: # Let’s not loop forever in this example! break print(num) # Output Key Takeaways Remember the helpful librarian the next time you face a memory-heavy task in Python. Don’t print the whole book—just yield one page at a time! Comment below if you like

Python’s yield Keyword: From Theory to Real-World Magic Read More »

Feature image showing the Python logo and a command-line terminal with the title ‘Create CLI Tool with Python: From Zero to Hero

Create a CLI Tool with Python: From Zero to Hero

Command-line tools are essential for developers—they’re fast, lightweight, and automate repetitive tasks. In this tutorial, we’ll build a File Organizer CLI tool in Python from scratch. By the end, you’ll have a working CLI tool that organizes files by type and is ready to share or package for others. Why Build CLI Tools with Python? Before we dive into the code, it’s important to understand why Python is an excellent choice for building command-line tools. 1. Simplicity and Readability Python’s clean and intuitive syntax allows you to focus on functionality, rather than worrying about complex language constructs. You can write concise, readable code that’s easy to maintain—perfect for small utilities or large projects alike. 2. Rich Ecosystem Python comes with a powerful standard library for file handling, argument parsing, and more. On top of that, third-party packages like Click, Rich, and argparse make building robust and user-friendly CLI tools even easier. 3. Cross-Platform Compatibility Python runs seamlessly on Windows, macOS, and Linux. The same CLI tool you develop on your local machine can be deployed anywhere without major changes—saving you time and headaches. 4. Rapid Development Python is an interpreted language, which means you can write, test, and iterate on your code quickly. This rapid feedback loop is ideal when building CLI tools where functionality and usability matter. Setting Up Your Development Environment First, let’s prepare our folder. I recommend creating a virtual environment to keep dependencies isolated: mkdir my-cli-tool cd my-cli-tool python -m venv venv source venv/bin/activate # On Windows: venv\Scripts\activate Install the essential rich-click we’ll use: pip install click rich I am using click for argument parsing and rich for beautiful terminal output. While Python’s built-in argparse is powerful, click offers a more intuitive approach for complex CLI applications. Building Your First CLI Tool: A File Organizer Let’s create something practical – a tool that organizes files in a directory by their extensions. This example will demonstrate core CLI concepts while solving a real problem. Create a file called file_organizer.py: import os import shutil from pathlib import Path import click from rich.console import Console from rich.table import Table from rich.progress import Progress console = Console() @click.command() @click.argument(‘directory’, type=click.Path(exists=True, file_okay=False, dir_okay=True)) @click.option(‘–dry-run’, is_flag=True, help=’Show what would be done without making changes’) @click.option(‘–verbose’, ‘-v’, is_flag=True, help=’Show detailed output’) def organize_files(directory, dry_run, verbose): “”” Organize files in DIRECTORY by their extensions. Creates subdirectories for each file type and moves files accordingly. “”” directory = Path(directory) if dry_run: console.print(“[yellow]Running in dry-run mode – no changes will be made[/yellow]”) # Scan directory and group files by extension file_groups = {} total_files = 0 for file_path in directory.iterdir(): if file_path.is_file(): extension = file_path.suffix.lower() or ‘no_extension’ if extension not in file_groups: file_groups[extension] = [] file_groups[extension].append(file_path) total_files += 1 if total_files == 0: console.print(“[red]No files found in the specified directory[/red]”) return # Display summary table if verbose or dry_run: table = Table(title=f”Files to organize in {directory}”) table.add_column(“Extension”, style=”cyan”) table.add_column(“Count”, style=”green”) table.add_column(“Files”, style=”white”) for ext, files in file_groups.items(): file_names = “, “.join([f.name for f in files[:3]]) if len(files) > 3: file_names += f” … and {len(files) – 3} more” table.add_row(ext, str(len(files)), file_names) console.print(table) if dry_run: return # Create directories and move files with Progress() as progress: task = progress.add_task(“[green]Organizing files…”, total=total_files) for extension, files in file_groups.items(): # Create directory for this extension ext_dir = directory / extension.lstrip(‘.’) ext_dir.mkdir(exist_ok=True) for file_path in files: destination = ext_dir / file_path.name # Handle naming conflicts counter = 1 while destination.exists(): name_parts = file_path.stem, counter, file_path.suffix destination = ext_dir / f”{name_parts[0]}_{name_parts[1]}{name_parts[2]}” counter += 1 shutil.move(str(file_path), str(destination)) if verbose: console.print(f”[green]Moved[/green] {file_path.name} → {destination}”) progress.advance(task) console.print(f”[bold green]Successfully organized {total_files} files![/bold green]”) if __name__ == ‘__main__’: organize_files() Understanding the Code Structure Let’s break down the key components: my-cli-tool/ │── file_organizer.py # Main CLI code │── text.py # Test file generator │── README.md # Documentation │── setup.py # Installation script │── assets/ │ └── banner.png # Optional banner for README │── venv/ # Local virtual environment Making Your Tool Installable To make your CLI tool easily installable and distributable, create a setup.py file: from setuptools import setup setup( name=”file-organizer”, version=”0.1.0″, py_modules=[“file_organizer”], # because you have file_organizer.py install_requires=[ “click”, “rich”, ], entry_points={ “console_scripts”: [ “file-organizer=file_organizer:organize_files”, ], }, author=”Tarun Kumar”, description=”A Python CLI tool to organize files by extension”, long_description=open(“README.md”).read() if open(“README.md”, “r”, encoding=”utf-8″) else “”, long_description_content_type=”text/markdown”, python_requires=”>=3.8″, ) Install your tool in development mode: pip install -e . Now you can run your tool from anywhere using the organize command! Testing Your CLI Tool Testing CLI applications is more important because it requires special consideration. Here’s how to test your file organizer: import os # Folder where test files will be created TEST_DIR = “test_files” # Make the directory if it doesn’t exist os.makedirs(TEST_DIR, exist_ok=True) # List of test files with different extensions files = [ “document1.pdf”, “document2.pdf”, “image1.jpg”, “image2.jpg”, “image3.png”, “script1.py”, “script2.py”, “archive1.zip”, “archive2.zip”, “notes.txt”, “readme.md” ] # Create empty files for file_name in files: file_path = os.path.join(TEST_DIR, file_name) with open(file_path, “w”) as f: f.write(f”Test content for {file_name}\n”) print(f”Created {len(files)} test files in ‘{TEST_DIR}’ folder.”) Run your tests with: python text.py Best Practices for CLI Development Clear Documentation: Always provide helpful docstrings and command descriptions. Users should understand your tool’s purpose at a glance. Graceful Error Handling: Anticipate common errors and provide meaningful error messages. Never let users see raw Python stack traces. Progress Feedback: For long-running operations, show progress bars or status updates. Silent tools feel broken. Configurable Behavior: Allow users to customize your tool’s behavior through configuration files or environment variables. Follow Unix Philosophy: Make tools that do one thing well and can be easily combined with other tools. Deployment and Distribution Once your CLI tool is ready, you have several distribution options: PyPI Publication: Upload your package to the Python Package Index for easy installation via pip. GitHub Releases: Distribute your tool through GitHub with pre-built executables using PyInstaller. Docker Container: Package your tool in a Docker container for consistent deployment across environments. Download code Advanced Topics to Explore As you become more comfortable with CLI development, consider exploring: Conclusion Building CLI

Create a CLI Tool with Python: From Zero to Hero Read More »

Illustration of Python virtual environments with Python logo, terminal, and folder icons, representing project isolation and dependency management.

Everything You Need to Know About Python Virtual Environments

When I first started coding in Python, I kept running into this frustrating problem. I’d install a package for one project, then start another project that needed a different version of the same package, and suddenly nothing worked anymore. Sound familiar? That’s when I discovered virtual environments, and honestly, they changed everything about how I work with Python. What Exactly Is a Virtual Environment? Think of a virtual environment as a separate, isolated workspace for each of your Python projects. It’s like having different toolboxes for different jobs – you wouldn’t use the same tools to fix a bike and bake a cake, right? Each virtual environment has its own Python interpreter and its own set of installed packages, completely independent from your system Python and other environments. Before I understood this, I was installing everything globally on my system. Big mistake. I once spent an entire afternoon trying to figure out why my Django app suddenly broke, only to realize I’d updated a package for a completely different project. Never again. Why You Actually Need Virtual Environments Let me paint you a picture. You’re working on Project A that needs Django 3.2, and everything’s running smoothly. Then you start Project B that requires Django 4.0. Without virtual environments, you’d have to constantly uninstall and reinstall different versions, or worse, try to make both projects work with the same version. It’s a nightmare I wouldn’t wish on anyone. Here’s what virtual environments solve: Dependency conflicts: Each project gets exactly the versions it needs. No more “but it works on my machine” situations. Clean development: You know exactly what packages each project uses. No mysterious dependencies floating around from old projects you forgot about. Reproducibility: When you share your project, others can recreate your exact environment. This has saved me countless hours of debugging with teammates. System protection: You’re not messing with your system Python. I learned this the hard way when I accidentally broke my system package manager by upgrading pip globally. Creating Your First Virtual Environment Python makes this surprisingly easy. Since Python 3.3, the venv module comes built-in, so you don’t need to install anything extra. Here’s how I typically set up a new project: First, navigate to your project directory and run: python -m venv myenv This creates a new folder called myenv (you can name it whatever you want) containing your virtual environment. I usually stick with venv or .venv As the name suggests, the dot makes it hidden on Unix systems, which keeps things tidy. Activating and Using Your Environment Creating the environment is just the first step. You need to activate it to actually use it. This part confused me at first because the command differs depending on your operating system. On Windows: myenv\Scripts\activate On macOS and Linux: source myenv/bin/activate Once activated, you’ll usually see the environment name in parentheses at the beginning of your command prompt, like (myenv). This is your confirmation that you’re working in the virtual environment. Everything you install with pip now goes into this environment only. To deactivate when you’re done: deactivate Simple as that. The environment still exists; you’re just not using it anymore. Managing Packages Like a Pro Here’s something that took me way too long to learn: always create a requirements file. Seriously, do this from day one of your project. After installing your packages, run: pip freeze > requirements.txt This creates a file listing all installed packages and their versions. When someone else (or future you) needs to recreate the environment, they just run: pip install -r requirements.txt I can’t tell you how many times this has saved me when moving projects between computers or deploying to production. Alternative Tools Worth Knowing While venv It’s great for most cases, but other tools might suit your workflow better: virtualenv: The original virtual environment tool. It works with older Python versions and has a few more features than venv. I still use this for legacy projects. conda: Popular in data science circles. It can manage non-Python dependencies too, which is handy for packages like NumPy that rely on C libraries. pipenv: Combines pip and virtualenv, and adds some nice features like automatic loading of environment variables. Some people love it; I find it a bit slow for my taste. poetry: My current favorite for serious projects. It handles dependency resolution better than pip and makes packaging your project much easier. Common Pitfalls and How to Avoid Them After years of using virtual environments, here are the mistakes I see people make most often: Forgetting to activate: I still do this sometimes. You create the environment, get excited to start coding, and forget to activate it. Then you wonder why your imports aren’t working. Committing the environment to Git: Please don’t do this. Add your environment folder to .gitignore. The requirements.txt file is all you need to recreate it. Using the wrong Python version: When creating an environment, it uses whatever Python version you call it with. Make sure you’re using the right one from the start. Not updating pip: First thing I do in a new environment is run pip install –upgrade pip. An outdated pip can cause weird installation issues. Copy-pasting a venv folder between projects usually breaks because: Instead, you should always recreate a new virtual environment for each project and install dependencies from requirements.txt or a lock file. Real-World Workflow Here’s my typical workflow when starting a new project: For existing projects, I clone the repo, create a fresh environment, and install from requirements.txt. Clean and simple. When Things Go Wrong Sometimes virtual environments get messy. Maybe you installed the wrong package, or something got corrupted. The beautiful thing is, you can just delete the environment folder and start fresh. Your code is safe, and recreating the environment from requirements.txt takes just minutes. If you’re getting permission errors on Mac or Linux, avoid using sudo it with pip. If you need to use sudo, you’re probably trying to install globally by mistake. Check

Everything You Need to Know About Python Virtual Environments Read More »

Unlocking the Power of Python Collections Library – feature image with Python logo and data structures

Unlocking the Power of Python Collections Library

As a Python developer, I’ve always been fascinated by how the language provides elegant solutions to common programming challenges. One library that consistently amazes me is the collections module. It’s like having a Swiss Army knife for data structures – packed with specialized tools that can make your code cleaner, more efficient, and surprisingly readable. Today, I want to share my journey of discovering the hidden gems in Python’s collections library and show you how these powerful data structures can transform your code. The best part? You don’t need to install anything extra — collections is a built-in Python module, ready to use out of the box. Why Collections Matter Before we dive in, let me ask you something: How many times have you written code to count occurrences of items in a list? Or struggled with creating a dictionary that has default values? I’ve been there too, and that’s exactly where the collections library shines. The collections module provides specialized container datatypes that are alternatives to Python’s general-purpose built-in containers like dict, list, set, and tuple. These aren’t just fancy alternatives – they solve real problems that we encounter in everyday programming. Counter: The Item Counting Superhero Let’s start with my personal favorite – Counter. This little gem has saved me countless lines of code. The Old Way vs The Counter Way Here’s how I used to count items: # The tedious way words = [‘apple’, ‘banana’, ‘apple’, ‘cherry’, ‘banana’, ‘apple’] word_count = {} for word in words: if word in word_count: word_count[word] += 1 else: word_count[word] = 1 Now, with Counter: from collections import Counter words = [‘apple’, ‘banana’, ‘apple’, ‘cherry’, ‘banana’, ‘apple’] word_count = Counter(words) print(word_count) # Counter({‘apple’: 3, ‘banana’: 2, ‘cherry’: 1}) The difference is night and day! But Counter isn’t just about counting – it’s packed with useful methods. Counter’s Hidden Powers from collections import Counter # Most common items sales_data = Counter({‘product_A’: 150, ‘product_B’: 89, ‘product_C’: 200, ‘product_D’: 45}) top_products = sales_data.most_common(2) print(top_products) # [(‘product_C’, 200), (‘product_A’, 150)] # Mathematical operations counter1 = Counter([‘a’, ‘b’, ‘c’, ‘a’]) counter2 = Counter([‘a’, ‘b’, ‘b’, ‘d’]) print(counter1 + counter2) # Addition print(counter1 – counter2) # Subtraction print(counter1 & counter2) # Intersection print(counter1 | counter2) # Union I use Counter extensively in data analysis projects. It’s incredibly handy for generating quick frequency distributions and finding patterns in datasets. defaultdict: Say Goodbye to KeyError How many times have you written code like this? # Grouping items by category items = [(‘fruit’, ‘apple’), (‘vegetable’, ‘carrot’), (‘fruit’, ‘banana’), (‘vegetable’, ‘broccoli’)] groups = {} for category, item in items: if category not in groups: groups[category] = [] groups[category].append(item) With defaultdict, it becomes elegant: from collections import defaultdict items = [(‘fruit’, ‘apple’), (‘vegetable’, ‘carrot’), (‘fruit’, ‘banana’), (‘vegetable’, ‘broccoli’)] groups = defaultdict(list) for category, item in items: groups[category].append(item) print(dict(groups)) # {‘fruit’: [‘apple’, ‘banana’], ‘vegetable’: [‘carrot’, ‘broccoli’]} Real-World defaultdict Magic I recently used defaultdict to build a simple caching system: from collections import defaultdict import time # Simple cache with automatic list creation cache = defaultdict(list) def log_access(user_id, action): timestamp = time.time() cache[user_id].append((action, timestamp)) log_access(‘user123’, ‘login’) log_access(‘user123’, ‘view_page’) log_access(‘user456’, ‘login’) print(dict(cache)) No more checking if keys exist – defaultdict handles it automatically! namedtuple: Structured Data Made Simple Regular tuples are great, but they lack readability. What does person[1] represent? Is it age? Name? namedtuple solves this beautifully. from collections import namedtuple # Define a Person structure Person = namedtuple(‘Person’, [‘name’, ‘age’, ‘city’]) # Create instances alice = Person(‘Alice’, 30, ‘New York’) bob = Person(‘Bob’, 25, ‘San Francisco’) # Access data meaningfully print(f”{alice.name} is {alice.age} years old and lives in {alice.city}”) # namedtuples are still tuples! name, age, city = alice print(f”Unpacked: {name}, {age}, {city}”) Why I Love namedtuple I use namedtuple for representing database records, API responses, and configuration objects. deque: The Double-Ended Queue Champion When you need efficient appends and pops from both ends of a sequence, deque (pronounced “deck”) is your friend. from collections import deque # Creating a deque queue = deque([‘a’, ‘b’, ‘c’]) # Efficient operations at both ends queue.appendleft(‘z’) # Add to left queue.append(‘d’) # Add to right print(queue) # deque([‘z’, ‘a’, ‘b’, ‘c’, ‘d’]) queue.popleft() # Remove from left queue.pop() # Remove from right print(queue) # deque([‘a’, ‘b’, ‘c’]) Real-World deque Usage I’ve used a deque for implementing sliding window algorithms: from collections import deque def sliding_window_max(arr, window_size): “””Find maximum in each sliding window””” result = [] window = deque() for i, num in enumerate(arr): # Remove elements outside current window while window and window[0] <= i – window_size: window.popleft() # Remove smaller elements from rear while window and arr[window[-1]] <= num: window.pop() window.append(i) # Add to result if window is complete if i >= window_size – 1: result.append(arr[window[0]]) return result numbers = [1, 3, -1, -3, 5, 3, 6, 7] print(sliding_window_max(numbers, 3)) # [3, 3, 5, 5, 6, 7] OrderedDict: When Order Matters While modern Python dictionaries maintain insertion order, OrderedDict provides additional functionality when you need fine-grained control over ordering. from collections import OrderedDict # LRU Cache implementation using OrderedDict class LRUCache: def __init__(self, capacity): self.capacity = capacity self.cache = OrderedDict() def get(self, key): if key in self.cache: # Move to end (most recently used) self.cache.move_to_end(key) return self.cache[key] return None def put(self, key, value): if key in self.cache: self.cache.move_to_end(key) elif len(self.cache) >= self.capacity: # Remove least recently used (first item) self.cache.popitem(last=False) self.cache[key] = value # Usage cache = LRUCache(3) cache.put(‘a’, 1) cache.put(‘b’, 2) cache.put(‘c’, 3) print(cache.get(‘a’)) # 1, moves ‘a’ to end cache.put(‘d’, 4) # Removes ‘b’ (least recently used) ChainMap: Combining Multiple Mappings ChainMap It is perfect when you need to work with multiple dictionaries as a single mapping: from collections import ChainMap # Configuration hierarchy defaults = {‘timeout’: 30, ‘retries’: 3, ‘debug’: False} user_config = {‘timeout’: 60, ‘debug’: True} environment = {‘debug’: False} # Chain them together (first match wins) config = ChainMap(environment, user_config, defaults) print(config[‘timeout’]) # 60 (from user_config) print(config[‘retries’]) # 3 (from defaults) print(config[‘debug’]) # False (from environment) # Add new mapping to front config = config.new_child({‘timeout’: 10}) print(config[‘timeout’]) # 10 (from

Unlocking the Power of Python Collections Library Read More »

Python Django job scraper workflow with BeautifulSoup, TimesJobs, and Google Sheets integration.

How I Built a Django Job Scraper that Saves to Google Sheets

Last month, I got stuck in the usual routine: job boards were checked by hand, listings were copied into spreadsheets, and the best opportunities were always missed. After too many hours were spent on this boring work, a thought came up – why not have the whole process automated? So, I started thinking about creating a Django project that could scrape and automate job listings from websites like LinkedIn and Indeed. However, after trying multiple ways to scrape data from sites like Indeed, I got stuck because most big websites have bot protections that prevent scraping. I even tried using Selenium, but it didn’t work reliably. Ultimately, I used BeautifulSoup4 and the requests library to extract the data. I scraped data from the TimesJobs website and saved it both in a Google Sheet and in a Django SQLite database. The Problem That Drove Me Crazy Every morning, I would open 5–6 different job boards, search for the same keywords, scroll through hundreds of listings, and manually copy the good ones into my tracking spreadsheet. By the time I was done, I was already mentally exhausted—before even starting to write cover letters. The worst part? I kept missing jobs that were posted while I was sleeping or busy with other tasks. Some great opportunities would disappear before I even got a chance to see them. I knew there had to be a better way. What I Built (And Why It Actually Works) My solution is pretty straightforward: a Python script, built with Django, that automatically scrapes job listings from multiple sources and saves everything into a Google Sheet and a SQLite database. But here’s what makes it actually useful: The Tech Stack (Nothing Too Fancy) I kept things simple because, honestly, I wanted something I could maintain without pulling my hair out: Lessons I Learned the Hard Way Rate limiting is real: I got blocked from a few sites in the first week because I was being too aggressive with requests. Had to add delays and retry logic. Websites change their structure: What worked perfectly in January broke in February when one site redesigned its job listing pages. Now I build in more flexibility from the start. Google Sheets API has quotas: You can’t just hammer their API endlessly. I learned to batch my updates and cache data locally. Job descriptions are messy: The amount of inconsistent HTML and weird formatting in job posts is honestly astounding. Cleaning this data took way more time than I expected. Want to Build Your Own? Here’s a step-by-step guide to building a Django project that scrapes job listings using BeautifulSoup4 and requests, and saves the data in both Google Sheets and your Django models: 1. Set Up Your Django Project pip install django django-admin startproject jobscraper cd jobscraper python manage.py startapp jobs 2. Create Your Job Model Define a model to store job listings in jobs/models.py: from django.db import models class Job(models.Model): title = models.CharField(max_length=255) company = models.CharField(max_length=255, blank=True, null=True) location = models.CharField(max_length=255, blank=True, null=True) experience = models.CharField(max_length=100, blank=True, null=True) salary = models.CharField(max_length=100, blank=True, null=True) posted = models.CharField(max_length=100, blank=True, null=True) description = models.TextField(blank=True, null=True) skills = models.TextField(blank=True, null=True) # store as comma-separated string link = models.URLField(unique=True) # prevent duplicates created_at = models.DateTimeField(auto_now_add=True) def __str__(self): return f”{self.title} at {self.company}” python manage.py makemigrations python manage.py migrate 3. Scrape Job Listings with BeautifulSoup4 and Requests pip install beautifulsoup4 requests gspread oauth2client def scrape_jobs(): url = “https://www.timesjobs.com/candidate/job-search.html?searchType=personalizedSearch&from=submit&txtKeywords=Python+developer&txtLocation=India” response = requests.get(url, headers={“User-Agent”: “Mozilla/5.0”}) soup = BeautifulSoup(response.text, “html.parser”) container = soup.find(“ul”, class_=”new-joblist”) if not container: print(“No job list found!”) return [] cards = container.find_all(“li”, class_=”clearfix job-bx wht-shd-bx”) print(f”Found {len(cards)} jobs”) jobs = [] for card in cards: job_data = parse_job_card(card) # Save if not exists if not Job.objects.filter(link=job_data[“link”]).exists(): Job.objects.create( title=job_data[“title”], company=job_data[“company”], location=job_data[“location”], experience=job_data[“experience”], salary=job_data[“salary”], posted=job_data[“posted”], description=job_data[“description”], skills=”, “.join(job_data[“skills”]), # convert list to string link=job_data[“link”], ) jobs.append(job_data) return jobs 4. Save Data to Google Sheets Log in to your Gmail and open Google Cloud. Create a New Project and Enable Google Sheets API and Google Drive API. Create Service Account Credentials. Generate a JSON Key File. Share your Google Sheet with the Service Account email as editor. import gspread from oauth2client.service_account import ServiceAccountCredentials from django.conf import settings def get_google_sheet(): scope = [“https://spreadsheets.google.com/feeds”, “https://www.googleapis.com/auth/drive”] creds = ServiceAccountCredentials.from_json_keyfile_name( settings.GOOGLE_SHEET_CREDENTIALS, scope ) client = gspread.authorize(creds) sheet = client.open(settings.GOOGLE_SHEET_NAME).sheet1 return sheet def update_sheet(job_data): sheet = get_google_sheet() existing = sheet.get_all_values() existing_links = {row[3] for row in existing[1:]} if len(existing) > 1 else set() # Add header if sheet is empty if not existing: sheet.append_row([“Title”, “Company”, “Location”, “Link”]) for job in job_data: if job[“link”] not in existing_links: # avoid duplicates sheet.append_row([job[“title”], job[“company”], job[“location”], job[“link”]]) 5. Automate It You can run the scraper periodically using Django management commands or a cron job. See the full code I have shared my full code download here: Final Thoughts Building this scraper turned out to be one of those projects that felt much more complicated at the start than it actually was. The hardest part was simply taking the first step. If you’re spending hours manually tracking job postings, I’d strongly recommend automating the process. Your future self will thank you—and you’ll have more energy to focus on what truly matters: writing strong applications and preparing for interviews. Have you automated any part of your job search? I’d love to hear about your experiences in the comments below.

How I Built a Django Job Scraper that Saves to Google Sheets Read More »

FastAPI Python web framework for high-performance API development

Exploring FastAPI: The Future of Python Web Frameworks

Why FastAPI is Taking the Python World by Storm In the rapidly evolving of Python web development, FastAPI has emerged as a game changing framework that’s reshaping how developers build modern APIs. Since its release in 2018, this innovative framework has gained massive adoption among developers worldwide, and for good reason. FastAPI combines the best of modern Python features with exceptional performance, making it an ideal choice for building production-ready APIs. Whether you’re a seasoned Python developer or just starting your web development journey, understanding FastAPI’s capabilities is crucial for staying ahead in today’s competitive development environment. What Makes FastAPI Special? Lightning-Fast Performance FastAPI lives up to its name by delivering exceptional speed that rivals frameworks written in Go and Node.js. Built on top of Starlette and Pydantic, FastAPI leverages Python’s async capabilities to handle thousands of concurrent requests efficiently. Performance benchmarks consistently show FastAPI outperforming traditional Python frameworks like Django and Flask by significant margins, making it perfect for high-traffic applications and microservices architectures. Automatic API Documentation One of FastAPI’s most beloved features is its automatic generation of interactive API documentation. Using the OpenAPI standard, FastAPI creates beautiful, interactive documentation that developers can use to test endpoints directly in the browser. This feature eliminates the tedious task of manually maintaining API documentation and ensures your documentation is always up-to-date with your code. Type Hints and Validation FastAPI leverages Python’s type hints to provide automatic request and response validation. This means fewer bugs, better IDE support, and more maintainable code. The framework uses Pydantic models to ensure data integrity and provide clear error messages when validation fails. Key Features That Set FastAPI Apart Modern Python Standards FastAPI is built with modern Python in mind, fully supporting: Built-in Security Features Security is paramount in modern web applications, and FastAPI provides robust built-in security features including: Developer Experience FastAPI prioritizes developer productivity with features like: Real-World Use Cases Microservices Architecture FastAPI excels in microservices environments due to its lightweight nature and fast startup times. Companies like Uber, Netflix, and Microsoft have adopted FastAPI for various microservices in their architecture. Machine Learning APIs The data science community has embraced FastAPI for deploying machine learning models as APIs. Its async capabilities and performance make it ideal for handling ML inference requests at scale. Traditional Web APIs From simple CRUD operations to complex business logic, FastAPI handles traditional web API development with elegance and efficiency. Getting Started with FastAPI Here’s a simple example of a FastAPI application: from fastapi import FastAPI from pydantic import BaseModel app = FastAPI() class Item(BaseModel): name: str price: float description: str = None @app.get(“/”) async def root(): return {“message”: “Hello World”} @app.post(“/items/”) async def create_item(item: Item): return {“item”: item} This simple example demonstrates FastAPI’s clean syntax and automatic validation through Pydantic models. FastAPI vs. Other Python Frameworks FastAPI vs. Django While Django remains excellent for full-stack web applications, FastAPI shines in API-first development with superior performance and modern async support. FastAPI vs. Flask Flask’s simplicity is appealing, but FastAPI offers better performance, automatic documentation, and built-in validation without sacrificing ease of use. FastAPI vs. Django REST Framework For pure API development, FastAPI provides better performance and developer experience compared to Django REST Framework, though DRF remains strong for Django-integrated projects. Best Practices for FastAPI Development Structure Your Project Organize your FastAPI project with clear separation of concerns: Performance Optimization Maximize your FastAPI application’s performance by: Testing and Documentation Ensure robust applications by: The Future of FastAPI FastAPI continues to evolve with regular updates and new features. The framework’s roadmap includes enhanced WebSocket support, improved performance optimizations, and better integration with modern deployment platforms. The growing ecosystem around FastAPI, including tools like FastAPI Users for authentication and FastAPI Cache for caching, demonstrates the framework’s bright future in Python web development. Conclusion: Is FastAPI Right for Your Next Project? FastAPI represents a significant leap forward in Python web development, combining high performance with developer-friendly features. If you’re building APIs that require speed, scalability, and maintainability, FastAPI should be at the top of your consideration list. The framework’s modern approach to Python development, combined with its excellent documentation and growing community support, makes it an excellent choice for both new projects and migrating existing applications. Whether you’re building microservices, machine learning APIs, or traditional web services, FastAPI provides the tools and performance needed to succeed in today’s competitive development landscape. If you like, please comment below for FastAPI’s more blogs:

Exploring FastAPI: The Future of Python Web Frameworks Read More »

The Power of Python: Real-World Project Ideas illustrated with laptop, Python logo, and project icons.

The Power of Python: Real-World Project Ideas

When people ask why I love Python, my answer is simple: it’s not just a programming language, it’s a toolbox for turning my ideas into reality. Python is beginner-friendly, versatile, and powerful enough to run everything from a tiny script on your laptop to large-scale systems powering global companies. But here’s the catch: learning Python by just reading syntax or following tutorials can feel… incomplete. The real magic happens when you build real-time projects, things you can see, use, and maybe even share with others. Projects push you to connect concepts, face real challenges, and gain the confidence that you’re not just “learning Python,” you’re using it. So, let’s talk about some real-world project ideas you can start with, depending on your interests. Use FastAPI for real-time chat, and django is the best framework for other projects. 1. Email and file automation Repetitive tasks are the enemy of productivity. Luckily, Python is perfect for automating them. You’ll be surprised at how empowering it feels when your code saves you time in the real world. 2. Blog Website Every developer needs a place to share their thoughts, projects, and journey. Why not build your own blog? The bonus? You learn backend logic and how to make something visually appealing. Plus, it doubles as your portfolio. 3. E-Commerce with Payment Integration Imagine running your mini Amazon-style site built with Python! This type of project will expose you to real-world concepts like authentication, databases, and secure transactions, things every serious developer should know. 4. Social Media App Social media powers our world. Building even a simplified version teaches you so much. You don’t need to reinvent Instagram or Twitter. Even a basic version is a fantastic learning experience in how large-scale platforms actually work. 5. Real-Time Chat App with WebSockets Chat apps are a perfect introduction to real-time communication. It’s one of those projects that feels “alive” because you’re building something interactive. 6. Data Analysis & Visualization Python shines when it comes to working with data. This isn’t just coding—it’s storytelling with data. Use streamlit for data visualization. 7. Movie Recommendation System This one’s always a crowd pleaser. It’s a cool project because people can actually interact with it, and it’s a great intro to AI without being overwhelming. 8. Fun & Creative Projects Not every project has to be “serious.” Some of the best learning happens when you’re just having fun. Quirky projects often keep you motivated when the “serious” ones get too heavy. Final Thoughts Python is powerful not because it’s the fastest or most complex language, but because it’s accessible and opens doors to so many areas of automation, web, data, AI, and even fun side projects. The best advice I can give is this: start small, but start today. Pick one idea from the list above and build it. It doesn’t have to be perfect; in fact, it won’t be perfect. And that’s the point. Every project teaches you something new. Before long, you’ll have a portfolio that doesn’t just show code, it shows creativity, problem-solving. Let me know which project you’re creating.

The Power of Python: Real-World Project Ideas Read More »

Mastering Python: 17 Tips, Tricks, and Best Practices That Will Transform Your Code.

Mastering Python: 17 Tips, Tricks & Best Practices

After five years of wrestling with Python code, debugging countless scripts, and building everything from web scrapers to machine learning models, I’ve learned that mastering Python isn’t just about memorizing syntax—it’s about developing the right mindset and knowing which tools to reach for when. Today, I’m sharing the practical tips, clever tricks, and battle-tested best practices that transformed me from a struggling beginner into a confident Python developer. Whether you’re just starting or looking to level up your existing skills, these insights will save you hours of frustration and help you write cleaner, more efficient code. Why Python Mastery Matters More Than Ever Python has become the Swiss Army Knife of programming languages. Python powers some of the world’s most innovative companies, from data science and web development to automation and AI. But here’s the thing I wish someone had told me earlier: knowing Python syntax is just the beginning. The real magic happens when you understand how to write Pythonic code that’s readable, maintainable, and efficient. Understanding Pythonic Thinking 1. Embrace the Zen of Python Remember when you first discovered import this? Those 19 lines aren’t just philosophy—they’re your roadmap to better code. “Simple is better than complex” and “Readability counts” have saved me from countless over-engineered solutions. My favorite principle in action: # Don’t do this result = [] for item in my_list: if item > 5: result.append(item * 2) # Do this instead result = [item * 2 for item in my_list if item > 5] 2. Master List Comprehensions (But Don’t Overdo It) List comprehensions are Python’s secret weapon for writing concise, readable code. But I learned the hard way that complex nested comprehensions can become unreadable nightmares. List comprehensions make it slightly faster than the normal append function. The sweet spot: # Perfect for simple transformations squares = [x**2 for x in range(10)] # Great with conditions even_squares = [x**2 for x in range(10) if x % 2 == 0] # But avoid this complexity nested_mess = [[y for y in x if condition(y)] for x in matrix if filter_func(x)] Game-Changing Python Tricks I Wish I’d Known Earlier 3. The Power of Enumerate and Zip Stop using range(len(list))! This was one of my biggest early mistakes. Python gives you better tools. # Instead of this amateur hour code for i in range(len(items)): print(f”{i}: {items[i]}”) # Write this like a pro for i, item in enumerate(items): print(f”{i}: {item}”) # And combine lists elegantly be careful while using zip both list lenght should be same. names = [‘Alice’, ‘Bob’, ‘Charlie’] ages = [25, 30, 35] for name, age in zip(names, ages): print(f”{name} is {age} years old”) 4. Context Managers: Your New Best Friend Context managers changed how I handle resources. No more forgotten file handles or database connections! # The old way (prone to errors) file = open(‘data.txt’, ‘r’) content = file.read() file.close() # Easy to forget! # The Pythonic way with open(‘data.txt’, ‘r’) as file: content = file.read() # File automatically closed, even if an exception occurs 5. Dictionary Magic with get() and setdefault() Dictionaries are Python’s crown jewel, but I spent too long writing clunky if-statements before discovering these gems. # Avoid KeyError headaches user_data = {‘name’: ‘John’, ‘age’: 30} email = user_data.get(’email’, ‘No email provided’) # Build dictionaries dynamically word_count = {} for word in text.split(): word_count.setdefault(word, 0) word_count[word] += 1 # Or use defaultdict for even cleaner code from collections import defaultdict word_count = defaultdict(int) for word in text.split(): word_count[word] += 1 Best Practices That Will Make Your Code Shine 6. Write Self-Documenting Code with Descriptive Names I used to write code like this: def calc(x, y). Don’t be past me. Your future self will thank you for clear, descriptive names. # Vague and confusing def process(data): result = [] for item in data: if item > threshold: result.append(item * factor) return result # Clear and self-documenting def filter_and_scale_values(measurements, min_threshold=10, scale_factor=1.5): “””Filter measurements above threshold and apply scaling factor.””” scaled_values = [] for measurement in measurements: if measurement > min_threshold: scaled_values.append(measurement * scale_factor) return scaled_values 7. Exception Handling: Be Specific, Not Lazy Generic except: Statements are a code smell. Be specific about what you’re catching and why. # Too broad – hides important errors try: result = risky_operation() except: print(“Something went wrong”) # Better – handle specific exceptions try: result = divide_numbers(a, b) except ZeroDivisionError: print(“Cannot divide by zero”) result = None except TypeError: print(“Invalid input types for division”) result = None 8. Use Type Hints for Better Code Documentation Type hints transformed how I write and maintain Python code. They’re not just for the compiler—they’re documentation for humans. from typing import List, Optional, Dict def calculate_average(numbers: List[float]) -> Optional[float]: “””Calculate the average of a list of numbers.””” if not numbers: return None return sum(numbers) / len(numbers) def group_by_category(items: List[Dict[str, str]]) -> Dict[str, List[str]]: “””Group items by their category field.””” groups = {} for item in items: category = item.get(‘category’, ‘uncategorized’) groups.setdefault(category, []).append(item[‘name’]) return groups Advanced Techniques for Python Mastery 9. Generators: Memory-Efficient Data Processing Generators were a revelation when I started working with large datasets. They process data lazily, using minimal memory. # Memory-heavy approach def read_large_file_bad(filename): with open(filename) as f: return [line.strip() for line in f] # Memory-efficient approach def read_large_file_good(filename): with open(filename) as f: for line in f: yield line.strip() # Use it like any iterable for line in read_large_file_good(‘huge_file.txt’): process_line(line) # Process one line at a time 10. Decorators: Clean and Reusable Code Enhancement Decorators seemed like magic when I first encountered them. Now they’re essential tools in my Python toolkit. wraps is a decorator from Python’s functools module that preserves the original function’s name, docstring, and other metadata when it’s wrapped by another function (like in a decorator). Below is a simple example. import time from functools import wraps def timing_decorator(func): “””Measure and print the execution time of a function.””” @wraps(func) def wrapper(*args, **kwargs): start_time = time.time() result = func(*args, **kwargs) end_time = time.time() print(f”{func.__name__} took {end_time – start_time:.4f} seconds”) return result return wrapper @timing_decorator def slow_function(): time.sleep(2) return “Done!”

Mastering Python: 17 Tips, Tricks & Best Practices Read More »

Five essential Python programming books stacked together - Python Crash Course, Python Tricks, Automate the Boring Stuff, Fluent Python, and Python Cookbook

5 Best Python Books for Beginners

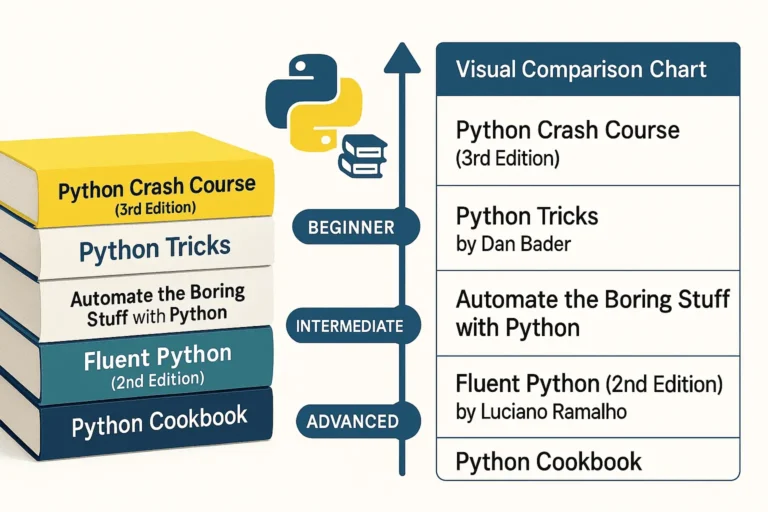
Python has become one of the most popular programming languages in the world, and with good reason. To begin with, its clean syntax, versatility, and massive ecosystem make it perfect for everything from web development to data science to automation. Its wide range of applications attracts both beginners and professionals alike. Therefore, whether you are just starting your Python journey or looking to deepen your expertise, these five books offer invaluable insights and practical knowledge. 1. Python Crash Course (3rd Edition) by Eric Matthes Perfect for: Complete beginners and those wanting a comprehensive introduction Python Crash Course is widely regarded as one of the best introductory Python books available. The third edition keeps pace with modern Python development practices while maintaining its accessible approach. What makes it special: Who should read it: 2. Python Tricks by Dan Bader Perfect for: Intermediate developers wanting to write more Pythonic code Dan Bader’s Python Tricks bridges the gap between basic skills and pro-level code. In particular, it explains the “how” and “why” behind Python’s unique features, helping you write cleaner and smarter programs. What makes it special: Key areas covered: Who should read it: 3. Automate the Boring Stuff with Python by Al Sweigart Perfect for: Anyone who wants to use Python for practical automation This book takes a unique approach by focusing on practical automation tasks that can immediately improve your productivity, regardless of your profession. What makes it special: Skills you’ll gain: Who should read it: 4. Fluent Python (2nd Edition) by Luciano Ramalho Perfect for: Intermediate to advanced developers who want deep Python mastery Fluent Python is considered the definitive guide to writing effective, idiomatic Python code. In fact, the second edition has been updated for Python 3.10+ and includes new chapters on pattern matching as well as async programming. What makes it special: Advanced topics covered: Who should read it: 5. Python Cookbook (3rd Edition) by David Beazley and Brian K. Jones Perfect for: Experienced developers looking for solutions to specific problems The Python Cookbook is a recipe-based reference that provides solutions to common (and not-so-common) Python programming challenges. It’s designed to be a practical resource you’ll return to throughout your Python career. What makes it special: Key recipe categories: Who should read it: How to Choose the Right Book for Your Journey If you’re a complete beginner: Start with Python Crash Course. Its project-based approach will give you both foundational knowledge and practical experience. If you know the basics: Python Tricks will help you write more professional, Pythonic code, while Automate the Boring Stuff will show you immediate practical applications. If you’re ready for advanced topics: Fluent Python provides deep insights into Python’s design and advanced features, perfect for developers who want a mastery-level understanding. If you need a reference: Therefore, keep the Python Cookbook handy for specific solutions to programming challenges you’ll encounter in real projects. Building Your Python Library Consider building your Python book collection gradually: Final Thoughts Each of these books offers a unique perspective on Python programming. To begin with, the key is to choose books that match your current skill level and goals, and then apply what you learn through hands-on practice. After all, Python’s strength lies in its syntax and philosophy of clear, readable code—something these books will help you master. Moreover, whether you’re automating your daily tasks, building web applications, or diving deep into Python’s advanced features, these books provide the knowledge and insights you need to become a more effective Python developer. Ultimately, remember: the best Python book is the one you read and apply. Therefore, choose based on your goals, commit to working through the examples, and don’t be afraid to write lots of code along the way.

5 Best Python Books for Beginners Read More »

Scroll to Top