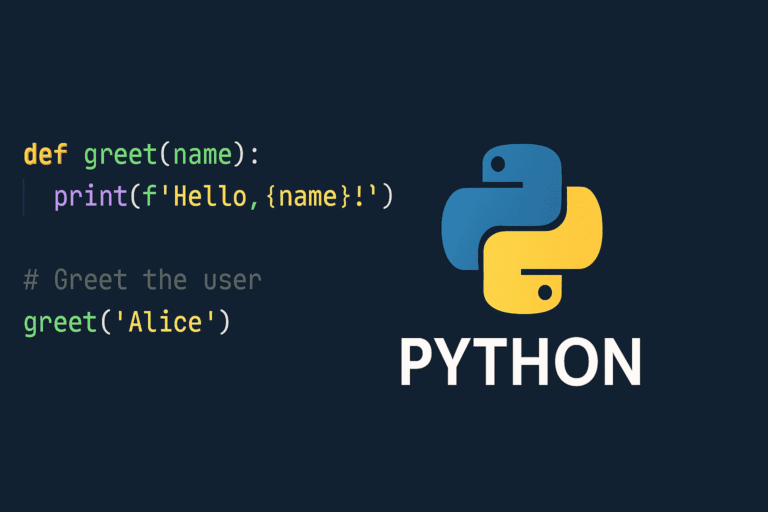
Tarun

Hi, I'm Tarun Kumar — a passionate Software Developer with 4+ years of experience specializing in Python, Django, Django REST Framework, and modern web technologies. I've built scalable applications for both government and private sectors, including ERP systems, HRMS, and digital platforms for Indian Railways. I thrive at the intersection of backend engineering and user-centric design, integrating tools like MongoDB, PostgreSQL, AWS EC2, and jQuery. I'm also the creator of pythonjournals.com, where I share insights, tutorials, and automation scripts to help developers grow. When I'm not coding, I mentor interns, explore AI/ML in geospatial analysis, and work on projects that bridge technology with real-world impact.

python programming

Python Cheat Sheet

Whether you’re a beginner just starting with Python or a seasoned developer needing a quick refresher, this Python Cheat Sheet has you covered! This concise guide includes essential syntax, common functions, data structures, loops, conditionals, file handling, and more. Keep it handy while coding or studying to boost your productivity and confidence. Dive in and supercharge your Python skills with this all-in-one reference! Basic Syntax Python uses clean, readable syntax without semicolons or curly braces. Indentation matters – it defines code blocks! Variables and Data Types Python is dynamically typed – you don’t need to declare variable types. Just assign and go! # Variables (no declaration needed) name = “Alice” age = 25 height = 5.6 is_student = True # Data types str_var = “Hello” # String int_var = 42 # Integer float_var = 3.14 # Float bool_var = True # Boolean list_var = [1, 2, 3] # List tuple_var = (1, 2, 3) # Tuple dict_var = {“key”: “value”} # Dictionary set_var = {1, 2, 3} # Set Control Structures These are the building blocks that control how your program flows and makes decisions. If Statements Make your program smart by adding decision-making logic. if age >= 18: print(“Adult”) elif age >= 13: print(“Teenager”) else: print(“Child”) Loops Automate repetitive tasks – let Python do the boring work for you! # For loop for i in range(5): print(i) for item in [1, 2, 3]: print(item) # While loop count = 0 while count < 5: print(count) count += 1 Data Structures Python’s built-in containers for organizing and storing your data efficiently. Lists The Swiss Army knife of Python data structures – ordered, changeable, and versatile. # Creating and modifying lst = [1, 2, 3, 4, 5] lst.append(6) # Add to end lst.insert(0, 0) # Insert at index lst.remove(3) # Remove first occurrence lst.pop() # Remove last item lst[0] = 10 # Change item len(lst) # Length Dictionaries Key-value pairs that let you store and retrieve data like a real-world dictionary. # Creating and accessing person = {“name”: “Alice”, “age”: 25} person[“name”] # Access value person[“city”] = “NYC” # Add new key-value del person[“age”] # Delete key person.keys() # Get all keys person.values() # Get all values person.get(“name”, “Unknown”) # Safe access Sets Collections of unique items – perfect when you need to eliminate duplicates or check membership. # Creating and operations s1 = {1, 2, 3, 4} s2 = {3, 4, 5, 6} s1.add(5) # Add element s1.remove(1) # Remove element s1 & s2 # Intersection s1 | s2 # Union s1 – s2 # Difference Functions Write reusable code blocks that make your programs modular and easier to maintain. Basic Functions Define once, use everywhere – functions are your best friend for organized code. def greet(name, greeting=”Hello”): return f”{greeting}, {name}!” def add_numbers(*args): return sum(args) def person_info(**kwargs): for key, value in kwargs.items(): print(f”{key}: {value}”) # Lambda functions square = lambda x: x**2 List Comprehensions Python’s elegant way to create lists in a single line – concise and powerful! # Basic list comprehension squares = [x**2 for x in range(10)] # With condition evens = [x for x in range(20) if x % 2 == 0] # Dictionary comprehension square_dict = {x: x**2 for x in range(5)} # Set comprehension unique_chars = {char for char in “hello world”} String Operations Text manipulation made easy – Python treats strings like first-class citizens. File Operations Read from and write to files – your gateway to persistent data storage. # Reading files with open(“file.txt”, “r”) as f: content = f.read() lines = f.readlines() # Writing files with open(“file.txt”, “w”) as f: f.write(“Hello World”) f.writelines([“Line 1\n”, “Line 2\n”]) Exception Handling Handle errors gracefully – because things don’t always go as planned! try: result = 10 / 0 except ZeroDivisionError: print(“Cannot divide by zero”) except Exception as e: print(f”An error occurred: {e}”) else: print(“No errors occurred”) finally: print(“This always executes”) Classes and Objects Object-oriented programming in Python – create your custom data types and behaviors. class Person: def __init__(self, name, age): self.name = name self.age = age def greet(self): return f”Hi, I’m {self.name}” def __str__(self): return f”Person(name='{self.name}’, age={self.age})” # Usage person = Person(“Alice”, 25) print(person.greet()) Common Built-in Functions Python’s toolbox of ready-to-use functions that save you time and effort. # Math functions abs(-5) # Absolute value min(1, 2, 3) # Minimum max(1, 2, 3) # Maximum sum([1, 2, 3]) # Sum of iterable round(3.14159, 2) # Round to 2 decimals # Type functions type(42) # Get type isinstance(42, int) # Check type len([1, 2, 3]) # Length # Iteration functions enumerate([1, 2, 3]) # Returns (index, value) pairs zip([1, 2], [‘a’, ‘b’]) # Combine iterables reversed([1, 2, 3]) # Reverse iterator sorted([3, 1, 2]) # Return sorted list Import and Modules Extend Python’s capabilities by using libraries – standing on the shoulders of giants! import math from math import pi, sqrt import numpy as np from datetime import datetime, timedelta # Using imports math.sqrt(16) pi np.array([1, 2, 3]) datetime.now() Common Patterns Real-world examples of frequently used Python patterns that every developer should know. Working with the Os module Files and Directories Navigate and manipulate your file system like a pro. import os os.listdir(‘.’) # List directory contents os.path.exists(‘file.txt’) # Check if file exists os.path.join(‘folder’, ‘file.txt’) # Join paths Date and Time Work with dates and times – essential for logging, scheduling, and data analysis. from datetime import datetime, timedelta now = datetime.now() tomorrow = now + timedelta(days=1) formatted = now.strftime(‘%Y-%m-%d %H:%M:%S’) Regular Expressions Pattern matching and text processing – powerful tools for working with strings. import re pattern = r’\d+’ # Match digits re.findall(pattern, “I have 5 apples and 3 oranges”) re.search(pattern, “Age: 25”) re.sub(r’\d+’, ‘X’, “I have 5 apples”) # Replace Useful Tips Pro tips and Python idioms that will make you more productive and your code more Pythonic. Please download the Full PDF.

Python Cheat Sheet Read More »

Top 5 Python libraries every developer should master in 2025

Top 5 Python Libraries Every Developer Should Master in 2025

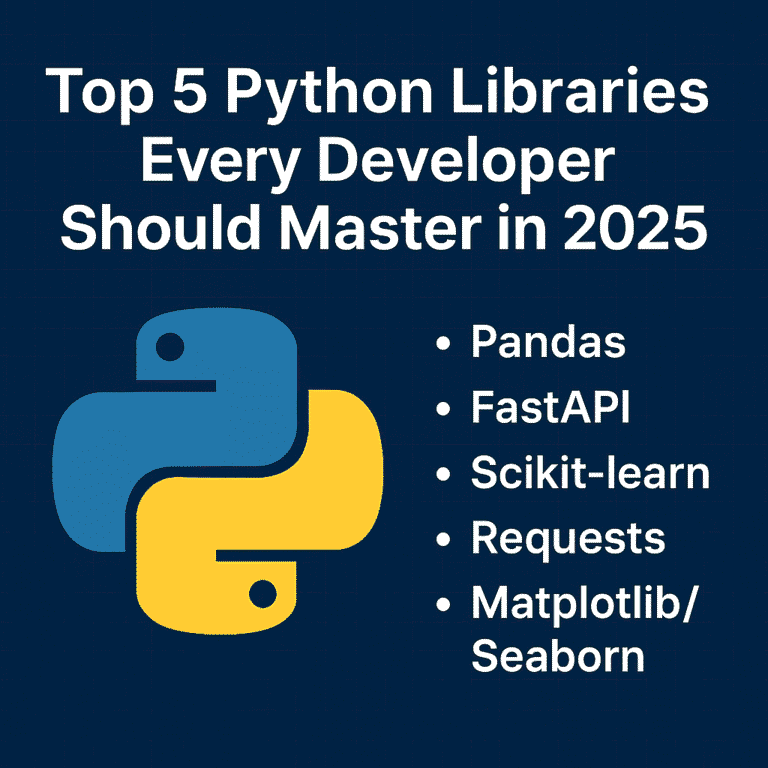
As we move further into 2025, Python continues to be one of the most popular programming languages in the world. Its clean syntax, vibrant community, and powerful libraries make it a favorite among industry developers—from web development and data science to AI, automation, and beyond. But Python’s true strength lies in its ecosystem. With the right libraries, you can do more with less code—faster, cleaner, and more efficiently. Whether you’re just starting your Python journey or looking to sharpen your existing skills, here are five essential libraries every Python developer should know this year. 1. Pandas – Your Go-To Tool for Data Manipulation In today’s data-driven world, knowing how to work with data is a must—and Pandas makes it easy. It’s the standard library for handling structured data in Python and is widely used in fields like data science, finance, web development, and machine learning. Why Learn Pandas: Real-world uses: Data analysis, reporting dashboards, cleaning raw datasets, and even feeding machine learning models. 2. FastAPI – The New Standard for Building APIs FastAPI is quickly becoming the framework for building modern web APIs in Python. It’s fast (really fast), easy to use, and comes with automatic documentation out of the box. Why Developers Love FastAPI: Why it matters in 2025: More and more apps are going API-first. FastAPI helps you build scalable, production-ready APIs that integrate easily with frontend and mobile apps. 3. Scikit-learn – Machine Learning Made Simple Scikit-learn is the perfect place to start if you’re curious about machine learning. It abstracts away the complexity of ML algorithms and provides a consistent interface for quickly trying things. What You Can Do with It: Why learn it: Even if you’re not a full-time data scientist, understanding ML basics can give your apps a smarter edge. 4. Requests – The Simplest Way to Talk to the Web Every app these days needs to fetch or send data from somewhere—APIs, websites, services. The requests The library makes working with HTTP super simple and intuitive. Why Requests are a Must-Have: Use Cases: Calling external APIs (like weather, payment, or social media), scraping data, automating web interactions, or even testing your backend services. 5. Matplotlib & Seaborn – Visualize Like a Pro Data is only useful when you can understand and communicate it. That’s where Matplotlib and Seaborn come in. Learn to: Why it’s essential: Visualization helps you (and others) make better decisions based on your data. Whether it’s a report for your boss or a dashboard for your users, good visuals matter. Bringing It All Together These five libraries cover the entire journey of modern Python development: Mastering this toolkit gives you the power to build full-stack data-driven applications, from scratch to production. How to Start Learning (A 10-Week Roadmap) Here’s a simple plan you can follow: Conclusion The Python ecosystem is vast, but you don’t need to learn everything. These five libraries form a solid foundation that will serve you in almost every tech role—whether you’re building apps, analyzing data, or exploring AI. Start with one library and build something small. If you want to combine all of these, consider using the Streamlit library to quickly build dashboards. Keep going—the skills you develop now will open doors throughout your career. Follow my Streamlit blog.

Top 5 Python Libraries Every Developer Should Master in 2025 Read More »

"Improve coding skills with Python built-in functions"

5 Python Built-in Function That Will Make You a Better Coder

When I first started learning Python, I focused mostly on syntax and solving basic problems. But as I wrote more code, I realized that some of Python’s built-in functions could make my code cleaner, faster, and easier to understand. These aren’t just time-savers—they’re game-changers. In this post, I’m sharing 5 Python built-in functions that have genuinely helped me become a better coder. Whether you’re just getting started or looking to refine your skills, these functions are worth knowing. 1. enumerate() – Stop Using Range with Len One of the most common anti-patterns in Python is using range(len(items)) to get both indices and values when iterating over a list. The enumerate() function provides a much cleaner solution. Instead of this: items = [‘apple’, ‘banana’, ‘cherry’] for i in range(len(items)): print(f”{i}: {items[i]}”) Write this: items = [‘apple’, ‘banana’, ‘cherry’] for i, item in enumerate(items): print(f”{i}: {item}”) The enumerate() function returns pairs of (index, value) for each item in an iterable. You can even specify a starting value for the index: for i, item in enumerate(items, start=1): print(f”{i}: {item}”) # Starts counting from 1 This approach is more readable, less error-prone, and slightly more performant than the manual indexing approach. 2. zip() – Iterate Multiple Sequences Simultaneously When you need to process multiple lists or sequences together, zip() it is your best friend. It pairs up elements from multiple iterables, making parallel iteration elegant and intuitive. Instead of this: names = [‘Alice’, ‘Bob’, ‘Charlie’] ages = [25, 30, 35] cities = [‘New York’, ‘London’, ‘Tokyo’] for i in range(len(names)): print(f”{names[i]} is {ages[i]} years old and lives in {cities[i]}”) Write this: names = [‘Alice’, ‘Bob’, ‘Charlie’] ages = [25, 30, 35] cities = [‘New York’, ‘London’, ‘Tokyo’] for name, age, city in zip(names, ages, cities): print(f”{name} is {age} years old and lives in {city}”) The zip() function stops when the shortest iterable is exhausted. If you need to handle iterables of different lengths, consider using itertools.zip_longest() from the standard library. You can also use zip() to transpose data structures: matrix = [[1, 2, 3], [4, 5, 6], [7, 8, 9]] transposed = list(zip(*matrix)) # [(1, 4, 7), (2, 5, 8), (3, 6, 9)] 3. any() and all() – Boolean Logic Made Simple These two functions are incredibly useful for checking conditions across collections. They can replace complex loops and make your Boolean logic much more readable. any() returns True if at least one element in the iterable is truthy: # Check if any number is even numbers = [1, 3, 5, 8, 9] has_even = any(n % 2 == 0 for n in numbers) # True # Check if any string starts with ‘A’ words = [‘banana’, ‘Apple’, ‘cherry’] starts_with_a = any(word.startswith(‘A’) for word in words) # True all() returns True only if all elements in the iterable are truthy: # Check if all numbers are positive numbers = [1, 5, 8, 12] all_positive = all(n > 0 for n in numbers) # True # Validate all required fields are filled form_data = {‘name’: ‘John’, ’email’: ‘john@email.com’, ‘age’: 25} required_fields = [‘name’, ’email’, ‘age’] all_filled = all(form_data.get(field) for field in required_fields) # True These functions short-circuit, meaning they stop evaluating as soon as the result is determined, making them efficient for large datasets. 4. getattr() – Dynamic Attribute Access with Grace The getattr() A function allows you to access object attributes dynamically and provides a safe way to handle missing attributes. This is particularly useful when working with APIs, configuration objects, or when you need to access attributes based on user input. Basic usage: class Config: debug = True database_url = “postgresql://localhost/mydb” config = Config() # Dynamic attribute access attr_name = ‘debug’ value = getattr(config, attr_name) # True # With default value for missing attributes timeout = getattr(config, ‘timeout’, 30) # Returns 30 if ‘timeout’ doesn’t exist Real-world example: def format_user_data(user, fields): “””Format user data based on requested fields””” result = {} for field in fields: value = getattr(user, field, ‘N/A’) result[field] = value return result # Usage class User: def __init__(self, name, email): self.name = name self.email = email user = User(“Tarun”, “tarun@email.com”) formatted = format_user_data(user, [‘name’, ’email’, ‘phone’]) # {‘name’: ‘Tarun’, ’email’: ‘tarun@email.com’, ‘phone’: ‘N/A’} This is much safer than using direct attribute access or hasattr() checks, and it’s more concise than try-except blocks. 5. sorted() with Custom Key Functions – Sorting Like a Pro While most developers know about the sorted() function, many underutilize its key parameter, which unlocks powerful sorting capabilities. The key function determines what value to use for comparison when sorting. Sort by string length: words = [‘Python’, ‘Java’, ‘C’, ‘JavaScript’, ‘Go’] by_length = sorted(words, key=len) # [‘C’, ‘Go’, ‘Java’, ‘Python’, ‘JavaScript’] Sort complex objects: students = [ {‘name’: ‘Alice’, ‘grade’: 85, ‘age’: 20}, {‘name’: ‘Bob’, ‘grade’: 92, ‘age’: 19}, {‘name’: ‘Charlie’, ‘grade’: 78, ‘age’: 21} ] # Sort by grade (descending) by_grade = sorted(students, key=lambda x: x[‘grade’], reverse=True) # Sort by multiple criteria using tuples by_age_then_grade = sorted(students, key=lambda x: (x[‘age’], -x[‘grade’])) Advanced sorting with operator module: from operator import attrgetter, itemgetter # For objects with attributes class Person: def __init__(self, name, age): self.name = name self.age = age people = [Person(‘Alice’, 30), Person(‘Bob’, 25), Person(‘Charlie’, 35)] sorted_people = sorted(people, key=attrgetter(‘age’)) # For dictionaries data = [{‘name’: ‘Alice’, ‘score’: 95}, {‘name’: ‘Bob’, ‘score’: 87}] sorted_data = sorted(data, key=itemgetter(‘score’), reverse=True) The key parameter makes sorting incredibly flexible and readable, eliminating the need for complex comparison functions. Putting It All Together These built-in functions work beautifully together. Here’s an example that combines several of them: def analyze_student_performance(students, subjects): “””Analyze student performance across multiple subjects””” results = [] for student in students: # Use getattr to safely access grades grades = [getattr(student, subject, 0) for subject in subjects] # Use zip to pair subjects with grades subject_grades = list(zip(subjects, grades)) # Use all() to check if student passed all subjects (grade >= 60) passed_all = all(grade >= 60 for grade in grades) # Use any() to check if student has any excellent grades (>= 90) has_excellent = any(grade >=

5 Python Built-in Function That Will Make You a Better Coder Read More »

django-performance-optimization-2025-guide

Boosting Your Django App Performance in 2025: Latest Tips

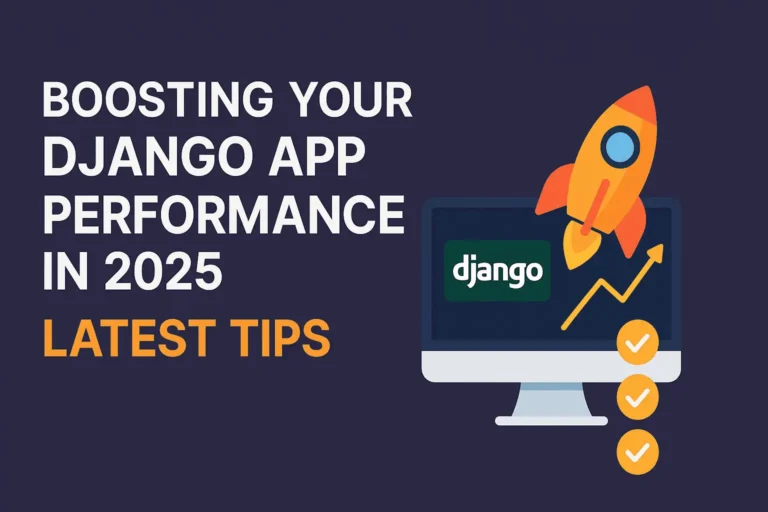
Performance optimization remains a critical aspect of Django development, and 2025 brings new tools, techniques, and best practices that can dramatically improve your application’s speed and efficiency. Whether you’re dealing with slow database queries, memory bottlenecks, or scaling challenges, this comprehensive guide covers the latest strategies to supercharge your Django applications. Understanding Performance Bottlenecks in Modern Django Apps Before diving into optimization techniques, it’s crucial to identify where performance issues typically occur in Django applications. The most common bottlenecks include database queries, template rendering, static file serving, and inefficient Python code execution. Modern Django apps also face unique challenges with microservices architecture, containerization overhead, and cloud-native deployment patterns. Database Optimization: The Foundation of Fast Django Apps Query Optimization with Django 5.x Features Django 5.0 and later versions introduce several query optimization features that can significantly improve database performance. The new select_related() and prefetch_related() Enhancements allow for more sophisticated relationship loading strategies. Use select_related() for forward foreign key relationships and one-to-one relationships to reduce database hits: # Instead of this (N+1 queries) for article in Article.objects.all(): print(article.author.name) # Use this (2 queries total) for article in Article.objects.select_related(‘author’): print(article.author.name) For reverse foreign key and many-to-many relationships, leverage prefetch_related(): # Efficient loading of related objects authors = Author.objects.prefetch_related(‘articles’).all() for author in authors: for article in author.articles.all(): print(article.title) Advanced Database Indexing Strategies Strategic database indexing is implemented in modern Django applications; as a result, Django app performance is enhanced. Slow queries can be identified using Django database introspection tools, and targeted indexes can then be created for this purpose. class Article(models.Model): title = models.CharField(max_length=200) created_at = models.DateTimeField(auto_now_add=True) category = models.ForeignKey(Category, on_delete=models.CASCADE) class Meta: indexes = [ models.Index(fields=[‘created_at’, ‘category’]), models.Index(fields=[‘title’], name=’article_title_idx’), ] Consider using partial indexes for frequently filtered data and composite indexes for multi-column queries. PostgreSQL users can take advantage of GIN and GiST indexes for full-text search and geometric data. Connection Pooling and Database Configuration Implement connection pooling to reduce database connection overhead. For PostgreSQL, consider using pgbouncer or Django’s built-in connection pooling: DATABASES = { ‘default’: { ‘ENGINE’: ‘django.db.backends.postgresql’, ‘NAME’: ‘your_db’, ‘USER’: ‘your_user’, ‘PASSWORD’: ‘your_password’, ‘HOST’: ‘localhost’, ‘PORT’: ‘5432’, ‘CONN_MAX_AGE’: 600, # Connection persistence ‘OPTIONS’: { ‘MAX_CONNS’: 20, } } } Caching Strategies for 2025 Redis and Memcached Optimization Modern caching strategies are employed to enhance Django app performance; in addition, multi-level caching is implemented with Redis for session storage, database query caching, and API response caching: CACHES = { ‘default’: { ‘BACKEND’: ‘django_redis.cache.RedisCache’, ‘LOCATION’: ‘redis://127.0.0.1:6379/1’, ‘OPTIONS’: { ‘CLIENT_CLASS’: ‘django_redis.client.DefaultClient’, ‘SERIALIZER’: ‘django_redis.serializers.json.JSONSerializer’, ‘COMPRESSOR’: ‘django_redis.compressors.zlib.ZlibCompressor’, } } } Use cache versioning and cache warming strategies to maintain data consistency while maximizing cache hit rates. Template Fragment Caching Implement granular template caching for expensive template operations: {% load cache %} {% cache 500 expensive_sidebar request.user.username %} <!– Expensive sidebar computation –> {% for item in complex_queryset %} {{ item.expensive_method }} {% endfor %} {% endcache %} API Response Caching For Django REST Framework applications, implement intelligent API caching: from rest_framework.decorators import api_view from django.views.decorators.cache import cache_page @cache_page(60 * 15) # Cache for 15 minutes @api_view([‘GET’]) def expensive_api_view(request): # Expensive computation return Response(data) Modern Python Performance Techniques Async Views and Database Operations Django’s async support continues to mature. Use async views for I/O-bound operations: import asyncio from django.http import JsonResponse from asgiref.sync import sync_to_async async def async_view(request): # Parallel database queries users_task = sync_to_async(list)(User.objects.all()) articles_task = sync_to_async(list)(Article.objects.all()) users, articles = await asyncio.gather(users_task, articles_task) return JsonResponse({ ‘users_count’: len(users), ‘articles_count’: len(articles) }) Memory Optimization with Generators Use generators and iterators for processing large datasets: def process_large_dataset(): # Instead of loading all objects into memory # objects = Model.objects.all() # Use iterator() to process objects one at a time for obj in Model.objects.iterator(chunk_size=2000): process_object(obj) Static File Optimization Optimize static file serving with compression and CDN integration: # settings.py STATICFILES_STORAGE = ‘django.contrib.staticfiles.storage.ManifestStaticFilesStorage’ # Use WhiteNoise for efficient static file serving MIDDLEWARE = [ ‘django.middleware.security.SecurityMiddleware’, ‘whitenoise.middleware.WhiteNoiseMiddleware’, # … other middleware ] STATICFILES_STORAGE = ‘whitenoise.storage.CompressedManifestStaticFilesStorage’ Template Optimization Minimize template complexity and use template compilation: TEMPLATES = [ { ‘BACKEND’: ‘django.template.backends.django.DjangoTemplates’, ‘OPTIONS’: { ‘loaders’: [ (‘django.template.loaders.cached.Loader’, [ ‘django.template.loaders.filesystem.Loader’, ‘django.template.loaders.app_directories.Loader’, ]), ], }, }, ] Conclusion Optimizing Django application performance in 2025 requires a holistic approach that combines database optimization, intelligent caching, modern Python techniques, and proper infrastructure setup. The key is to measure performance continuously, identify bottlenecks systematically, and apply optimizations incrementally. Start with database query optimization and caching, as these typically provide the most significant performance improvements. Then move to template and static file optimization, followed by infrastructure improvements. Always measure the impact of your changes and maintain a balance between performance, maintainability, and security.

Boosting Your Django App Performance in 2025: Latest Tips Read More »

chat bot

Integrate ChatGPT with Django: Build an AI-Powered Web App

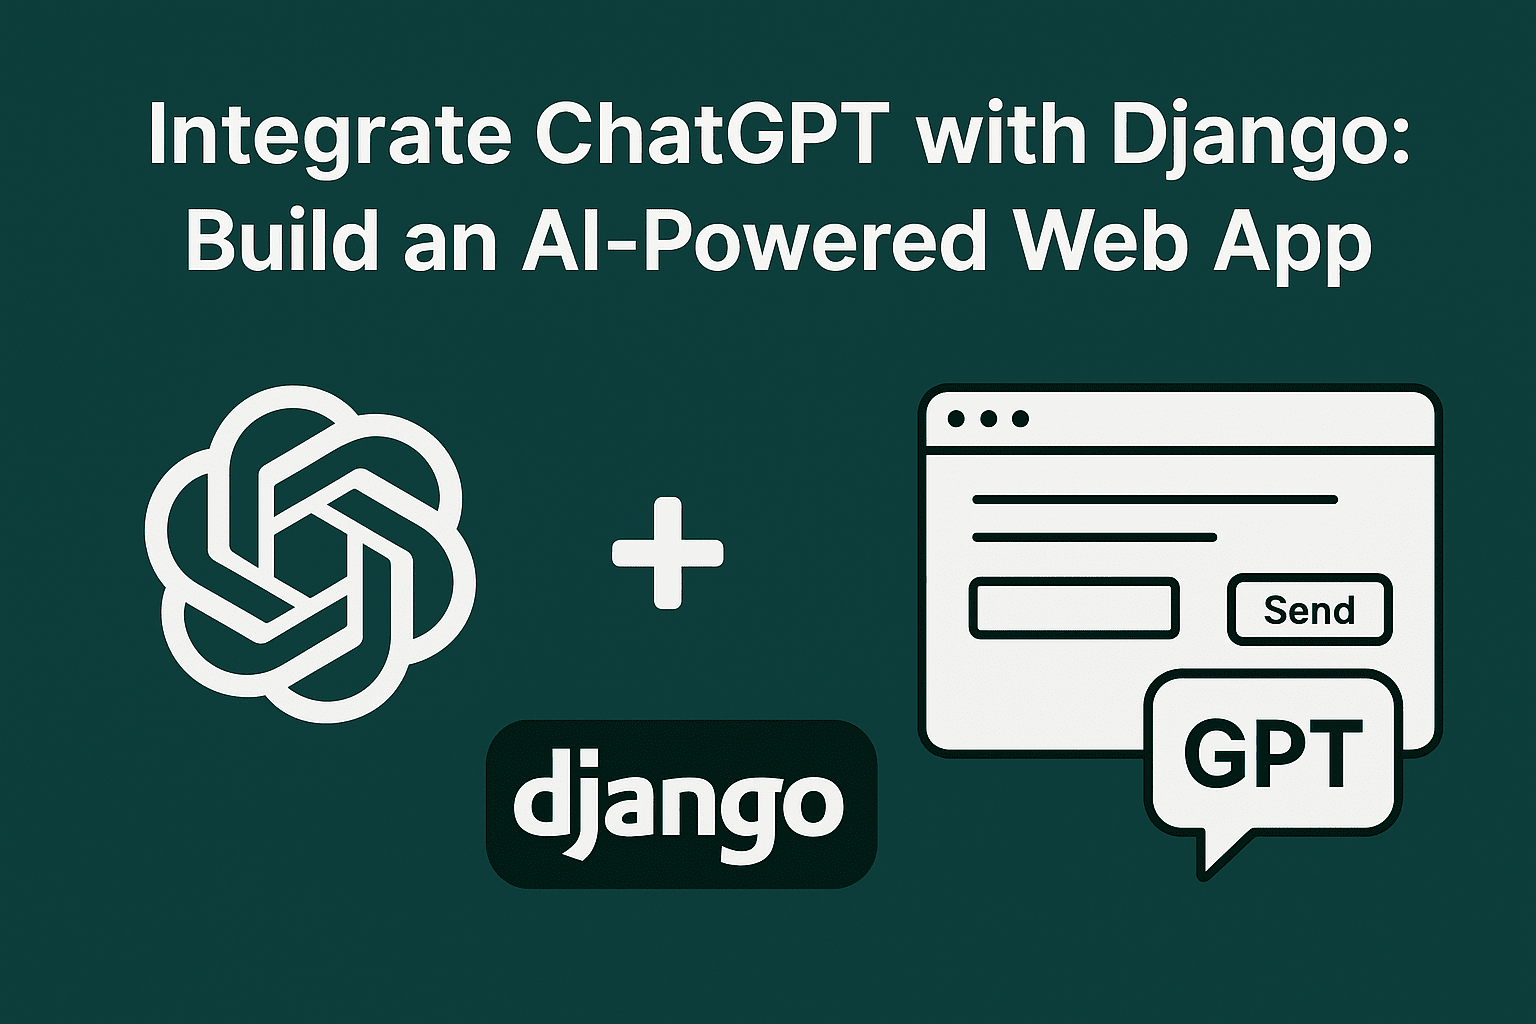
Artificial Intelligence is shaping the future of web applications. One of the most powerful tools in this space is ChatGPT, developed by OpenAI. In this tutorial, you’ll learn how to integrate ChatGPT with Django to build your AI-powered web app. We will use OpenAI’s API and Django to create a web app where users can enter a prompt and get a response from ChatGPT. What Is the ChatGPT API? The ChatGPT API is a cloud-based REST API provided by OpenAI. It allows your app or website to send messages to the model and receive smart, human-like responses. It’s part of OpenAI’s Chat Completions API, designed specifically for multi-turn conversation, like a chatbot. Prerequisites Step 1: Get Your OpenAI API Key Step 2: Create a New Django Project django-admin startproject djangoGpt cd djangoGpt python manage.py startapp chatbot Now we will create a model to store chats: from django.db import models class Chat(models.Model): user_message = models.TextField() bot_response = models.TextField() timestamp = models.DateTimeField(auto_now_add=True) def __str__(self): return f”{self.timestamp}: {self.user_message[:30]}” Step 3: Create View 1. You Send a Request Your backend Django sends a POST request to this endpoint: https://api.openai.com/v1/chat/completions This request includes: Here’s a basic example using Python: import openai client = OpenAI(api_key=settings.OPENAI_API_KEY) response = client.chat.completions.create( model=”gpt-3.5-turbo”, messages=[ {“role”: “user”, “content”: user_input} ] ) 2. OpenAI Processes It OpenAI’s servers receive your input and pass it through a transformer-based language model trained on billions of tokens. The model understands: It generates a predicted response, which is context-aware and intelligent. 3. You Get a Smart Response The API returns a JSON response that looks like this: { “choices”: [ { “message”: { “role”: “user”, “content”: “The capital of France is Paris.” } } ] } What Does chat_view Do? The chat_view Function serves two main purposes: Let’s examine it in parts and understand how it works together. We use OpenAI’s chat.completions endpoint to get a response from a model like gpt-3.5-turbo Show chat history in the frontend In your chat.html You can fetch and loop through previous chats: {% extends ‘base.html’ %} {% block content%} <div class=”container mt-5″> <h3 class=”text-center mb-4″>Django Chatbot</h3> <div class=”chat-box mb-4″ id=”chat-container”> {% for chat in chats %} <div class=”bot-msg”> <div class=”message”><strong>Bot:</strong> {{ chat.bot_response }}</div> </div> <div class=”user-msg”> <div class=”message”><strong>You:</strong> {{ chat.user_message }}</div> </div> {% endfor %} </div> <form id=”chat-form” method=”post”> {% csrf_token %} <div class=”input-group”> <input type=”text” class=”form-control” name=”message” id=”message-input” placeholder=”Type your message…” required> <button class=”btn btn-primary” type=”submit”>Send</button> </div> </form> </div> <script> const form = document.getElementById(“chat-form”); const messageInput = document.getElementById(“message-input”); const chatContainer = document.getElementById(“chat-container”); form.addEventListener(“submit”, async function(e) { e.preventDefault(); const userMessage = messageInput.value.trim(); if (!userMessage) return; const csrfToken = document.querySelector(‘[name=csrfmiddlewaretoken]’).value; // Show user message chatContainer.innerHTML += ` <div class=”user-msg”> <div class=”message”><strong>You:</strong> ${userMessage}</div> </div> `; chatContainer.scrollTop = chatContainer.scrollHeight; messageInput.value = “”; // Send request const response = await fetch(“”, { method: “POST”, headers: { “Content-Type”: “application/x-www-form-urlencoded”, “X-CSRFToken”: csrfToken, }, body: new URLSearchParams({ message: userMessage }), }); const data = await response.json(); // Show bot response chatContainer.innerHTML += ` <div class=”bot-msg”> <div class=”message”><strong>Bot:</strong> ${data.response}</div> </div> `; chatContainer.scrollTop = chatContainer.scrollHeight; }); </script> {%endblock%} Create a .env file in the project dir and add your api key: Do not expose your api key in production OPENAI_API_KEY=”your api key” If you have any doubts, feel free to comment below this post or contact me

Integrate ChatGPT with Django: Build an AI-Powered Web App Read More »

How I Built a COVID-19 Dashboard in 10 Minutes Using Streamlit

Streamlit is a Python library that lets you build web apps super easily. Think of it as a way to turn your Python scripts into interactive websites without having to learn web development. So imagine you’ve got some data analysis code or a machine learning model, and you want to show it off or let people play around with it. Normally, you’d need to learn HTML, CSS, JavaScript – all that web stuff. With Streamlit, you just write Python, and it handles the web part for you. You can add things like sliders, buttons, file upload boxes, and charts with just a few lines of code. When someone moves a slider or uploads a file, your app automatically updates. It’s pretty neat. The best part is how fast you can go from idea to working app. You write your Python code, add some Streamlit commands, and boom – you’ve got a web app running locally. Want to share it? Deploy it to their free hosting service. It’s become popular with data scientists and anyone doing machine learning because you can quickly create demos of your models or build dashboards to visualize data. No need to bug the web dev team or spend weeks learning React or whatever. The code is surprisingly simple, too – you’re just adding commands like st.slider() or st.chart() to your existing Python code, and Streamlit figures out how to turn that into a web interface. 🛠 Tools & Libraries pip install streamlit pandas plotly Step 1: Prepare Your CSV Data Create a file named covid_data.csv With the following columns: State,Zone,Total Cases,Active,Discharged,Deaths,Active Ratio,Discharge Ratio,Death Ratio,Population Bihar,Red,10000,2000,7500,500,20,75,5,120000000 Delhi,Orange,8000,1000,6500,500,12.5,81.25,6.25,20000000 … Step 2: Create the Streamlit App (app.py) 1. Import the Libraries pythonCopyEditimport streamlit as st import pandas as pd import plotly.express as px 2. Load the CSV Data pythonCopyEditdf = pd.read_csv(“covid_data.csv”) This line reads the covid_data.csv file into a DataFrame called dfSo we can work with it in the app. 3. Page Configuration pythonCopyEditst.set_page_config(page_title=”India COVID Dashboard”, layout=”wide”) st.title(“🦠 India COVID Dashboard (All States Combined)”) 4. Calculate Metrics pythonCopyEdittotal_cases = df[“Total Cases”].sum() active_cases = df[“Active”].sum() discharged = df[“Discharged”].sum() deaths = df[“Deaths”].sum() These lines add up the columns across all rows to get the total national numbers. 5. Show the Metrics in 4 Columns pythonCopyEditcol1, col2, col3, col4 = st.columns(4) col1.metric(“Total Cases”, f”{total_cases:,}”) col2.metric(“Active Cases”, f”{active_cases:,}”) col3.metric(“Discharged”, f”{discharged:,}”) col4.metric(“Deaths”, f”{deaths:,}”) 6. Draw a Pie Chart pythonCopyEditst.subheader(“State-wise Share of Total Cases”) pie = px.pie(df, names=”State”, values=”Total Cases”, title=”Total Cases by State”) st.plotly_chart(pie, use_container_width=True) 7. Draw a Bar Chart pythonCopyEditst.subheader(“State-wise Breakdown of Active, Discharged, and Deaths”) bar = px.bar( df, x=”State”, y=[“Active”, “Discharged”, “Deaths”], barmode=”group”, title=”State-wise Case Category”, height=500 ) st.plotly_chart(bar, use_container_width=True) 8. Optional Data Filter and Table pythonCopyEditwith st.expander(“Show/Filter State-Wise Data”): selected_states = st.multiselect(“Select States to View”, df[“State”].unique(), default=df[“State”].unique()) filtered_df = df[df[“State”].isin(selected_states)] st.dataframe(filtered_df.sort_values(“Total Cases”, ascending=False), use_container_width=True) Step 3: Run the App In your terminal, run: streamlit run app.py Your browser will open the dashboard automatically. on 8501 port http://localhost:8501/ Bonus Ideas Comment below if you like my post

How I Built a COVID-19 Dashboard in 10 Minutes Using Streamlit Read More »

How to Create a Next.js MongoDB Todo Project: A Complete Guide

Introduction In today’s fast-paced development world, building a full-stack app doesn’t have to be complicated. With the power of Next.js and MongoDB, developers can quickly create scalable applications. In this tutorial, you will learn how to build a simple, full-stack To-Do App that leverages the App Router in Next.js and MongoDB for data persistence. Moreover, this app will be built using pure JavaScript (no TypeScript), making it perfect for beginners. By the end of this guide, you’ll understand how to set up a database, connect it using Mongoose, and build a frontend that interacts seamlessly with your backend. Prerequisites Before we begin, make sure you have: Project Overview We’ll build a simple but powerful To-Do App that includes: Choose: I have a Node.js version v22.17.0 npm Version 10.3.0 mongoose version v7.0.11 Step 1: Setting Up the Next.js Project First, let’s create a new Next.js project with JavaScript support: npx create-next-app@latest todo-project cd todo-project While running this command, it will ask you some questions about the dependency so that you can choose the option “No” for TypeScript and TailwindCSS Install additional dependencies we’ll need: Step 2: Setting Up MongoDB Connection Install MongoDB Community Edition locally and run the MongoDB service. Option A: MongoDB Atlas (Cloud) Option B: Local MongoDB Install MongoDB Community Edition locally and run the MongoDB service. Creating the Database Connection Utility Create a new file lib/mongodb.js: npm install mongoose I have created lib/mongob.js inside the src folder, and now paste this code import mongoose from ‘mongoose’ const MONGODB_URI = process.env.MONGODB_URI if (!MONGODB_URI) throw new Error(‘MONGODB_URI not defined in .env.local’) let cached = global.mongoose || { conn: null, promise: null } export async function connectDB() { if (cached.conn) return cached.conn if (!cached.promise) { cached.promise = mongoose.connect(MONGODB_URI, { dbName: ‘todo-app’, bufferCommands: false, }).then((mongoose) => { return mongoose }) } cached.conn = await cached.promise return cached.conn } Create a .env.local file in your src folder: MONGODB_URI=mongodb://<username>:<password>@localhost:27017/nextjsdb?authSource=admin Step 3: Creating the Todo Model Create a new directory models Inside the src and add Todo.js: import mongoose from ‘mongoose’ const TodoSchema = new mongoose.Schema({ text: { type: String, required: true }, completed: { type: Boolean, default: false } }, { timestamps: true }) export default mongoose.models.Todo || mongoose.model(‘Todo’, TodoSchema) Step 4: Creating API Routes For GET and POST requests, we use a single route.js file. For DELETE and PUT requests (which require dynamic parameters like an id We create a separate folder structure. This is because Next.js follows a file-based routing system, and each endpoint must have its own file or dynamic folder to handle different HTTP methods and routes correctly. GET & POST → /app/api/todos/route.js import { connectDB } from ‘@/lib/mongodb’ import Todo from ‘@/models/Todo’ export async function GET() { await connectDB() const todos = await Todo.find().sort({ createdAt: -1 }) return Response.json(todos) } export async function POST(req) { const { text } = await req.json() await connectDB() const newTodo = await Todo.create({ text }) return Response.json(newTodo) } Create the Folder path below. I have added PUT & DELETE → /app/api/todos/[id]/route.js Note: This would be a folder name [id] Do not confuse. import { connectDB } from ‘@/lib/mongodb’ import Todo from ‘@/models/Todo’ export async function PUT(req, { params }) { const { id } = params const { completed } = await req.json() await connectDB() const updated = await Todo.findByIdAndUpdate(id, { completed }, { new: true }) return Response.json(updated) } export async function DELETE(req, { params }) { const { id } = params await connectDB() await Todo.findByIdAndDelete(id) return Response.json({ message: ‘Deleted’ }) } Step 6: Build the UI — /app/page.js Now that our API is ready, let’s shift our focus to the front end. To begin with, we’ll build the user interface using React (via Next.js). This will include a task input field, a task list, and buttons to complete or delete a task. First, we define two state variables: task to hold the current input, and todos to store the fetched task list. After the component mounts, we use useEffect to fetch tasks from the API and display them on the screen. When a user adds a task, it is sent to the backend via a POST request. Then, the new task is added to the state and shown immediately in the list. In contrast, when a task is toggled or deleted, we use PUT and DELETE requests to update the backend accordingly. As a result, the interface remains synced with the database in real time. The file /app/page.js is the main UI page of your application — it’s where users: ‘use client’ What’s Happening in /app/page.js: This line tells Next.js that this file uses client-side rendering (since we use React hooks like useState and useEffect). React State const [task, setTask] = useState(”) const [todos, setTodos] = useState([]) Add a New Task const addTodo = async () => { if (!task.trim()) return const res = await fetch(‘/api/todos’, { method: ‘POST’, body: JSON.stringify({ text: task }), }) const newTodo = await res.json() setTodos([newTodo, …todos]) setTask(”) } Full code ‘use client’import { useEffect, useState } from ‘react’export default function Home() { const [task, setTask] = useState(”) const [todos, setTodos] = useState([]) useEffect(() => { fetchTodos() }, []) const fetchTodos = async () => { const res = await fetch(‘/api/todos’) const data = await res.json() setTodos(data) } const addTodo = async () => { if (!task.trim()) return const res = await fetch(‘/api/todos’, { method: ‘POST’, body: JSON.stringify({ text: task }), }) const newTodo = await res.json() setTodos([newTodo, …todos]) setTask(”) } const toggleComplete = async (id, completed) => { const res = await fetch(`/api/todos/${id}`, { method: ‘PUT’, body: JSON.stringify({ completed: !completed }) }) const updated = await res.json() setTodos(todos.map(todo => todo._id === id ? updated : todo)) } const deleteTodo = async (id) => { await fetch(`/api/todos/${id}`, { method: ‘DELETE’ }) setTodos(todos.filter(todo => todo._id !== id)) } return ( <main className=”min-h-screen p-6 bg-gray-100 flex flex-col items-center”> <h1 className=”text-2xl font-bold mb-4″>To-Do App</h1> <div className=”flex gap-2 mb-4″> <input type=”text” value={task} onChange={(e) => setTask(e.target.value)} placeholder=”Enter task…” className=”border p-2 rounded w-64″ /> <button onClick={addTodo} className=”bg-blue-500 text-white px-4 py-2 rounded hover:bg-blue-600″ > Add </button> </div>

How to Create a Next.js MongoDB Todo Project: A Complete Guide Read More »

python interview question

Top 30 Python Interview Questions and Answers (2025)

In this blog, I’ll share 30+ real-world Python interview questions and answers — carefully curated from actual company interviews, including those from startups and top tech firms. Whether you’re just starting out or preparing for your next big opportunity, these questions will help you build confidence, sharpen your problem-solving skills, and stand out in competitive hiring rounds. Moreover, they are tailored to match what companies are asking in 2025, making this a practical and up-to-date resource for your next Python coding interview. I’ve included beginner to advanced Python concepts, covering OOP, data structures, algorithms, and Python libraries commonly asked about by recruiters. If you find this helpful, comment below—I’ll post an advanced Python Q&A series next! 1. What is the Difference Between a List and a Tuple? l = [1, 2, 3] # list t = (1, 2, 3) # tuple 2. Difference Between List Comprehension and Dict Comprehension # List squares = [x*x for x in range(5)] # Dict square_dict = {x: x*x for x in range(5)} 3. What is a Lambda Function in Python? A Lambda function in Python is a small, anonymous function that can have any number of arguments but can only have one expression. It’s a concise way to create simple functions without using the def keyword. add = lambda a, b: a + b 4. Examples of Mutable and Immutable Datatypes in Python Basic Difference: # Value equality with == a = [1, 2, 3] b = [1, 2, 3] print(a == b) # True – same values print(a is b) # False – different objects # Identity with is c = a print(a is c) # True – same object print(a == c) # True – same values 5. What is the Difference Between is and ==? a = [1, 2] b = a c = [1, 2] a is b # True a == c # True a is c # False 6. How Are Variables and Objects Stored in Python? In Python, variables and objects are stored using a combination of namespaces and memory management through references. Objects → Stored in Heap MemoryVariables (Names) → Stored in Stack Memory 7. What is a Decorator in Python? A function that modifies another function without changing its structure. def decorator(func): def wrapper(): print(“Before function”) func() print(“After function”) return wrapper @decorator def greet(): print(“Hello”) greet() 8. Difference Between Generators and Iterators def gen(): yield 1 yield 2 9. Difference Between Pickling and Unpickling? import pickle data = pickle.dumps({‘a’: 1}) obj = pickle.loads(data) 10. Difference Between Shallow Copy and Deep Copy import copy copy.copy(obj) # shallow copy.deepcopy(obj) # deep 11. Multiprocessing vs Multithreading in Python 12. How is Memory Managed in Python? Memory management in Python is handled by the Python memory manager, which includes a private heap, automatic garbage collection, and dynamic memory allocation using reference counting and a cyclic garbage collector. 13. What is the Garbage Collector in Python? The garbage collector in Python is a built-in mechanism that automatically frees up memory by reclaiming objects that are no longer in use, primarily using reference counting and cyclic garbage collection. 14. What is GIL (Global Interpreter Lock)? A mutex that allows only one thread to execute Python bytecode at a time, preventing race conditions in CPython. 15. What is a First-Class Function in Python? First-Class Function: In Python, functions are first-class objects, meaning they can be treated like any other data type. They can be: This allows for powerful programming patterns like higher-order functions, decorators, and functional programming techniques. Functions have the same privileges as other objects in Python. 16. What is a Closure in Python? Closure: A closure is a function that captures and retains access to variables from its outer (enclosing) scope, even after the outer function has finished executing. The inner function “closes over” these variables, keeping them alive in memory. def outer_function(message): def inner_function(): print(f”Message: {message}”) return inner_function # Create a closure my_closure = outer_function(“Hello from closure!”) # Call the inner function my_closure() Key characteristics: This enables data encapsulation and creates functions with persistent local state. 17. Different Ways to Read/Write a File in Python # Read with open(‘file.txt’, ‘r’) as f: data = f.read() # Write with open(‘file.txt’, ‘w’) as f: f.write(“Hello”) 18. What is a Context Manager in Python? Context Manager: An object that defines methods to be used with Python’s with statement. It ensures proper resource management by automatically handling setup and cleanup operations, even if an exception occurs. Key Methods: Purpose: Provides a clean way to manage resources like files, database connections, or locks by ensuring they are properly acquired and released, preventing resource leaks and ensuring cleanup code always runs. 19. Types of Inheritance in Python 20. Difference Between Abstraction and Encapsulation Abstraction: The process of hiding complex implementation details and showing only the essential features of an object. It focuses on what an object does rather than how it does it. Achieved through abstract classes, interfaces, and methods that provide a simplified view of functionality. Encapsulation: The bundling of data (attributes) and methods that operate on that data within a single unit (class), while restricting direct access to internal components. It focuses on hiding the internal state and requiring interaction through well-defined interfaces using access modifiers (private, protected, public). Key Difference: Abstraction is about simplifying complexity by hiding unnecessary details, while encapsulation is about protecting data integrity by controlling access to internal components. 21. What is Polymorphism in Python? Polymorphism: The ability of different objects to respond to the same interface or method call in their specific way. It allows objects of different types to be treated uniformly while exhibiting different behaviors based on their actual type. Key Characteristics: Types in Python: This enables writing generic code that can work with various object types without knowing their specific implementation details. 22. What is Function Overloading? Multiple functions with the same name but different parameters (Not natively supported in Python). 23. What is Function Overriding? Function Overriding: The ability of a child class

Top 30 Python Interview Questions and Answers (2025) Read More »

connecting nextjs project with mongodb blog post

How to Connect Next.js with MongoDB

MongoDB is a powerful NoSQL database that pairs perfectly with Next.js for full-stack applications. In this guide, you’ll learn how to connect Next.js to MongoDB (locally or with MongoDB Atlas) using Mongoose, and how to build simple API routes to insert and retrieve data. Prerequisites Before you begin, ensure you have the following installed: Create a Next.js app if needed: npx create-next-app@latest next-mongo-app cd next-mongo-app Although there is a small code change if you want to use TypeScript, I suggest using JavaScript for learning purposes. Step 1: Install Mongoose npm install mongoose Set the MongoDB URI in the .env.local file in your root directory MONGODB_URI=mongodb://<username>:<password>@localhost:27017/<databaseName>?authSource=admin //example MONGODB_URI=mongodb://admin:12345@localhost:27017/nextjsdb?authSource=admin Step 2: Set Up MongoDB Connection Helper Create a folder name lib and a file lib/mongodb.js: Make sure you are connected to the MongoDB database // lib/mongodb.js import mongoose from ‘mongoose’; const MONGODB_URI = process.env.MONGODB_URI; if (!MONGODB_URI) { throw new Error(‘Please define the MONGODB_URI environment variable’); } let cached = global.mongoose; if (!cached) { cached = global.mongoose = { conn: null, promise: null }; } export async function connectToDatabase() { if (cached.conn) return cached.conn; if (!cached.promise) { cached.promise = mongoose.connect(MONGODB_URI, { bufferCommands: false, useNewUrlParser: true, useUnifiedTopology: true, }).then((mongoose) => mongoose); } cached.conn = await cached.promise; return cached.conn; } Step 3: Define a Mongoose Model Create a folder models and a file models/Post.js // models/Post.js import mongoose from ‘mongoose’; const PostSchema = new mongoose.Schema({ title: String, content: String, }, { timestamps: true }); export default mongoose.models.Post || mongoose.model(‘Post’, PostSchema); Step 4: Create an API Route Create pages/api/posts.js: // pages/api/posts.js import { connectToDatabase } from ‘../../../lib/mongodb’; import Post from ‘../../../models/Post’; export default async function handler(req, res) { await connectToDatabase(); if (req.method === ‘GET’) { const posts = await Post.find({}); return res.status(200).json(posts); } if (req.method === ‘POST’) { const post = await Post.create(req.body); return res.status(201).json(post); } return res.status(405).json({ message: ‘Method not allowed’ }); } Step 5: Test with a Frontend Form Update pages/index.js With a simple form: This will show in the home URL / in the browser a simple form for inserting data into the database // pages/index.js or any component ‘use client’; // if using App Router import { useState } from ‘react’; export default function Home() { const [title, setTitle] = useState(”); const [content, setContent] = useState(”); async function handleSubmit(e) { e.preventDefault(); const res = await fetch(‘/api/posts’, { method: ‘POST’, headers: { ‘Content-Type’: ‘application/json’ }, body: JSON.stringify({ title, content }) }); const data = await res.json(); console.log(data); // Clear form after submit setTitle(”); setContent(”); } return ( <div style={{ maxWidth: 500, margin: ‘0 auto’ }}> <h1>Create Post</h1> <form onSubmit={handleSubmit}> <div> <label>Title:</label> <input type=”text” value={title} onChange={(e) => setTitle(e.target.value)} required style={{ width: ‘100%’, padding: ‘8px’, marginBottom: ’10px’ }} /> </div> <div> <label>Content:</label> <textarea value={content} onChange={(e) => setContent(e.target.value)} required rows={5} style={{ width: ‘100%’, padding: ‘8px’, marginBottom: ’10px’ }} ></textarea> </div> <button type=”submit”>Submit</button> </form> </div> ); } Folder Structure Overview Your folder structure should look the same. I have created: myproject/ ├── lib/ │ └── mongodb.js ├── models/ │ └── Post.js ├── pages/ │ ├── api/ │ │ └── posts.js │ └── index.js ├── .env.local └── … Api output should look like this : Comment below, let me know how you start your next JS journey

How to Connect Next.js with MongoDB Read More »

10 Python Scripts That Will Automate Your Daily Tasks

Looking to boost your productivity with Python? This blog shares 10 powerful Python scripts that can automate your daily tasks — from cleaning up files and sending emails to scraping websites and renaming folders. Whether you’re a beginner or an experienced developer, these time-saving scripts will help simplify your workflow and give you practical tools to automate the boring stuff. In this blog post, I will explore 10 powerful Python scripts that will make your daily digital life easier. 1. Auto-rename and organize with shutil The shutil module in Python helps you easily copy, move, and delete files and folders. It provides simple commands for handling files in bulk. For example, you can: If you need to work with single files (like reading or changing permissions), you should use the os module instead. 2. Email Automation with Attachments The smtplib module in Python lets you send emails using the SMTP (Simple Mail Transfer Protocol). It connects to an email server (like Gmail, Outlook, etc.) and sends emails directly from your Python script. Send emails automatically with a subject, body, and attachment. 3. Daily, Take a Screenshot of Any Website We will use Selenium to take a screenshot. Generally, Selenium is used for scraping data from any website. It’s a large library, and we are just used to taking screenshots. Now we need to install it. Just copy and run 4. Convert YouTube Videos to MP3 Download YouTube videos and convert them to MP3. pytube is a genuine, lightweight, dependency-free Python library for downloading YouTube videos. 5. Auto Backup Important Files Automatically back up a folder to another location. 6. Send WhatsApp Messages Automatically Use pywhatkit to send WhatsApp messages. This Python script automates sending WhatsApp messages using the Selenium WebDriver. Instead of using pywhatkit, it directly opens web.whatsapp.com, waits for the user to scan the QR code, navigates to the desired contact using their phone number, types the message, and sends it. This approach offers more control and flexibility, especially useful when you want to: It mimics real user behavior and can be extended to: ⚠️ Note: You must be logged into WhatsApp Web for the script to work. This script is for educational and personal use only Avoid spamming. 7. Scrape Weather Updates You need to install requests library to call api Fetch real-time weather data from OpenWeatherMap. Sign up for openWeatherMap and verify your credit card for api 1000 api hit is free. 8. Auto-Login to Websites Use Selenium to log into websites automatically. 9. Text-to-Speech Bot A Python library called pyttsx3 converts text to speech. It is compatible with Python 2 and 3, and unlike other libraries, it operates offline. Turn your text into speech using pyttsx3. 10. Daily To-Do Notifier Pop up your daily to-do list as a notification. Bonus Tip: Set up cron jobs (Linux) or Task Scheduler (Windows) to run these scripts automatically every day! If you found this helpful, share it with a fellow Python enthusiast. Have a favourite script of your own? Drop it in the comments below!

10 Python Scripts That Will Automate Your Daily Tasks Read More »

Scroll to Top