web development

django-tenants

Building Enterprise-Grade SaaS with Django

Very few know how to build a SaaS platform that safely serves hundreds or thousands of companies from a single system. The difference is not features. It is architecture. In this article, I will focus on one critical concept used by real SaaS platforms: schema-based multi-tenancy using Django and PostgreSQL. This guide is intentionally minimal and educational.No advanced tooling. No distractions. Just the core ideas Why Multi-Tenancy Is Fundamental to SaaS Imagine you are building a project management product. You onboard 200 companies. Do you: That approach quickly becomes impossible. A SaaS platform must: This is exactly what multi-tenancy provides. The Three Ways to Implement Multi-Tenancy 1. Shared Tables with Tenant ID All tenants share the same tables. Data is filtered using a tenant_id column. This is simple, but dangerous.A single missing filter can expose data across tenants. This approach does not scale safely. 2. Shared Database, Separate Schemas (Recommended) Each tenant gets: Django connects to the correct schema per request. This gives: This article focuses on this approach. 3. Separate Database per Tenant Each tenant has a dedicated database. This offers maximum isolation but adds major operational complexity.Most SaaS platforms do not need this. Why Schema-Based Multi-Tenancy Works Isolation at the Database Level Schemas are enforced by PostgreSQL itself. Even if the application code is incorrect, the database prevents cross-tenant access.Security does not depend on developer discipline. Scales Without Rewrites You can: The architecture remains stable as the business grows. Django Code Remains Clean You write normal Django queries: Django-tenants ensures the query runs in the correct schema automatically. No tenant_id fields everywhere.No custom query filters. How Tenant Resolution Works A simplified request flow: Every request is isolated by default. Data Layout Strategy Public Schema Contains platform-level data: This answers the question: who is the customer? Tenant Schemas Each tenant schema contains: This answers the question: what belongs to this company? Essential Libraries This blog intentionally uses only the core requirements. Django The main web framework. django-tenants Handles: PostgreSQL Driver Required for PostgreSQL schema support. Essential Commands Run shared (public schema) migrations: Run migrations for all tenant schemas: Create a tenant: Create a superuser: Common Mistakes Beginners Make Most of these mistakes appear only after the system grows. Final Thoughts Enterprise SaaS is not about complexity.It is about correct boundaries. Schema-based multi-tenancy gives you: With just Django, django-tenants, and PostgreSQL, you can build a foundation capable of serving real businesses safely. Everything else can be added later. Architecture, however, is very hard to fix later. Build it right from day one. If you want next, I can: Just tell me the next chapter. Why This Matters Schema-based multi-tenancy relies on hostnames to resolve tenants.The domain resolution and middleware logic treat localhost them 127.0.0.1 as different hosts. In development, tenant routing and schema switching are configured to work with localhost. Accessing the app via 127.0.0.1 bypasses this logic, causing tenant resolution to fail.

Building Enterprise-Grade SaaS with Django Read More »

Master Python by Building 8 Classic Games

Learning Python by building games is one of the most effective ways to develop real programming skills. Each game teaches specific concepts while keeping you engaged and motivated. This roadmap will guide you from a beginner to a confident Python developer. Solutions will not be provided directly—you are encouraged to struggle, think, and build your own logic. This is where real learning happens. Avoid using AI to solve the problems; do it yourself to truly master Python. 1. Hangman What it teaches: String manipulation, lists, loops, basic I/O The game: Player guesses letters to reveal a hidden word. Each wrong guess adds a body part to the hangman. Six wrong guesses = game over. How to start: Key hint: Store the display as a list of characters, making it easy to reveal letters: [‘_’, ‘_’, ‘t’, ‘_’, ‘o’, ‘_’] 2. Rock Paper Scissors What it teaches: Random module, dictionaries for logic, game loops The game: Player picks rock, paper, or scissors. The computer picks randomly. Winner determined by classic rules. How to start: Key hint: Use a dictionary to encode what each choice beats instead of nested if-statements. This makes adding Lizard and Spock trivial. 3. Quiz Game What it teaches: Lists of dictionaries, file I/O, data organization The game: Present multiple-choice questions, track correct answers, show final score, and percentage. How to start: Key hint: Use a list of dictionaries to store questions. Later, read from a JSON file for easy question management. 4. Blackjack (21) What it teaches: Classes, complex state management, multiple functions The game: Get closer to 21 than the dealer without going over. Aces count as 1 or 11. Dealer hits to 16, stands on 17+. How to start: Key hint: Handle aces by starting them as 11, then converting to 1 if the hand busts. Use a function to calculate hand value. 5. Tic-Tac-Toe What it teaches: 2D lists, pattern checking, basic AI The game: Two players alternate placing X and O on a 3×3 grid. First to get three in a row wins. How to start: Key hint: Check win conditions by examining all rows, then all columns, then two diagonals. For AI, start with random moves, then add logic to block the opponent. 6. Mastermind What it teaches: Counting algorithms, feedback systems, careful logic The game: The computer picks a secret code of 4 colors. Player guesses, gets feedback on exact matches (right color, right position) and partial matches (right color, wrong position). How to start: Key hint: Calculate exact matches first, then count remaining colors that appear in both secret and guess for partial matches. 7. Dice Rolling Game (Yahtzee) What it teaches: Counter class, scoring logic, categorization The game: Roll 5 dice, choose which to keep, re-roll others (up to 3 rolls). Score based on combinations: three of a kind, full house, straight, etc. How to start: Key hint: Use collections.Counter to count dice values. Each scoring rule is a separate function that takes the dice list. 8. Battleship What it teaches: Multiple grids, coordinate systems, validation, and hidden information The game: Player and computer each place ships on a 10×10 grid. Take turns guessing coordinates to sink the opponent’s ships. How to start: Key hint: Use separate grids for the player’s board, the computer’s board, and tracking guesses. Convert input like “B4” to coordinates: row = ord(‘B’) – ord(‘A’), col = 3. Quick Start Guide Project Order Recommendation Beginner: Start with Hangman → Rock Paper Scissors → Quiz Game Intermediate: Tic-Tac-Toe → Mastermind → Blackjack Advanced: Dice Game → Battleship By the time you complete all eight games, you’ll have solid Python fundamentals and a portfolio of working projects. Now pick your first game and start coding!

Master Python by Building 8 Classic Games Read More »

Make Your Personal Blog Website with Wagtail CMS

So I’ve been wanting to build my own blog for a while now, and after trying out a bunch of different platforms like WordPress and some CMSs, I finally found Wagtail. And honestly? It’s been pretty great. Let me tell you why I think Wagtail is perfect for a personal blog and how you can get started with it. Why I Chose Wagtail I know what you’re thinking: “There are like a million blogging platforms out there—why Wagtail?” Fair question. Here’s the thing: I wanted something flexible enough to customize, but not so complicated that I’d spend weeks just setting it up. Wagtail is very easy to set up and customize with templates, but you still get the power and flexibility you need. And Wagtail is 10x faster than a WordPress website, and because it has much batter seo feature It’s built on Django, which I already have some experience with, and it provides a really clean admin interface that doesn’t feel like it was designed in 2005. Plus, it’s open source, which means no monthly fees eating into my coffee budget. What You’ll Need Before we dive in, here’s what you should have ready: Getting Started Alright, let’s actually build this thing. First, I recommend setting up a virtual environment because you don’t want to mess up your system Python packages. Now install Wagtail: Once that’s done, create your project: That last command will ask you to create an admin account. Don’t forget those credentials – you’ll need them to log into your admin panel. Now fire it up: Go to http://127.0.0.1:8000 And boom – you’ve got a Wagtail site running. The admin panel is at http://127.0.0.1:8000/admin. Setting Up Your Blog Here’s where it gets fun. Wagtail is all about creating custom page types. For a blog, you’ll want to create models for your blog index page and individual blog posts. Create a new app for your blog: Then add it to your INSTALLED_APPS settings file. In your blog/models.py, you’ll want something like this: Run migrations again: Creating Templates Wagtail needs templates to display your pages. Create a blog/templates/blog directory and add your templates there. Here’s a simple one for blog_page.html: Adding Some Style The default Wagtail setup is pretty bare-bones, which is actually good because you can style it however you want. I added some basic CSS to make mine look decent, and I’m planning to customize it more as I go. You can put your CSS in a static folder and link it in your base template. Nothing fancy is needed unless you want to get fancy. What I Like About This Setup After using this for my own blog, here’s what I appreciate: The admin interface is actually pleasant to use. I can draft posts, schedule them, and manage everything without wanting to throw my laptop out the window. The StreamField feature (which I didn’t cover here, but you should definitely look into) lets you create really flexible page layouts. And since it’s Django under the hood, I can add any custom functionality I want. A Few Gotchas It’s not all sunshine and rainbows, though. The learning curve is steeper than something like WordPress if you’re not familiar with Python or Django. And while the documentation is pretty good, sometimes you’ll need to dig around to figure out how to do something specific. Also, deployment is on you. Wagtail doesn’t come with hosting, so you’ll need to figure that out yourself. I ended up using a simple VPS, but there are easier options like PythonAnywhere or Heroku if you don’t want to deal with server management. Final Thoughts Building a blog with Wagtail has been a really good experience for me. It’s given me way more control than I’d get with a typical blogging platform, and I actually understand how everything works. If you’re comfortable with Python and want a blog that you can customize to your heart’s content, I’d definitely recommend giving Wagtail a shot.

Make Your Personal Blog Website with Wagtail CMS Read More »

10 Python Libraries That Build Dashboards in Minutes

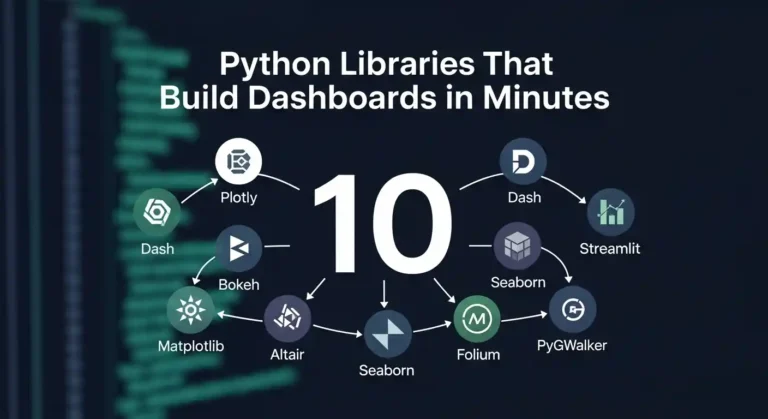
Let me tell you something—I’ve wasted countless hours building dashboards from scratch, wrestling with JavaScript frameworks, and questioning my life choices. Then I discovered these Python libraries, and honestly? My life got so much easier. If you’re a data person who just wants to visualize your work without becoming a full-stack developer, this post is for you. 1. Streamlit I’ll be honest—Streamlit changed everything for me. You literally write Python scripts and get beautiful web apps. No HTML, no CSS, no JavaScript headaches. That’s it. That’s the tweet. Three lines and you’ve got an interactive dashboard. It’s perfect for quick prototypes and sharing models with non-technical stakeholders who just want to click buttons and see results. 2. Dash by Plotly When I need something more production-ready, I reach for Dash. It’s built on top of Flask, Plotly, and React, but you don’t need to know any of that. You just write Python and get gorgeous, interactive dashboards. The learning curve is slightly steeper than Streamlit, but the customization options are incredible. I’ve built entire analytics platforms with this thing. 3. Panel Panel is my go-to when I’m already working in Jupyter notebooks and don’t want to rewrite everything. It works seamlessly with practically any visualization library you’re already using—matplotlib, bokeh, plotly, you name it. What I love is that I can develop right in my notebook and then deploy it as a standalone app. No context switching, no rewriting code. 4. Gradio If you’re doing anything with machine learning models, Gradio is a gift from the tech gods. I’ve used it to demo models to clients, and the “wow factor” is real. You can wrap your model in a UI with literally 3 lines of code. Image classification? Text generation? Audio processing? Gradio handles it all and makes you look like a wizard. 5. Voilà Sometimes I just want to turn my Jupyter notebook into a dashboard without changing a single line of code. That’s where Voilà comes in. It renders your notebook as a standalone web app, hiding all the code cells. I use this all the time for presenting analysis to my team. They get to see the results and interact with widgets, but they don’t have to wade through my messy code. 6. Plotly Express Okay, technically Plotly Express isn’t a dashboard library—it’s a visualization library. But hear me out. The charts it creates are so interactive and beautiful that sometimes you don’t even need a full dashboard framework. I’ve literally built entire reports with just Plotly Express charts embedded in simple HTML. One-liners that create publication-ready visualizations? Yes please. 7. Bokeh Bokeh is for when I need fine-grained control but still want everything in Python. It’s great for creating custom interactive visualizations that feel professional and polished. The server component lets you build full applications, and I’ve used it for real-time monitoring dashboards. It handles streaming data beautifully. 8. Taipy I only recently discovered Taipy, but I’m kicking myself for not finding it sooner. It’s designed specifically for data scientists who need to build production applications. What sets it apart is how it handles scenarios and pipelines. If your dashboard needs to run complex workflows or manage different data scenarios, Taipy makes it surprisingly straightforward. 9. Solara Solara is all about reactive programming—your dashboard automatically updates when your data changes. It’s built on top of React but you never touch JavaScript. I love using this for dashboards that need to feel really responsive and modern. The component-based approach makes it easy to build complex interfaces without losing your mind. 10. Shiny for Python If you’re coming from the R world, as I did, Shiny for Python will feel like coming home. It brings the reactive programming model of R Shiny to Python, and it works beautifully. I appreciate how it encourages you to think about reactivity and state management from the start. The resulting dashboards feel polished and professional. My Honest Take Here’s what I’ve learned after building dashboards with all of these: there’s no “best” library. It depends on what you’re trying to do. The beautiful thing is that they’re all Python. You don’t need to become a web developer to build impressive, interactive dashboards. You just need to know Python and have something interesting to show. So pick one, build something, and stop overthinking it. I spent way too long agonizing over which library to learn first. Just start with Streamlit, you’ll have something running in 10 minutes, and you can always learn the others later. Now go build something cool and show it off. The world needs more data people who can actually visualize their insights.

10 Python Libraries That Build Dashboards in Minutes Read More »

Real questions from my recent Python Developer interview

Top 10 Python Interview Questions and Answers

So you’ve got a Python interview coming up? I’ve been there, and I know that feeling of wanting to make sure you really understand the fundamentals. Over the years, I’ve noticed the same questions keep popping up in interviews, and honestly, they’re asked for good reasons—they reveal how well you actually understand Python, not just whether you can Google syntax. Let me walk you through the questions I see most often, along with explanations that actually make sense (no textbook jargon, I promise). 1. What Makes Python… Python? You know what’s funny? This seems like such a basic question, but it’s actually the interviewer’s way of seeing if you understand why we use Python in the first place. Here’s the thing—Python was designed to be readable. Like, really readable. When Guido van Rossum created it, he wanted code that you could almost read like English. And it worked! You don’t need semicolons everywhere, you don’t need to declare types for every variable, and honestly, after coding in Python, going back to other languages feels a bit verbose. Python runs your code line by line (that’s the “interpreted” part), which makes debugging so much easier. You can literally open up a terminal, type python, and start playing around. No compilation step, no ceremony. The dynamic typing thing? That means you can just write x = 5 and later x = “hello” And Python’s totally cool with it. Some people find this scary, but I find it liberating for rapid prototyping. 2. Lists vs Tuples—What’s the Big Deal? Okay, so this one trips people up because lists and tuples look so similar. But trust me, the difference matters. Think of it this way: a list is like a shopping list you can edit—cross things off, add new items, rearrange stuff. A tuple is like a GPS coordinate—once it’s (40.7128, -74.0060), it stays that way. Lists are packed with methods—you can append, remove, extend, you name it. Tuples? Not so much. They’re simpler, faster, and use less memory precisely because they can’t change. I use tuples when I want to make it crystal clear that this data shouldn’t be modified. Like coordinates, RGB color values, or database records. It’s a signal to other developers (or future me) that says, “hey, don’t mess with this.” 3. The GIL—Python’s Weird Little Secret Alright, this is where things get interesting. The Global Interpreter Lock (GIL) is one of those things that sounds way scarier than it actually is, but you should definitely understand it. Here’s the deal: Python has this lock that says “only one thread can execute Python code at a time.” Yes, even on your fancy 16-core processor. I know, I know—it sounds crazy in 2025, right? But here’s why it’s not actually the apocalypse: if your code is waiting around for stuff (downloading files, reading from disk, making API calls), the GIL doesn’t really matter. While one thread waits, another can run. It’s only when you’re crunching numbers non-stop that you run into issues. When I hit GIL limitations, here’s what I do: The GIL exists because it made Python’s memory management so much simpler to implement. Is it perfect? No. But it’s a trade-off that’s worked out pretty well for most use cases. 4. __str__ vs __repr__—Two Sides of the Same Coin This one’s actually kind of elegant once you get it. These methods control how your objects look when you print them, but they’re meant for different audiences. __str__ is for humans. It’s what shows up when you print something or convert it to a string. Make it friendly and readable. __repr__ is for developers. It should give you enough info to recreate the object. When you’re debugging at 2 AM, you’ll thank yourself for a good __repr__. Pro tip: if you only define __repr__, Python will use it for both. But if you care about user experience, define both. 5. Decorators—Fancy Function Wrappers Decorators sound intimidating, but they’re actually just a clean way to wrap functions with extra behavior. Once you “get” them, you’ll start seeing uses everywhere. Think of it like gift wrapping. You have a present (your function), and you wrap it in paper (the decorator) that adds something extra—maybe timing, logging, or checking permissions. That @timer_decorator line? It’s just Python shorthand. Without it, you’d write slow_function = timer_decorator(slow_function), which is way less pretty. I use decorators all the time for things like checking if a user is logged in, caching expensive function calls, or (like above) timing how long things take. They keep your actual function code clean while adding functionality. 6. List Comprehensions vs Generators—Memory Matters Here’s a real-world scenario: you need to process a million records. Do you load them all into memory at once, or process them one at a time? That’s basically the list vs generator question. The difference? That list comprehension (square brackets) creates all 1000 numbers immediately and stores them. The generator (parentheses) creates them lazily, one at a time, as needed. I learned this the hard way when I tried to load a 2GB CSV file into a list and watched my program crash. Switching to a generator? Smooth sailing. Use list comprehensions when you need the entire list, such as to access items randomly or iterate multiple times. Use generators when you’re dealing with large datasets or when you only need to go through the data once. Your RAM will thank you. 7. Static Methods vs Class Methods—The Identity Crisis These two decorators confused me for the longest time, so let me break it down in a way that finally made sense to me. Static methods are like the roommate who keeps to themselves—they don’t care about the class or any instances. They’re just utility functions that happen to live there because they’re related. Think of them as helper functions. Class methods get passed the class itself (that cls parameter), so they can access class-level stuff and are great for alternative constructors. Like if you want to create

Top 10 Python Interview Questions and Answers Read More »

If You Could Make Python Run 20× Faster Without Changing Your Logic?

If You Could Make Python Run 20× Faster Without Changing Your Logic?

Look, I love Python. I really do. It’s elegant, readable, and honestly? It just makes sense. But let’s be real for a second—it’s also slow. Like, painfully slow sometimes. I remember this one time I was processing a massive CSV file for a data analysis project. My script was chugging along, and I literally had time to make coffee, check my emails, and question all my life choices before it finished. I thought, “There’s got to be a better way, right?” Turns out, there is. And no, I’m not talking about rewriting everything in C++ or learning Rust (though props to you if you do). I’m talking about squeezing serious performance gains out of Python without touching your actual logic. Sounds too good to be true? Stick with me. The Reality Check Nobody Talks About Here’s the thing most tutorials won’t tell you: Python is an interpreted language, and that’s both its blessing and its curse. The same flexibility that makes it so easy to write also makes it… well, not exactly a speed demon. But before you start panicking and thinking you need to rewrite your entire codebase, let me share what I’ve learned from years of making slow Python code fast. The Low-Hanging Fruit (That Actually Works) 1. NumPy: Your New Best Friend If you’re doing anything with numbers—and I mean anything—and you’re not using NumPy, we need to talk. Seriously. I once rewrote a loop that was processing temperature data. The original version with regular Python lists took about 45 seconds. The NumPy version? Less than 2 seconds. Same logic, same result, just vectorized operations instead of loops. It’s almost embarrassing how much faster this is. 2. List Comprehensions Over Loops This one’s subtle but powerful. Python’s list comprehensions aren’t just more Pythonic—they’re actually faster because they’re optimized at the C level. The performance difference grows with your data size. And honestly? The comprehension version just looks cleaner too. 3. Use the Right Data Structure (Please) I spent weeks once debugging a performance issue that turned out to be… wait for it… using a list when I should’ve used a set. Checking if an item exists in a list is O(n). In a set? O(1). If I had a time machine, I’d go back and slap myself for not knowing this sooner. The Game Changers Codon: The Actual Game Changer Okay, this is where my mind was genuinely blown. Have you heard of Codon? It’s a Python compiler—not an interpreter, a compiler—that converts Python to native machine code. And get this: it can give you performance that’s basically on par with C/C++. I was skeptical at first. Like, really skeptical. But then I tried it on a bioinformatics script I’d been working on. Standard Python took about 12 minutes to process a genomic dataset. With Codon? 38 seconds. I checked three times because I thought I’d broken something. Here’s the wild part—you can use Codon’s JIT decorator in your regular Python code: That’s it. One import, one decorator. The @jit decorator compiles that function to native machine code the first time it runs, and every subsequent call is blazing fast. I’m talking 50-100x speedups for computational loops. The beautiful part? It’s literally just Python. You’re not writing in some weird subset of the language or learning new syntax. You write normal Python, add @jit, and Codon does the heavy lifting. The catch? It’s still relatively new (MIT developed it), and while it supports most of Python’s standard library, some third-party packages might not work yet. But for computational tasks, data processing, or anything CPU-intensive, where you’re writing your own logic? This is the real deal. I’ve started sprinkling @jit decorators on my performance-critical functions, and it’s become my go-to solution before considering any major rewrites. Numba: Magic When You Need It Numba is wild. You literally just add a decorator to your function, and it compiles it to machine code. It’s especially amazing for numerical computations. That @jit decorator can give you 10-100x speedups depending on what you’re doing. It’s not magic—it’s a JIT compiler—but it feels like magic. The Honest Truth About Caching Okay, real talk: I used to think caching was for people who were bad at writing efficient code. I was wrong. So, so wrong. Python’s functools.lru_cache is ridiculously easy to use and can make recursive functions or repeated calculations blazing fast. Without caching, calculating fibonacci(35) takes forever. With caching? Instant. It’s one line of code for potentially massive gains. When to Actually Care About This Stuff Here’s my honest advice: don’t optimize prematurely. I’ve wasted hours optimizing code that ran once a week and took 3 seconds. That’s 3 seconds I’ll never get back, and probably 2 hours of optimization time I definitely won’t. But when you’re dealing with: Then yeah, these techniques are absolutely worth it. The Bottom Line Python doesn’t have to be slow. Sure, it’ll never beat C for raw speed, but you know what? Most of the time, we don’t need C-level performance. We need code that’s fast enough and still maintainable. I’ve seen 20x speedups from just: And the best part? My code still looks like Python. It’s still readable. I can still come back to it in six months and understand what’s happening. So yeah, if someone told past-me that I could make my Python code 20x faster without rewriting the logic, I would’ve called them a liar. But here we are. And honestly? It feels pretty good.

If You Could Make Python Run 20× Faster Without Changing Your Logic? Read More »

what is python

What is Python?

Python is a widely-used programming language that’s known for being beginner-friendly. Created by Guido van Rossum and first released in 1991, it has become one of the most popular languages in the world. Python is commonly used for: What can you do with Python? Why choose Python? Important things to know How Python syntax differs from other languages How do we define a function? Simple Class creation.

What is Python? Read More »

Data Science Courses

Top 5 Data Science Courses in India for 2026

Data Science and Artificial Intelligence are among the most in-demand skills today. Many top Indian institutes now offer online programs that allow students and working professionals to learn these skills without leaving their jobs. In 2026, make it your goal to start a data science course and earn a salary between ₹8 LPA and ₹40 LPA. Here are the top 5 Data Science courses in India for 2026, explained in simple words, along with fees and duration. 1. IIT Delhi – Certificate Programme in Data Science & Machine Learning Duration: 6 monthsMode: Online live classesFees: ₹1.25 – ₹1.50 lakh + GST Apply Now Simple explanation:This course is good for people who want to start or grow their career in data science. You will learn how to work with data using Python, understand statistics, and build machine learning models. The course also introduces Generative AI. Classes are taken live by IIT Delhi faculty, and you work on real-life projects. Best for: 2. IIT Madras – Diploma in Data Science Duration: Around 8 monthsMode: OnlineFees: Modular (pay per course; flexible total cost) Simple explanation:This is a diploma-level program where you pay for each subject separately. You can study at your own pace. The course teaches programming, statistics, and machine learning step by step. It is flexible and suitable for students as well as working professionals. Apply Now Best for: 3. IIT Roorkee – PG Certificate in Data Science, Machine Learning & Generative AI Duration: About 8 monthsMode: Online (live + recorded)Fees: Around ₹1.49 lakh Simple explanation:This is a slightly advanced course that goes deeper into machine learning and Generative AI. You will learn how AI models work, how to handle large data, and how to build real projects from start to end. It is more detailed than short courses and includes a final capstone project. Best for: 4. IIT Kanpur (E&ICT Academy) – Professional Certificate in Generative AI & Machine Learning Duration: About 11 monthsMode: OnlineFees: Around ₹1.53 lakh Simple explanation:This course focuses strongly on AI, especially Generative AI, NLP, and computer vision. The longer duration gives you more time to practice coding and projects. You will learn how AI models are trained and used in real products like chatbots and image systems. Read More Best for: 5. IIM Kozhikode – Professional Certificate in Data Science & Artificial Intelligence Duration: About 8 monthsMode: OnlineFees: ₹1.79 – ₹2.15 lakh + GST Simple explanation:This course is designed for managers and business professionals. It explains data science in a way that helps you make better business decisions. You will learn what data science can do for companies, even if you are not a hardcore coder. Technical concepts are explained in a business-friendly way. See MoreDetail Best for:

Top 5 Data Science Courses in India for 2026 Read More »

Django Tenants

Django Tenants Complete Guide: Build Scalable Multi-Tenant Applications

Everyone is curious about how large companies manage their SaaS-based software. In this blog post, I will guide you through how to use the django-tenants library to implement multi-tenancy in Django. Multi-tenancy is a software architecture where a single application instance serves multiple customers (tenants), with each tenant’s data securely isolated from others. Django-tenants is a powerful and widely used library that makes implementing multi-tenancy in Django simple and scalable. In this complete guide, you’ll learn everything you need to get started with Django Tenants—from basic concepts to practical implementation. What is Multi-Tenancy? Multi-tenancy allows you to run multiple organizations or clients on a single application deployment. Each tenant has its own isolated database schema, ensuring complete data separation while sharing the same codebase and infrastructure. Common use cases include SaaS applications, HRMS, e-learning platforms, e-commerce marketplaces, and enterprise management systems, where each client needs their own isolated environment. Real-World Companies Using Multi-Tenancy Many leading companies rely on multi-tenant architecture, including Salesforce (CRM), Shopify (e-commerce), and Slack (team communication).Internally, what they use the company didn’t do to reveal, but django Tenancy provides the same architecture Why Django-Tenants? Django-tenants provides schema-based multi-tenancy using PostgreSQL schemas. Each tenant gets their own database schema, providing strong data isolation while being more efficient than separate databases. The library handles tenant identification, routing, and database operations automatically. Prerequisites Before starting, ensure you have Python 3.8 or higher, PostgreSQL 10 or higher installed, and basic knowledge of Django. Django-tenants works best with PostgreSQL due to its schema support. Installation First, install the required packages: Create a new Django project if you haven’t already: Configuration Update your settings.py file with the following configurations. Start by modifying the database settings to use PostgreSQL: Add django-tenants to your installed apps. The order is crucial here: Configure the tenant model and middleware: Specify which apps are shared across all tenants and which are tenant-specific: Set the public schema name: Creating Tenant Models Create your tenant and domain models in tenants/models.py: The TenantMixin provides essential fields like schema_name and is_active. The auto_create_schema attribute automatically creates the database schema when a new tenant is created. Running Migrations Django-tenants requires a special migration process. First, create migrations: Run migrations for the shared apps (public schema): This creates the public schema and shared tables. Now you’re ready to create tenants. Creating Your First Tenant Create a management command or use the Django shell to create tenants. Here’s an example using the shell: Testing Your Multi-Tenant Setup Start the development server: To test different tenants, you’ll need to modify your hosts file or use different domains. For local development, add entries to your hosts file: Now you can access different tenants at tenant1.localhost:8000 and tenant2.localhost:8000. Creating Tenant-Specific Views Create views that automatically work with the current tenant’s data: The request object includes a tenant attribute that gives you access to the current tenant information. Best Practices Keep tenant-specific data in TENANT_APPS and shared data like user authentication in SHARED_APPS. Use descriptive schema names that are URL-safe and unique. Always test tenant isolation to ensure data doesn’t leak between tenants. Implement proper error handling for missing or invalid tenants. Use database connection pooling to handle multiple tenant connections efficiently. Consider implementing tenant creation workflows with proper validation. Advanced Features Django-tenants supports custom tenant routing, allowing you to use subdomains, custom domains, or path-based routing. You can implement tenant-specific settings by overriding settings based on the current tenant. The library also supports tenant cloning for quickly setting up new tenants with existing data structures. Common Pitfalls Avoid forgetting to run migrate_schemas for both shared and tenant apps. Don’t use absolute imports that bypass tenant middleware. Be careful with static files and media files, ensuring they’re properly scoped per tenant when needed. Always test migrations on a copy of your production database before deploying. Conclusion Django-tenants provides a robust solution for building multi-tenant Django applications. By following this guide, you’ve learned how to set up schema-based multi-tenancy, create and manage tenants, and build tenant-aware applications. The library handles the complexity of tenant routing and database isolation, allowing you to focus on building great features for your users. Read More on official docs.

Django Tenants Complete Guide: Build Scalable Multi-Tenant Applications Read More »

python cisco free test

Learn Python and Earn Free Badges with Cisco NetAcad

Are you ready to start your Python programming journey? I’ve found something exciting to share with you – two completely free Python courses from Cisco that will help you master Python fundamentals and earn valuable badges to showcase your skills! Why Learn Python? Python is one of the most popular and beginner-friendly programming languages in the world. Whether you want to build websites, analyze data, automate tasks, or dive into artificial intelligence, Python is your perfect starting point. The best part? You can learn it for free and get certified along the way! Free Python Courses with Badges Cisco Networking Academy offers two comprehensive Python courses that are completely free and provide you with official badges upon completion: 1. Python Essentials 1 Perfect for: Absolute beginners with no programming experience This course covers the fundamentals of Python programming and helps you build a strong foundation. You’ll learn: Get Started: Python Essentials 1 Course 2. Python Essentials 2 Perfect for: Those who’ve completed Python Essentials 1 or have basic Python knowledge This intermediate course takes your skills to the next level with: Get Started: Python Essentials 2 Course What You’ll Get 100% Free – No hidden costs or subscription fees Official Badges – Showcase your achievements on LinkedIn and your resume Self-Paced Learning – Study whenever and wherever you want Hands-On Practice – Real coding exercises and projects Industry Recognition – Cisco is a globally recognized technology leader How to Get Started Why I Recommend These Courses Unlike many other free resources that leave you wandering without direction, these Cisco courses provide structured learning paths with clear goals. The interactive exercises help you practice what you learn immediately, and the badges give you something tangible to show potential employers or clients. Whether you’re looking to switch careers, enhance your current job skills, or simply explore programming as a hobby, these courses are an excellent starting point. Ready to Start? Don’t wait! Your Python programming journey begins today. Click on the course links, enroll for free, and start earning those valuable badges. The skills you gain will open doors to countless opportunities in the tech world. Remember: Every expert programmer started exactly where you are now. Comment below if you get any other free resource, I will make a post

Learn Python and Earn Free Badges with Cisco NetAcad Read More »

Scroll to Top