web development

Python object image

How to Check if an Object Has an Attribute in Python

I can’t tell you how many times I’ve run into this scenario: I’m working on a Python project, confidently accessing an object’s attribute, and boom—AttributeError crashes my program. Sound familiar? This happens all the time when you’re dealing with different object types. Maybe you’re working with user accounts where some users have premium features and others don’t. Or perhaps you’re building an API that receives varying data structures. Whatever the case, knowing how to safely check for attributes is essential. Let me walk you through the different ways I handle this in my own code. Why Bother Checking for Attributes? Here’s a real scenario I dealt with recently: I was building a user management system where regular users had basic info (name, email), but premium users had additional fields like subscription_type and discount_rate. If I tried to access user.subscription_type a regular user object, Python would throw an AttributeError and my whole application would crash. Not ideal, especially in production! That’s why we need to check first. The Different Ways to Check (And When I Use Each) 1. hasattr() – My Go-To Method Honestly, this is what I use 90% of the time. It’s clean, simple, and does exactly what you need: I love hasattr() because it’s readable. When someone else looks at my code, they immediately understand what I’m doing. 2. getattr() – Check and Grab in One Go Sometimes you don’t just want to check if an attribute exists—you want to use it right away. That’s where getattr() shines: I find this super useful when I’m setting up configuration objects or dealing with optional features. Instead of writing an if-statement, I just provide a sensible default. 3. Try-Except – When You Need More Control Sometimes I need to do something more complex when an attribute doesn’t exist. That’s when I reach for try-except: This approach is great when the attribute access itself might trigger some side effects, or when you want to log the missing attribute for debugging. 4. dir() – For When You’re Exploring To be honest, I mostly use dir() When I’m debugging or exploring an unfamiliar library: It’s not something I put in production code, but it’s invaluable during development. A Real Example from My E-commerce Project Let me show you how I used these techniques in an actual project. I was building a shopping cart system with different user tiers: The beauty here is that process_order() it doesn’t need to know what type of cart it’s dealing with. It just checks for the capability and acts accordingly. Works for Methods and Properties Too By the way, these techniques aren’t just for regular attributes. They work perfectly with methods and properties: What I’ve Learned Over Time After years of Python development, here are my rules of thumb: When to use what: Things to avoid: Here’s a mistake I made early on: Wrapping Up Learning to check for attributes properly has saved me countless hours of debugging and prevented so many crashes. The key takeaway? Choose the right tool for the job: Start with hasattr() For most cases, it’s Pythonic, readable, and gets the job done. You can always refactor to something more complex if you need to. What’s your preferred method? Have you run into any tricky situations with attribute checking? I’d love to hear about them in the comments!

How to Check if an Object Has an Attribute in Python Read More »

image of many to many relation in Django

Many-to-Many Relations with ‘through’ in Django

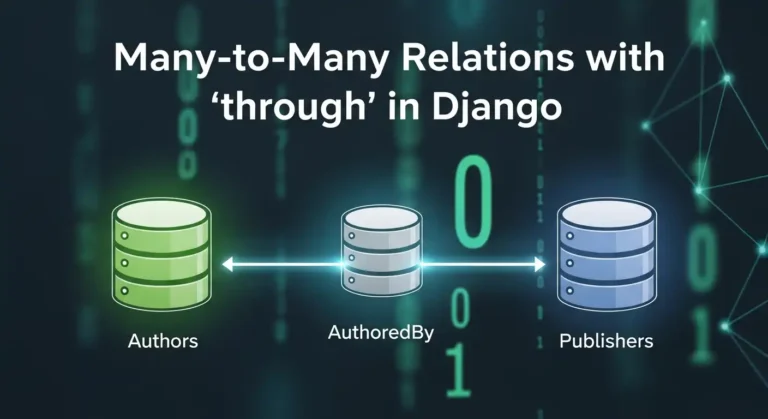
Hey there! If you’ve been working with Django for a while, you’ve probably used many-to-many relationships. They’re great, right? But have you ever felt like you needed more control over that relationship? Like, you want to store extra information about the connection between two models? That’s exactly where the through parameter comes in, and trust me, once you get the hang of it, you’ll wonder how you ever lived without it. What’s a Many-to-Many Relationship Anyway? Before we dive into the through stuff, let’s quickly recap. A many-to-many relationship is when multiple instances of one model can be related to multiple instances of another model. Think about it like this: You get the idea! The Basic Many-to-Many Setup Usually, you’d set up a many-to-many relationship like this: Django automatically creates an intermediate table behind the scenes to handle this relationship. Easy peasy! But here’s the thing – what if you want to store more information about the enrollment? Like when the student enrolled, what grade they got, or whether they’ve completed the course? Enter the ‘through’ Parameter This is where the magic happens. The through The parameter lets you create your own intermediate model with whatever extra fields you want. Here’s how it works: See what we did there? We told Django: “Hey, use this Enrollment model to manage the relationship between Student and Course.” Why Would You Want to Do This? Here are some real-world scenarios: 1. Social Media App: You have Users and Groups. The membership can have a role (admin, moderator, member) and a join date. 2. E-commerce Platform Products and Orders. The intermediate table stores quantity, price at time of purchase, and any discounts applied. 3. Project Management Employees and Projects. You want to track the role of each employee in each project and the hours they’ve worked. 4. Recipe App: Recipes and Ingredients. The intermediate table holds the quantity and measurement unit for each ingredient. How to Work with Through Models Creating Relationships You can’t use the simple add() method anymore. You need to create instances of your “through” model directly: Querying Relationships You can query in both directions: Filtering with Extra Fields Here’s where it gets really cool: Important Things to Remember 1. ForeignKey Fields are Required. Your through model MUST have foreign keys to both models in the relationship. 2. unique_together. Usually, you want to prevent duplicate relationships, so use unique_together in the Meta class. 3. No Direct add(), create(), or set(). When using a through model, you can’t use these shortcuts. You have to create instances of the through model directly. 4. Removal Still Works. You can still use remove() and clear(): Complex Example Let’s say you’re building a music streaming app: Now you can do cool stuff like: Common Problems to Avoid 1. Forgetting to Create the Through Instance. Don’t try to use add() – it won’t work! 2. Not Using unique_together. You might end up with duplicate relationships, which can cause weird bugs. 3. Making the Through Model Too Complex: Keep it focused on the relationship. If you’re adding tons of fields, maybe they belong in one of the main models instead. 4. Circular Import Issues. If you reference models as strings (like through=’Enrollment’), make sure the model is defined in the same file or properly imported. When NOT to Use Through You don’t always need a through model! Use the simple many-to-many if: Remember: premature optimization is the root of all evil. Don’t overcomplicate things if you don’t need to! Wrapping Up The through parameter in Django’s many-to-many relationships is super powerful. It gives you complete control over intermediate tables and lets you model complex real-world relationships accurately. Start simple, and add complexity only when you need it. Your future self (and your teammates) will thank you for keeping things as straightforward as possible while still meeting your requirements. Now go ahead and build something awesome! And remember, every complex relationship in your database is just a bunch of simple relationships working together.

Many-to-Many Relations with ‘through’ in Django Read More »

Real questions from my recent Python Developer interview

Interview Questions I Faced for a Python Developer

Hi guys, recently I gave an interview at a startup company. I can’t reveal their name, but I am posting the questions they asked me. It was a Python Developer interview, but they also asked questions from Django, MySQL, and JavaScript. 1. What is a Django Signal? A Django signal is a messaging system that allows certain parts of your application to send notifications (signals) when an action occurs, and other parts of the app can listen and react to those events automatically. In Other words:Signals let you run some code whenever something happens in Django (like after a user is saved, deleted, or logged in). 2. How does map() work in JavaScript? map() is an array method that loops through each element, applies a function, and returns a new array without modifying the original. Example: 3. What is Django ORM? Django ORM is Object Relational Mapper that lets you interact with the database using Python instead of SQL. Example: 4. What is a Trigger in SQL? A trigger is an automatic block of SQL code that runs when you insert, update, or delete data in a table. Used for logs, validation, and audits. 5. Example of One-to-Many relationship in Django ORM 6. Difference between REST API and SOAP API SOAP is a strict, XML-based protocol with built-in security REST is a lightweight, flexible API style using JSON. REST SOAP Flexible Strict JSON/XML XML Only Lightweight Heavy No WSDL Uses WSDL Quick Slower Keep it short in interviews. 7. How do you authenticate a REST API? You can authenticate REST APIs using: Mention JWT, it’s the most popular. 8. DDL – Data Definition Language DDL (Data Definition Language) is a type of SQL command used to define, create, modify, and delete database structures such as tables, indexes, schemas, and views. Commands: Deals with tables, columns, and schemas. 9. DML – Data Manipulation Language DML (Data Manipulation Language) is a set of SQL commands used to insert, update, delete, and retrieve data from a database. Commands:  Changes data, not structure. 10. How you write a custom SQL query in django Django provides a connection.cursor() functionality, and by using this cursor, we can write and execute custom SQL queries directly. For example:

Interview Questions I Faced for a Python Developer Read More »

Building Real-World APIs with FastAPI

Building Real-World APIs with FastAPI

When I first started working with FastAPI, I was blown away by how quickly I could get a simple API up and running. But as my projects grew from proof-of-concepts to production systems serving thousands of requests per second, I learned that writing scalable FastAPI applications requires more than just decorating functions with @app.get(). Today, I want to share the patterns and practices I’ve developed over the past few years building APIs that actually scale in the real world. Why FastAPI? Before diving deeper, let me quickly justify why FastAPI has become my go-to framework. It’s not just hype—FastAPI genuinely delivers on its promises: But speed and features mean nothing if your codebase becomes unmaintainable at scale. The Layered Architecture Pattern The first mistake I made was putting everything in a single main.py file. It worked great for tutorials, but became a nightmare in production. Here’s the architecture I now use for every project: This structure separates concerns clearly: API endpoints handle HTTP, services contain business logic, and models represent data. It’s not over-engineering—it’s sustainable engineering. Dependency Injection: Your Best Friend FastAPI’s dependency injection system is powerful, but it took me a while to appreciate it fully. Here’s how I use it for database sessions: But dependencies aren’t just for databases. I use them for: The beauty is that dependencies are testable and composable. You can mock them easily in tests without touching your endpoint code. Configuration Management Done Right Hard-coded configuration is a recipe for disaster. I use Pydantic’s BaseSettings for environment-based config: This pattern gives you: Async All the Way (But Wisely) FastAPI supports async endpoints, but mixing sync and async code incorrectly can kill performance. Here’s what I learned: Use async when: Stick with sync when: Don’t make everything async just because you can. Profile and measure. Error Handling and Custom Exceptions Early on, I let exceptions bubble up and relied on default error messages. Bad idea. Now I use custom exception handlers: This gives you consistent error responses across your API and makes debugging much easier. Request Validation with Pydantic Pydantic schemas are more than just data containers—they’re your first line of defense against bad data: The validation happens automatically before your endpoint code runs. Invalid requests never reach your business logic. Background Tasks for Better Response Times Don’t make users wait for tasks that don’t need to be completed before responding: For heavier workloads, integrate with Celery or RQ, but background tasks are perfect for lightweight async operations. Testing Strategies That Work I use TestClient for integration tests and dependency overrides for mocking: The ability to override dependencies makes testing incredibly clean—no monkey patching required. Database Session Management One of the trickiest aspects is managing database sessions correctly. Here’s my pattern: Never create global database sessions. Always use dependency injection and let FastAPI handle the lifecycle. Monitoring and Observability You can’t improve what you don’t measure. I add middleware for request logging and timing: For production, integrate with proper monitoring tools like Prometheus, DataDog, or New Relic. Rate Limiting for Protection Protect your API from abuse with rate limiting. I use slowapi: Caching for Performance For expensive operations or frequently accessed data, implement caching: For distributed caching, Redis is your friend. Use libraries like aioredis for async support. Final Thoughts Building production-grade APIs with FastAPI isn’t about following every pattern blindly—it’s about understanding which patterns solve real problems in your specific context. Start simple, profile your application, identify bottlenecks, and apply these patterns where they make sense. Over-engineering early is just as bad as under-engineering. The patterns I’ve shared here have saved me countless hours of debugging and refactoring. They’ve helped me build APIs that handle millions of requests per day with confidence. FastAPI gives you the tools, but it’s up to you to use them wisely. Happy coding!

Building Real-World APIs with FastAPI Read More »

python 3.14

Python 3.14 Is Here: The Most Exciting Update Yet!

Python 3.14 came out on October 7, 2025, and it has a lot of useful and powerful features that make coding easier, faster, and more fun.This version has something for everyone, whether you’re a beginner, a data scientist, or a backend developer. Let’s dive into what’s new and why it matters 1. Template Strings (t-Strings) You’ve seen f-strings (f”Hello {name}”) for formatting text, right?Now meet t-strings — written as t”…”. Instead of directly turning into a string, a t-string keeps the template information.This means you can safely inspect or reuse the placeholders before final formatting. Why it’s cool: Think of it like f-strings with superpowers. 2. Lazy Type Hints (No More Import Errors) If you’ve ever faced annoying “circular import” issues when using typing, rejoice!Python 3.14 now delays evaluation of type hints — they’re stored as expressions, not immediately executed. That means: Why it’s great:Cleaner code, fewer import headaches, and faster app startup. 3. Free-Threaded Python (No More GIL) This is huge. The Global Interpreter Lock (GIL) — Python’s long-time concurrency bottleneck — is now optional.Python 3.14 introduces an official free-threaded build, allowing true multi-threading. That means your threads can finally run in parallel on multiple CPU cores. Why it matters: Tip: If you use C extensions or NumPy, test compatibility before switching builds. 4. A Smarter, Colorful REPL Say hello to a more modern interactive shell! Python 3.14’s built-in REPL (the prompt you get by typing python in your terminal) now has: Example: Why you’ll love it:No need for extra tools like IPython to enjoy a colorful, beginner-friendly shell. 5. Cleaner Error Messages Errors in Python keep getting more human-friendly. Now, Python can suggest corrections when you mistype keywords or module names.It also shows clearer hints when exceptions happen in tricky spots. Example: No more head-scratching moments over simple typos. 6. New Syntax Options Python gets some subtle syntax polish this time: Shorter exception handling You can now write multiple exceptions without parentheses: Warnings for risky finally: blocks If you use return, break, or continue inside a finally: clause, Python 3.14 warns you — since it can silently skip cleanup code. 7. Standard Library Upgrades Lots of small but awesome library updates: Example: Why it’s useful:You get smarter CLI tools, better file management, and more modern compression built right in. 8. Performance Boosts Under the Hood You may not notice dramatic speed jumps, but overall Python feels snappier — especially for import-heavy apps. 9. Developer Quality-of-Life Tweaks Final Thoughts Python 3.14 feels like a developer-focused release — combining practical improvements with exciting groundwork for the future. Top highlights: If you haven’t upgraded yet, now’s the time.Run: Comment below if you like this post

Python 3.14 Is Here: The Most Exciting Update Yet! Read More »

python os module

Master Python OS Module: Simple Guide to Powerful System Control

Hey there! So you want to work with files and folders in Python? Maybe automate some boring stuff? Well, the OS module is going to be your new best friend. Trust me, once you get the hang of it, you’ll wonder how you ever lived without it. What’s This OS Module Anyway? Think of the OS module as Python’s way of talking to your computer. Want to create a folder? Move files around? Check if something exists? The OS module has got your back. And the best part? It works the same whether you’re on Windows, Mac, or Linux. Write once, run anywhere! That’s it. One line and you’re ready to go. Let’s Start Simple – Working with Folders Where am I right now? Ever get lost in your terminal? Yeah, me too. Here’s how to check where you are: Moving around Making new folders That second one is super handy. It creates all the folders in the path if they don’t exist yet. What’s in this folder? Simple, right? This shows everything in your current directory. Dealing with Files and Paths Does this thing even exist? Before you try to open or delete something, you probably want to make sure it’s actually there: Is it a file or a folder? Joining paths the smart way Here’s a rookie mistake I used to make – hardcoding paths with slashes: Breaking paths apart Moving and Deleting Stuff Renaming files Getting rid of things Environment Variables – Super Useful! Your computer has these things called environment variables. They’re like settings that programs can read: Some Real-World Examples Example 1: Walking through all your files This is one of my favorites. It lets you go through every file in a directory and all its subdirectories: Example 2: Organizing a messy downloads folder We’ve all been there – a downloads folder full of random files. Let’s organize them by file type: Example 3: Getting file info Quick Tips I Wish Someone Told Me Earlier 1. Always use os.path.join() Seriously. Even if you’re only working on one operating system right now, your future self (or your teammates) will thank you. 2. Check before you wreck Always verify a file or folder exists before trying to do something with it. Trust me, you’ll save yourself a lot of headaches: 3. Use try-except blocks Things can go wrong. Permissions issues, files in use, you name it: 4. Consider pathlib for newer projects If you’re using Python 3.4 or newer, check out the pathlib module. It’s more modern and object-oriented. But the OS module is still super useful, and you’ll see it everywhere in older code. Wrapping Up Look, the OS module might seem a bit overwhelming at first, but once you start using it, you’ll realize how powerful it really is. Start small maybe just list some files or check if something exists. Then gradually build up to more complex tasks. I’ve included some of the basic features of the OS module here. It has many extensive capabilities that I can’t cover in a single post, but in general, you can use it to interact deeply with your system. If you guys explore more, please share it with me. You can even create an OS controller using Python modules.

Master Python OS Module: Simple Guide to Powerful System Control Read More »

python dictionaries

Unlocking Python Dictionaries: A Beginner’s Guide to Adding New Keys

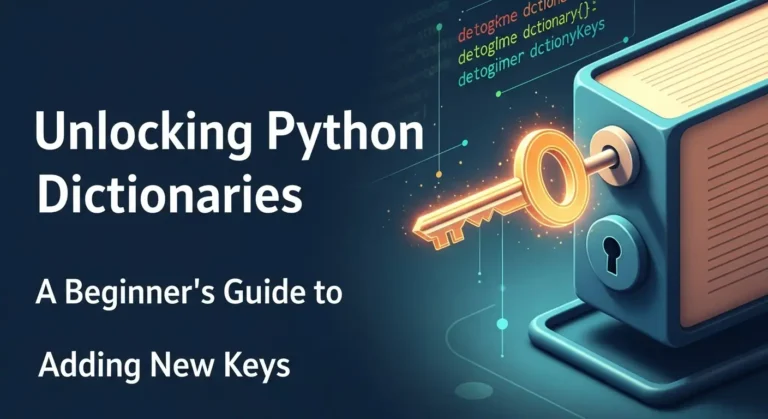
Think of a dictionary as a real-life address book. You don’t flip through every page to find someone; you look up their name (key) to instantly get their address (value). Dictionaries work the same way, storing data in key: value pairs for lightning-fast retrieval. But what happens when you get a new friend and need to add them to your address book? You just added a new entry! Similarly, in Python, you often need to add new keys to a dictionary. This blog post will guide you through the different ways to do just that, making you a dictionary master in no time. Method 1: The Straightforward Way – Using Square Brackets [] This is the most common and intuitive method. The syntax is simple: my_dictionary[new_key] = new_value If the new_key doesn’t exist, Python happily adds it to the dictionary. If it does exist, Python updates its value. It’s a two-in-one operation! Example: See? It’s as easy as assigning a value to a variable. Method 2: The Safe Bet – Using the .get() Method Sometimes, you’re not sure if a key exists. You might want to add a key only if it’s not already present. Using [] directly would overwrite the existing value, which might not be what you want. This is where the .get() method shines. While .get() it is primarily used for safe retrieval, we can use the logic it provides to conditionally add a key. Example: This method prevents accidental data loss. Method 3: The Powerful Update – Using the .update() Method What if you need to add multiple keys at once? The .update() method is your best friend. It can merge another dictionary or an iterable of key-value pairs into your original dictionary. Example 1: Merging Two Dictionaries Example 2: Using an Iterable Just like the [] method, if any of the new keys already exist, .update() will overwrite their values. Method 4: The Modern Approach – Using the “Walrus Operator” := (Python 3.8+) This is a more advanced technique, but it’s elegant for specific scenarios. The Walrus Operator := allows you to assign a value to a variable as part of an expression. It’s useful when you want to check a condition based on the new value you’re about to add. Example: Note: This is a more niche use case, but it’s good to know it exists! A Real-World Example: Building a Shopping Cart Let’s tie it all together with a practical example. Imagine you’re building a simple shopping cart for an e-commerce site. Output: This example shows how you can use all three primary methods in a cohesive, real-world scenario. Summary: Which Method Should You Use? Now you’re equipped to dynamically build and modify dictionaries in your Python projects. Go forth and code! Remember, the key to mastering dictionaries is practice.

Unlocking Python Dictionaries: A Beginner’s Guide to Adding New Keys Read More »

django sped up image

How I made my Django project almost as fast as FastAPI

FastAPI runs on Uvicorn, an ASGI server made for Python code that runs at the same time. Django is older and has more features, but from version 3.0, it can also operate on ASGI with Uvicorn. Once you set up Django on Uvicorn and make queries and caching work better, you can get the same speed for most things. 1. Start Django with Uvicorn The best way to improve performance is to switch to an ASGI server. Install Uvicorn Make sure your project has a asgi.py file, which is made automatically in Django 3+. Then turn on the server: uvicorn myproject.asgi:application –host 0.0.0.0 –port 8000 –workers 4 Why Uvicorn If you use a process manager like Supervisor or systemd, you can add: 2. Use async views where possible Why use httpx instead of requests: It lets you send HTTP requests (GET, POST, etc.) and handle responses, similar to requests, but it also supports asynchronous programming (async/await). That means you can make many API calls at once without blocking your Django or FastAPI app, ideal for performance and concurrency. import httpx from django.http import JsonResponse async def price_view(request): async with httpx.AsyncClient() as client: r = await client.get(‘https://api.example.com/price’) return JsonResponse(r.json()) For ORM queries, still use sync code or wrap it with sync_to_async: from asgiref.sync import sync_to_async from django.contrib.auth.models import User @sync_to_async def get_user(pk): return User.objects.get(pk=pk) async def user_view(request): user = await get_user(1) return JsonResponse({‘username’: user.username}) 3. Optimize your database Example: posts = Post.objects.select_related(‘author’).all() 4. Enable caching with Redis Install Redis and configure Django: pip install django-redis Add this to settings.py: CACHES = { ‘default’: { ‘BACKEND’: ‘django_redis.cache.RedisCache’, ‘LOCATION’: ‘redis://127.0.0.1:6379/1’, ‘OPTIONS’: { ‘CLIENT_CLASS’: ‘django_redis.client.DefaultClient’, } } } Cache heavy views: from django.views.decorators.cache import cache_page @cache_page(60) def home(request): return render(request, ‘home.html’) 5. Offload background work Use Celery or Dramatiq to handle slow tasks like emails or large file uploads asynchronously. 6. Serve static files efficiently Use WhiteNoise for small deployments or a CDN (Cloudflare, S3 + CloudFront) for large ones. MIDDLEWARE = [ ‘django.middleware.security.SecurityMiddleware’, ‘whitenoise.middleware.WhiteNoiseMiddleware’, # … ] 7. Monitor performance Example Benchmark Running the same Django app under Uvicorn vs Gunicorn (WSGI): Server Avg Latency Req/s Gunicorn (WSGI) 90 ms 700 Uvicorn (ASGI) 40 ms 1400 Final Thoughts FastAPI may always win in pure async benchmarks, but Django + Uvicorn can be nearly as fast for most production workloads — and you keep Django’s ORM, admin, and ecosystem. Checklist:

How I made my Django project almost as fast as FastAPI Read More »

FastAPI Python web framework for high-performance API development

Exploring FastAPI: The Future of Python Web Frameworks

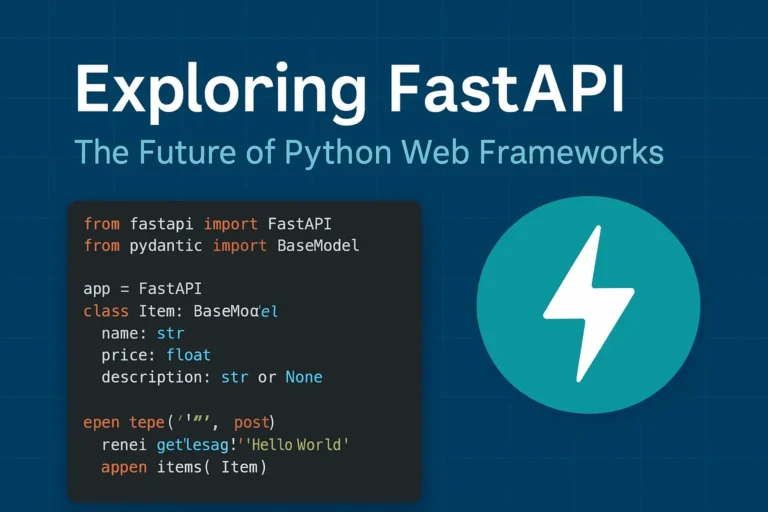
Why FastAPI is Taking the Python World by Storm In the rapidly evolving of Python web development, FastAPI has emerged as a game changing framework that’s reshaping how developers build modern APIs. Since its release in 2018, this innovative framework has gained massive adoption among developers worldwide, and for good reason. FastAPI combines the best of modern Python features with exceptional performance, making it an ideal choice for building production-ready APIs. Whether you’re a seasoned Python developer or just starting your web development journey, understanding FastAPI’s capabilities is crucial for staying ahead in today’s competitive development environment. What Makes FastAPI Special? Lightning-Fast Performance FastAPI lives up to its name by delivering exceptional speed that rivals frameworks written in Go and Node.js. Built on top of Starlette and Pydantic, FastAPI leverages Python’s async capabilities to handle thousands of concurrent requests efficiently. Performance benchmarks consistently show FastAPI outperforming traditional Python frameworks like Django and Flask by significant margins, making it perfect for high-traffic applications and microservices architectures. Automatic API Documentation One of FastAPI’s most beloved features is its automatic generation of interactive API documentation. Using the OpenAPI standard, FastAPI creates beautiful, interactive documentation that developers can use to test endpoints directly in the browser. This feature eliminates the tedious task of manually maintaining API documentation and ensures your documentation is always up-to-date with your code. Type Hints and Validation FastAPI leverages Python’s type hints to provide automatic request and response validation. This means fewer bugs, better IDE support, and more maintainable code. The framework uses Pydantic models to ensure data integrity and provide clear error messages when validation fails. Key Features That Set FastAPI Apart Modern Python Standards FastAPI is built with modern Python in mind, fully supporting: Built-in Security Features Security is paramount in modern web applications, and FastAPI provides robust built-in security features including: Developer Experience FastAPI prioritizes developer productivity with features like: Real-World Use Cases Microservices Architecture FastAPI excels in microservices environments due to its lightweight nature and fast startup times. Companies like Uber, Netflix, and Microsoft have adopted FastAPI for various microservices in their architecture. Machine Learning APIs The data science community has embraced FastAPI for deploying machine learning models as APIs. Its async capabilities and performance make it ideal for handling ML inference requests at scale. Traditional Web APIs From simple CRUD operations to complex business logic, FastAPI handles traditional web API development with elegance and efficiency. Getting Started with FastAPI Here’s a simple example of a FastAPI application: from fastapi import FastAPI from pydantic import BaseModel app = FastAPI() class Item(BaseModel): name: str price: float description: str = None @app.get(“/”) async def root(): return {“message”: “Hello World”} @app.post(“/items/”) async def create_item(item: Item): return {“item”: item} This simple example demonstrates FastAPI’s clean syntax and automatic validation through Pydantic models. FastAPI vs. Other Python Frameworks FastAPI vs. Django While Django remains excellent for full-stack web applications, FastAPI shines in API-first development with superior performance and modern async support. FastAPI vs. Flask Flask’s simplicity is appealing, but FastAPI offers better performance, automatic documentation, and built-in validation without sacrificing ease of use. FastAPI vs. Django REST Framework For pure API development, FastAPI provides better performance and developer experience compared to Django REST Framework, though DRF remains strong for Django-integrated projects. Best Practices for FastAPI Development Structure Your Project Organize your FastAPI project with clear separation of concerns: Performance Optimization Maximize your FastAPI application’s performance by: Testing and Documentation Ensure robust applications by: The Future of FastAPI FastAPI continues to evolve with regular updates and new features. The framework’s roadmap includes enhanced WebSocket support, improved performance optimizations, and better integration with modern deployment platforms. The growing ecosystem around FastAPI, including tools like FastAPI Users for authentication and FastAPI Cache for caching, demonstrates the framework’s bright future in Python web development. Conclusion: Is FastAPI Right for Your Next Project? FastAPI represents a significant leap forward in Python web development, combining high performance with developer-friendly features. If you’re building APIs that require speed, scalability, and maintainability, FastAPI should be at the top of your consideration list. The framework’s modern approach to Python development, combined with its excellent documentation and growing community support, makes it an excellent choice for both new projects and migrating existing applications. Whether you’re building microservices, machine learning APIs, or traditional web services, FastAPI provides the tools and performance needed to succeed in today’s competitive development landscape. If you like, please comment below for FastAPI’s more blogs:

Exploring FastAPI: The Future of Python Web Frameworks Read More »

WebSocket WebSocket WebSocket real-time real-time

WebSockets Guide: Real-Time Web Communication Explained

Introduction WebSocket is a game-changing technology that enables persistent, bidirectional communication between clients and servers. In today’s web development landscape, real-time communication is essential for building interactive and engaging user experiences. Whether it’s live chat, online gaming, collaborative tools, or live data feeds, traditional HTTP patterns often fall short—this is where WebSocket truly shines. What Are WebSockets? WebSocket is a communication protocol that provides full-duplex communication channels over a single TCP connection. Unlike traditional HTTP requests that follow a request-response pattern, WebSockets establish a persistent connection that allows both the client and server to send data at any time. The WebSocket protocol was standardized as RFC 6455 in 2011 and has since become a cornerstone technology for real-time web applications. It operates over TCP and uses the same ports as HTTP (80) and HTTPS (443), making it firewall-friendly and easy to deploy. How WebSockets Work The Handshake Process WebSockets begin with an HTTP handshake that upgrades the connection to the WebSocket protocol: Example Handshake Headers Client Request: GET /chat HTTP/1.1 Host: example.com Upgrade: websocket Connection: Upgrade Sec-WebSocket-Key: dGhlIHNhbXBsZSBub25jZZ== Sec-WebSocket-Version: 13 Server Response: HTTP/1.1 101 Switching Protocols Upgrade: websocket Connection: Upgrade Sec-WebSocket-Accept: s3pPLMBiTxaQ9kYGzzhZRbK+xOo= WebSockets vs. Traditional HTTP Aspect HTTP WebSockets Communication Request-Response Full-duplex Connection Stateless Persistent Overhead High (headers with each request) Low (after handshake) Real-time Requires polling Native support Server Push Complex (SSE, long polling) Simple Key Features and Benefits 1. Real-Time Communication WebSockets enable instant data exchange without the latency associated with HTTP polling or long-polling techniques. 2. Low Latency Once established, WebSocket connections have minimal overhead, resulting in faster data transmission compared to HTTP requests. 3. Bidirectional Communication Both client and server can initiate data transmission, enabling truly interactive applications. 4. Efficient Resource Usage Eliminates the need for constant HTTP polling, reducing server load and bandwidth consumption. 5. Cross-Origin Support WebSockets support Cross-Origin Resource Sharing (CORS), allowing connections from different domains when properly configured. Common Use Cases 1. Real-Time Chat Applications WebSockets are perfect for instant messaging systems where messages need to be delivered immediately to all participants. 2. Live Gaming Multiplayer games require low-latency communication for smooth gameplay and real-time state synchronization. 3. Financial Trading Platforms Stock prices, cryptocurrency values, and trading data need to be updated in real-time for accurate decision-making. 4. Collaborative Editing Tools Applications like Google Docs use WebSockets to sync changes across multiple users in real-time. 5. Live Sports Scores and News Sports applications deliver live scores, commentary, and updates as events happen. 6. IoT Device Monitoring Internet of Things devices can stream sensor data continuously for real-time monitoring and analysis. Implementation Examples Client-Side JavaScript // Establishing a WebSocket connection const socket = new WebSocket(‘ws://localhost:8080’); // Connection opened socket.addEventListener(‘open’, function (event) { console.log(‘Connected to WebSocket server’); socket.send(‘Hello Server!’); }); // Listen for messages socket.addEventListener(‘message’, function (event) { console.log(‘Message from server: ‘, event.data); }); // Handle errors socket.addEventListener(‘error’, function (event) { console.error(‘WebSocket error: ‘, event); }); // Connection closed socket.addEventListener(‘close’, function (event) { console.log(‘WebSocket connection closed’); }); // Sending data function sendMessage(message) { if (socket.readyState === WebSocket.OPEN) { socket.send(JSON.stringify({ type: ‘message’, data: message, timestamp: new Date().toISOString() })); } } Server-Side Implementation (Node.js with ws library) const WebSocket = require(‘ws’); const server = new WebSocket.Server({ port: 8080 }); server.on(‘connection’, function connection(ws) { console.log(‘New client connected’); // Send welcome message ws.send(JSON.stringify({ type: ‘welcome’, message: ‘Connected to WebSocket server’ })); // Handle incoming messages ws.on(‘message’, function incoming(data) { try { const message = JSON.parse(data); console.log(‘Received:’, message); // Broadcast to all clients server.clients.forEach(function each(client) { if (client !== ws && client.readyState === WebSocket.OPEN) { client.send(JSON.stringify(message)); } }); } catch (error) { console.error(‘Error parsing message:’, error); } }); // Handle connection close ws.on(‘close’, function close() { console.log(‘Client disconnected’); }); // Handle errors ws.on(‘error’, function error(err) { console.error(‘WebSocket error:’, err); }); }); WebSocket Security Considerations 1. Authentication and Authorization Implement proper authentication mechanisms before establishing WebSocket connections: // Client-side token-based authentication const token = localStorage.getItem(‘authToken’); const socket = new WebSocket(`ws://localhost:8080?token=${token}`); 2. Input Validation Always validate and sanitize incoming data to prevent injection attacks: ws.on(‘message’, function incoming(data) { try { const message = JSON.parse(data); // Validate message structure if (!message.type || !message.data) { throw new Error(‘Invalid message format’); } // Sanitize data const sanitizedData = sanitizeInput(message.data); // Process message processMessage(message.type, sanitizedData); } catch (error) { console.error(‘Invalid message:’, error); ws.close(1003, ‘Invalid message format’); } }); 3. Rate Limiting Implement rate limiting to prevent abuse: const rateLimiter = new Map(); ws.on(‘message’, function incoming(data) { const clientId = getClientId(ws); const now = Date.now(); const windowMs = 60000; // 1 minute const maxRequests = 100; if (!rateLimiter.has(clientId)) { rateLimiter.set(clientId, { count: 1, resetTime: now + windowMs }); } else { const clientData = rateLimiter.get(clientId); if (now > clientData.resetTime) { clientData.count = 1; clientData.resetTime = now + windowMs; } else { clientData.count++; if (clientData.count > maxRequests) { ws.close(1008, ‘Rate limit exceeded’); return; } } } // Process message processMessage(data); }); 4. CORS Configuration Configure Cross-Origin Resource Sharing properly: const server = new WebSocket.Server({ port: 8080, verifyClient: (info) => { const origin = info.origin; const allowedOrigins = [‘https://yourdomain.com’, ‘https://app.yourdomain.com’]; return allowedOrigins.includes(origin); } }); Advanced Features 1. Subprotocols WebSockets support subprotocols for specialized communication: // Client requesting specific subprotocol const socket = new WebSocket(‘ws://localhost:8080’, [‘chat’, ‘superchat’]); // Server handling subprotocols server.on(‘connection’, function connection(ws, request) { const protocol = ws.protocol; console.log(‘Client connected with protocol:’, protocol); if (protocol === ‘chat’) { handleChatProtocol(ws); } else if (protocol === ‘superchat’) { handleSuperChatProtocol(ws); } }); 2. Extensions WebSockets support extensions for compression and other features: // Per-message deflate compression const server = new WebSocket.Server({ port: 8080, perMessageDeflate: { zlibDeflateOptions: { level: 3 } } }); 3. Connection Management Implement heartbeat/ping-pong to detect broken connections: function heartbeat() { this.isAlive = true; } server.on(‘connection’, function connection(ws) { ws.isAlive = true; ws.on(‘pong’, heartbeat); }); // Ping all clients every 30 seconds setInterval(function ping() { server.clients.forEach(function each(ws) { if (ws.isAlive === false) { return ws.terminate(); } ws.isAlive = false; ws.ping(); }); }, 30000); Performance Optimization 1. Connection Pooling Manage connections efficiently to handle high loads: class WebSocketManager { constructor() { this.connections = new Map(); this.rooms =

WebSockets Guide: Real-Time Web Communication Explained Read More »

Scroll to Top