Building Real-World APIs with FastAPI

Building Real-World APIs with FastAPI

When I first started working with FastAPI, I was blown away by how quickly I could get a simple API up and running. But as my projects grew from proof-of-concepts to production systems serving thousands of requests per second, I learned that writing scalable FastAPI applications requires more than just decorating functions with @app.get(). Today, I want to share the patterns and practices I’ve developed over the past few years building APIs that actually scale in the real world. Why FastAPI? Before diving deeper, let me quickly justify why FastAPI has become my go-to framework. It’s not just hype—FastAPI genuinely delivers on its promises: But speed and features mean nothing if your codebase becomes unmaintainable at scale. The Layered Architecture Pattern The first mistake I made was putting everything in a single main.py file. It worked great for tutorials, but became a nightmare in production. Here’s the architecture I now use for every project: This structure separates concerns clearly: API endpoints handle HTTP, services contain business logic, and models represent data. It’s not over-engineering—it’s sustainable engineering. Dependency Injection: Your Best Friend FastAPI’s dependency injection system is powerful, but it took me a while to appreciate it fully. Here’s how I use it for database sessions: But dependencies aren’t just for databases. I use them for: The beauty is that dependencies are testable and composable. You can mock them easily in tests without touching your endpoint code. Configuration Management Done Right Hard-coded configuration is a recipe for disaster. I use Pydantic’s BaseSettings for environment-based config: This pattern gives you: Async All the Way (But Wisely) FastAPI supports async endpoints, but mixing sync and async code incorrectly can kill performance. Here’s what I learned: Use async when: Stick with sync when: Don’t make everything async just because you can. Profile and measure. Error Handling and Custom Exceptions Early on, I let exceptions bubble up and relied on default error messages. Bad idea. Now I use custom exception handlers: This gives you consistent error responses across your API and makes debugging much easier. Request Validation with Pydantic Pydantic schemas are more than just data containers—they’re your first line of defense against bad data: The validation happens automatically before your endpoint code runs. Invalid requests never reach your business logic. Background Tasks for Better Response Times Don’t make users wait for tasks that don’t need to be completed before responding: For heavier workloads, integrate with Celery or RQ, but background tasks are perfect for lightweight async operations. Testing Strategies That Work I use TestClient for integration tests and dependency overrides for mocking: The ability to override dependencies makes testing incredibly clean—no monkey patching required. Database Session Management One of the trickiest aspects is managing database sessions correctly. Here’s my pattern: Never create global database sessions. Always use dependency injection and let FastAPI handle the lifecycle. Monitoring and Observability You can’t improve what you don’t measure. I add middleware for request logging and timing: For production, integrate with proper monitoring tools like Prometheus, DataDog, or New Relic. Rate Limiting for Protection Protect your API from abuse with rate limiting. I use slowapi: Caching for Performance For expensive operations or frequently accessed data, implement caching: For distributed caching, Redis is your friend. Use libraries like aioredis for async support. Final Thoughts Building production-grade APIs with FastAPI isn’t about following every pattern blindly—it’s about understanding which patterns solve real problems in your specific context. Start simple, profile your application, identify bottlenecks, and apply these patterns where they make sense. Over-engineering early is just as bad as under-engineering. The patterns I’ve shared here have saved me countless hours of debugging and refactoring. They’ve helped me build APIs that handle millions of requests per day with confidence. FastAPI gives you the tools, but it’s up to you to use them wisely. Happy coding!

Building Real-World APIs with FastAPI Read More »

chatgpt web browser

ChatGPT Atlas: The Browser That Actually Talks Back

So OpenAI just luanch a browser. Not a Chrome extension, not a chatbot widget an actual, full-fledged web browser called ChatGPT Atlas. And honestly? It’s kind of wild. But its only available for Mac os only. Let me walk you through what this thing is, why it matters, and whether you should care. What Even Is This? Imagine you’re browsing the web, right? You’re reading some dense article about quantum computing or whatever, and instead of copy-pasting chunks into ChatGPT in another tab, you just… ask. Right there. A sidebar pops up, you type “explain this like I’m five,” and boom — instant clarity. That’s Atlas. It’s not just a browser with ChatGPT bolted on. The AI is woven into the fabric of the browsing experience itself. When you’re on any webpage, you can summon ChatGPT to summarize, analyze, rewrite, or question whatever you’re looking at. No context switching. No tab juggling. Just you, the page, and an AI assistant that actually knows what you’re looking at. The Memory Thing (This Is Where It Gets Interesting) Here’s where Atlas gets a bit sci-fi: Browser Memories. If you opt in, Atlas remembers where you’ve been and what you’ve done. Not in a creepy Big Brother way (we’ll get to privacy in a sec), but in a “personal assistant who actually pays attention” way. Picture this: It’s Friday afternoon. You’ve spent the week job hunting, opened like 47 tabs of different postings, and now you can’t remember which companies actually excited you. With Atlas, you just ask: “Show me all the job postings I looked at this week and tell me which ones matched my salary requirements.” And it does. No more “where was that one site with the thing?” moments. The browser actually remembers for you. Agent Mode: When Your Browser Does Stuff For You This feature is currently only for paying users (Plus, Pro, Business tiers), but it’s probably the most futuristic part of Atlas. Agent Mode lets ChatGPT actually do things on websites for you. With your permission, obviously. Want to book a flight? Atlas can navigate the airline sites, compare prices, and fill in your details. Shopping for a gift? It can add items to carts, compare specs across different stores, and even help you draft that “hey, would you like this?” text to your friend. It’s like having an intern who lives in your browser and never sleeps. The Catch: It’s Only on Mac Right Now Yeah, about that. Atlas launched on October 21, 2025, but only for macOS. Specifically, you need a Mac with Apple Silicon (those M1, M2, M3 chips) running macOS 12 Monterey or later. Windows users? iPhone folks? Android people? You’re in the “coming soon” category. OpenAI says versions for those platforms are on the way, but no firm dates yet. If you’re not on a recent Mac, you’re basically reading about a cool party you can’t attend yet. How You’d Actually Use This Thing Let me give you some real scenarios: The Research Deep Dive: You’re writing a paper or report. Instead of drowning in open tabs, you browse naturally and ask Atlas things like “What are the main arguments across these five articles I just read?” It actually knows because it was there with you. Shopping Without the Headache: You’re comparing laptops. Atlas remembers the specs from the one you looked at yesterday, the one you’re looking at now, and the one you bookmarked last week. Ask it to make a comparison table. Done. Learning Mode: Taking an online course? Watching lecture videos? Ask Atlas to explain concepts as you encounter them. It’s like having a tutor who sees your screen. Life Admin: “Find me a dinner reservation for Saturday, email the options to Sarah, and add the best one to my calendar.” With Agent Mode, this becomes less fantasy and more… potentially real? Okay, But What About Privacy? Valid question. This is where things get real. OpenAI says your browsing data in Atlas isn’t used to train their models unless you explicitly opt in. You can turn memories off entirely, delete what’s been stored, or disable ChatGPT’s access on specific sites. There’s also private browsing mode for when you want zero tracking. But here’s the thing: to get the cool features — the memory, the context awareness, the personal assistant vibes — you’re giving the browser a lot more access to what you do online than Chrome or Safari typically get. Some people are understandably nervous about this. One analyst described Atlas as less of a traditional web browser and more of an AI overlay that interprets the web for you. That’s powerful, but it also means you need to trust OpenAI with your digital footprint. My take? If you use it, actually read the settings. Turn off memory for banking sites. Be intentional about what you let it see. This isn’t paranoia — it’s just smart browsing in 2025. The Good Stuff What Atlas does well: The “Meh” Parts What’s less impressive: What Does This Actually Cost? Good news: Atlas itself is free for anyone with a ChatGPT account. Download it, use the basic features, no charge. But the advanced stuff — Agent Mode, priority access, the really powerful features — those are locked behind ChatGPT’s paid tiers. Plus is $20/month, Pro is more, and there are business plans too. So you can try it for free, but the full experience costs money. Why This Actually Matters Look, OpenAI isn’t just releasing another product here. They’re making a statement: they’re not just a chatbot company anymore. They’re coming for the browser market. That means competing with Google Chrome (which has like 65% market share) and Safari and Edge. That’s… ambitious. But it also suggests something bigger: maybe the future of browsing isn’t about search engines and URLs. Maybe it’s about conversations. About asking instead of clicking. About having a browser that understands what you’re trying to do, not just where you’re trying to go. Whether that future is

ChatGPT Atlas: The Browser That Actually Talks Back Read More »

python 3.14

Python 3.14 Is Here: The Most Exciting Update Yet!

Python 3.14 came out on October 7, 2025, and it has a lot of useful and powerful features that make coding easier, faster, and more fun.This version has something for everyone, whether you’re a beginner, a data scientist, or a backend developer. Let’s dive into what’s new and why it matters 1. Template Strings (t-Strings) You’ve seen f-strings (f”Hello {name}”) for formatting text, right?Now meet t-strings — written as t”…”. Instead of directly turning into a string, a t-string keeps the template information.This means you can safely inspect or reuse the placeholders before final formatting. Why it’s cool: Think of it like f-strings with superpowers. 2. Lazy Type Hints (No More Import Errors) If you’ve ever faced annoying “circular import” issues when using typing, rejoice!Python 3.14 now delays evaluation of type hints — they’re stored as expressions, not immediately executed. That means: Why it’s great:Cleaner code, fewer import headaches, and faster app startup. 3. Free-Threaded Python (No More GIL) This is huge. The Global Interpreter Lock (GIL) — Python’s long-time concurrency bottleneck — is now optional.Python 3.14 introduces an official free-threaded build, allowing true multi-threading. That means your threads can finally run in parallel on multiple CPU cores. Why it matters: Tip: If you use C extensions or NumPy, test compatibility before switching builds. 4. A Smarter, Colorful REPL Say hello to a more modern interactive shell! Python 3.14’s built-in REPL (the prompt you get by typing python in your terminal) now has: Example: Why you’ll love it:No need for extra tools like IPython to enjoy a colorful, beginner-friendly shell. 5. Cleaner Error Messages Errors in Python keep getting more human-friendly. Now, Python can suggest corrections when you mistype keywords or module names.It also shows clearer hints when exceptions happen in tricky spots. Example: No more head-scratching moments over simple typos. 6. New Syntax Options Python gets some subtle syntax polish this time: Shorter exception handling You can now write multiple exceptions without parentheses: Warnings for risky finally: blocks If you use return, break, or continue inside a finally: clause, Python 3.14 warns you — since it can silently skip cleanup code. 7. Standard Library Upgrades Lots of small but awesome library updates: Example: Why it’s useful:You get smarter CLI tools, better file management, and more modern compression built right in. 8. Performance Boosts Under the Hood You may not notice dramatic speed jumps, but overall Python feels snappier — especially for import-heavy apps. 9. Developer Quality-of-Life Tweaks Final Thoughts Python 3.14 feels like a developer-focused release — combining practical improvements with exciting groundwork for the future. Top highlights: If you haven’t upgraded yet, now’s the time.Run: Comment below if you like this post

Python 3.14 Is Here: The Most Exciting Update Yet! Read More »

python os module

Master Python OS Module: Simple Guide to Powerful System Control

Hey there! So you want to work with files and folders in Python? Maybe automate some boring stuff? Well, the OS module is going to be your new best friend. Trust me, once you get the hang of it, you’ll wonder how you ever lived without it. What’s This OS Module Anyway? Think of the OS module as Python’s way of talking to your computer. Want to create a folder? Move files around? Check if something exists? The OS module has got your back. And the best part? It works the same whether you’re on Windows, Mac, or Linux. Write once, run anywhere! That’s it. One line and you’re ready to go. Let’s Start Simple – Working with Folders Where am I right now? Ever get lost in your terminal? Yeah, me too. Here’s how to check where you are: Moving around Making new folders That second one is super handy. It creates all the folders in the path if they don’t exist yet. What’s in this folder? Simple, right? This shows everything in your current directory. Dealing with Files and Paths Does this thing even exist? Before you try to open or delete something, you probably want to make sure it’s actually there: Is it a file or a folder? Joining paths the smart way Here’s a rookie mistake I used to make – hardcoding paths with slashes: Breaking paths apart Moving and Deleting Stuff Renaming files Getting rid of things Environment Variables – Super Useful! Your computer has these things called environment variables. They’re like settings that programs can read: Some Real-World Examples Example 1: Walking through all your files This is one of my favorites. It lets you go through every file in a directory and all its subdirectories: Example 2: Organizing a messy downloads folder We’ve all been there – a downloads folder full of random files. Let’s organize them by file type: Example 3: Getting file info Quick Tips I Wish Someone Told Me Earlier 1. Always use os.path.join() Seriously. Even if you’re only working on one operating system right now, your future self (or your teammates) will thank you. 2. Check before you wreck Always verify a file or folder exists before trying to do something with it. Trust me, you’ll save yourself a lot of headaches: 3. Use try-except blocks Things can go wrong. Permissions issues, files in use, you name it: 4. Consider pathlib for newer projects If you’re using Python 3.4 or newer, check out the pathlib module. It’s more modern and object-oriented. But the OS module is still super useful, and you’ll see it everywhere in older code. Wrapping Up Look, the OS module might seem a bit overwhelming at first, but once you start using it, you’ll realize how powerful it really is. Start small maybe just list some files or check if something exists. Then gradually build up to more complex tasks. I’ve included some of the basic features of the OS module here. It has many extensive capabilities that I can’t cover in a single post, but in general, you can use it to interact deeply with your system. If you guys explore more, please share it with me. You can even create an OS controller using Python modules.

Master Python OS Module: Simple Guide to Powerful System Control Read More »

python dictionaries

Unlocking Python Dictionaries: A Beginner’s Guide to Adding New Keys

Think of a dictionary as a real-life address book. You don’t flip through every page to find someone; you look up their name (key) to instantly get their address (value). Dictionaries work the same way, storing data in key: value pairs for lightning-fast retrieval. But what happens when you get a new friend and need to add them to your address book? You just added a new entry! Similarly, in Python, you often need to add new keys to a dictionary. This blog post will guide you through the different ways to do just that, making you a dictionary master in no time. Method 1: The Straightforward Way – Using Square Brackets [] This is the most common and intuitive method. The syntax is simple: my_dictionary[new_key] = new_value If the new_key doesn’t exist, Python happily adds it to the dictionary. If it does exist, Python updates its value. It’s a two-in-one operation! Example: See? It’s as easy as assigning a value to a variable. Method 2: The Safe Bet – Using the .get() Method Sometimes, you’re not sure if a key exists. You might want to add a key only if it’s not already present. Using [] directly would overwrite the existing value, which might not be what you want. This is where the .get() method shines. While .get() it is primarily used for safe retrieval, we can use the logic it provides to conditionally add a key. Example: This method prevents accidental data loss. Method 3: The Powerful Update – Using the .update() Method What if you need to add multiple keys at once? The .update() method is your best friend. It can merge another dictionary or an iterable of key-value pairs into your original dictionary. Example 1: Merging Two Dictionaries Example 2: Using an Iterable Just like the [] method, if any of the new keys already exist, .update() will overwrite their values. Method 4: The Modern Approach – Using the “Walrus Operator” := (Python 3.8+) This is a more advanced technique, but it’s elegant for specific scenarios. The Walrus Operator := allows you to assign a value to a variable as part of an expression. It’s useful when you want to check a condition based on the new value you’re about to add. Example: Note: This is a more niche use case, but it’s good to know it exists! A Real-World Example: Building a Shopping Cart Let’s tie it all together with a practical example. Imagine you’re building a simple shopping cart for an e-commerce site. Output: This example shows how you can use all three primary methods in a cohesive, real-world scenario. Summary: Which Method Should You Use? Now you’re equipped to dynamically build and modify dictionaries in your Python projects. Go forth and code! Remember, the key to mastering dictionaries is practice.

Unlocking Python Dictionaries: A Beginner’s Guide to Adding New Keys Read More »

django sped up image

How I made my Django project almost as fast as FastAPI

FastAPI runs on Uvicorn, an ASGI server made for Python code that runs at the same time. Django is older and has more features, but from version 3.0, it can also operate on ASGI with Uvicorn. Once you set up Django on Uvicorn and make queries and caching work better, you can get the same speed for most things. 1. Start Django with Uvicorn The best way to improve performance is to switch to an ASGI server. Install Uvicorn Make sure your project has a asgi.py file, which is made automatically in Django 3+. Then turn on the server: uvicorn myproject.asgi:application –host 0.0.0.0 –port 8000 –workers 4 Why Uvicorn If you use a process manager like Supervisor or systemd, you can add: 2. Use async views where possible Why use httpx instead of requests: It lets you send HTTP requests (GET, POST, etc.) and handle responses, similar to requests, but it also supports asynchronous programming (async/await). That means you can make many API calls at once without blocking your Django or FastAPI app, ideal for performance and concurrency. import httpx from django.http import JsonResponse async def price_view(request): async with httpx.AsyncClient() as client: r = await client.get(‘https://api.example.com/price’) return JsonResponse(r.json()) For ORM queries, still use sync code or wrap it with sync_to_async: from asgiref.sync import sync_to_async from django.contrib.auth.models import User @sync_to_async def get_user(pk): return User.objects.get(pk=pk) async def user_view(request): user = await get_user(1) return JsonResponse({‘username’: user.username}) 3. Optimize your database Example: posts = Post.objects.select_related(‘author’).all() 4. Enable caching with Redis Install Redis and configure Django: pip install django-redis Add this to settings.py: CACHES = { ‘default’: { ‘BACKEND’: ‘django_redis.cache.RedisCache’, ‘LOCATION’: ‘redis://127.0.0.1:6379/1’, ‘OPTIONS’: { ‘CLIENT_CLASS’: ‘django_redis.client.DefaultClient’, } } } Cache heavy views: from django.views.decorators.cache import cache_page @cache_page(60) def home(request): return render(request, ‘home.html’) 5. Offload background work Use Celery or Dramatiq to handle slow tasks like emails or large file uploads asynchronously. 6. Serve static files efficiently Use WhiteNoise for small deployments or a CDN (Cloudflare, S3 + CloudFront) for large ones. MIDDLEWARE = [ ‘django.middleware.security.SecurityMiddleware’, ‘whitenoise.middleware.WhiteNoiseMiddleware’, # … ] 7. Monitor performance Example Benchmark Running the same Django app under Uvicorn vs Gunicorn (WSGI): Server Avg Latency Req/s Gunicorn (WSGI) 90 ms 700 Uvicorn (ASGI) 40 ms 1400 Final Thoughts FastAPI may always win in pure async benchmarks, but Django + Uvicorn can be nearly as fast for most production workloads — and you keep Django’s ORM, admin, and ecosystem. Checklist:

How I made my Django project almost as fast as FastAPI Read More »

Flatten a List of Lists in Python

How to Flatten a List of Lists in Python

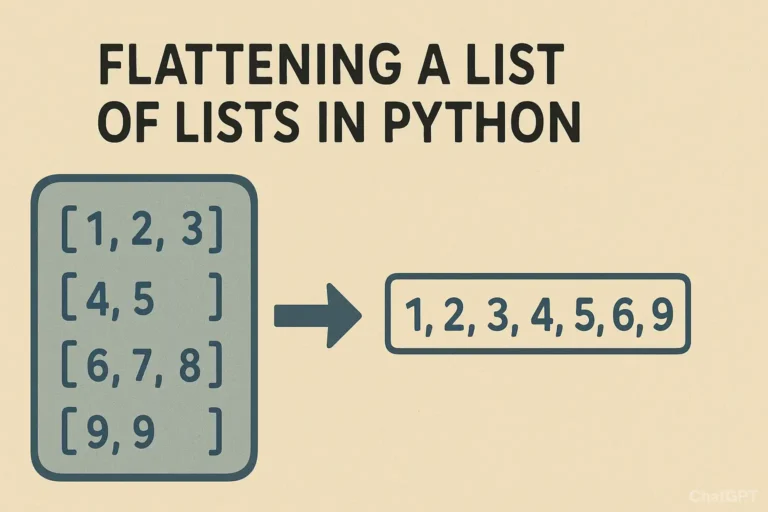
You open one list, only to find another list inside, and then another. In programming, we call this a “list of lists.” While this is a powerful way to organize data, there are countless times when you just need a simple, single-level list to work with. The process of converting this nested structure into a single list is called “flattening.” Imagine you’re cleaning up a cluttered desk. You have several piles of papers (the lists of lists), and you need to put all the papers into a single, neat stack (the flat list) to feed through a scanner. That’s exactly what flattening a list does! Example of a List of Lists: list_of_lists = [[1, 2, 3], [4, 5], [6, 7, 8, 9]] Our goal is to turn this into: flat_list = [1, 2, 3, 4, 5, 6, 7, 8, 9] Let’s explore the most effective ways to achieve this in Python, from the classic methods to the modern, elegant one-liners. Method 1: The Classic For-Loop This method is perfect for understanding what’s happening under the hood. We use a nested loop: one loop to go through each sub-list, and an inner loop to go through each item inside those sub-lists. # Our nested data list_of_lists = [[‘Alice’, ‘Bob’], [‘Charlie’, ‘Diana’], [‘Eve’]] # Start with an empty list to hold our results flat_list = [] # Outer loop: iterate through each sub-list (e.g., [‘Alice’, ‘Bob’]) for sublist in list_of_lists:     # Inner loop: iterate through each item in the current sub-list     for item in sublist:         # Append the item to our final flat_list         flat_list.append(item) print(flat_list) # Output: [‘Alice’, ‘Bob’, ‘Charlie’, ‘Diana’, ‘Eve’] Why use this method? Method 2: The itertools.chain() The itertools.chain() function efficiently treats a series of lists as one continuous sequence, making it very fast. import itertools list_of_lists = [[10, 20], [30], [40, 50, 60]] # The asterisk (*) unpacks the list_of_lists into separate arguments flat_list = list(itertools.chain(*list_of_lists)) print(flat_list) # Output: [10, 20, 30, 40, 50, 60] Why use this method? Method 3: List Comprehension Developers love list comprehensions. They create lists in a single, expressive line, and many consider them the most ‘Pythonic’ way to flatten a list. list_of_lists = [[‘Red’, ‘Blue’], [‘Green’], [‘Yellow’, ‘Purple’, ‘Orange’]] # Read it as: “For each sublist in list_of_lists, give me each item in that sublist.” flat_list = [item for sublist in list_of_lists for item in sublist] print(flat_list) # Output: [‘Red’, ‘Blue’, ‘Green’, ‘Yellow’, ‘Purple’, ‘Orange’] Why use this method? A Real-World Example: Consolidating Weekly Tasks Let’s say you’re building a simple to-do list application. Your data for the week might be stored as a list of daily task lists. weekly_tasks = [     [‘Email client’, ‘Write report’],        # Monday     [‘Team meeting’, ‘Buy groceries’],       # Tuesday     [‘Gym’, ‘Read book’],                    # Wednesday ] # You want a single list of all tasks for the week to calculate the total number. all_tasks = [task for day in weekly_tasks for task in day] print(f”Total tasks this week: {len(all_tasks)}”) print(“All tasks:”, all_tasks) # Output: # Total tasks this week: 6 # All tasks: [‘Email client’, ‘Write report’, ‘Team meeting’, ‘Buy groceries’, ‘Gym’, ‘Read book’] This flat list is now much easier to work with if you want to search for a specific task, count all tasks, or assign priorities across the entire week. Deeply nested lists — recursive flattening If your nesting depth is unknown (e.g., lists inside lists inside lists…), use a recursive approach. Be careful to treat strings as atomic (so they don’t get iterated character-by-character). from collections.abc import Iterable def flatten_deep(seq): for item in seq: if isinstance(item, Iterable) and not isinstance(item, (str, bytes)): yield from flatten_deep(item) else: yield item deeply_nested = [[[1, 2], [3, 4]], [[5, 6]], 7, [‘eight’, [‘nine’]]] print(list(flatten_deep(deeply_nested))) # [1, 2, 3, 4, 5, 6, 7, ‘eight’, ‘nine’] Note: This handles arbitrary depths. If you only need to flatten one level, prefer the simpler methods above. Summary: Which Method Should You Choose? Method Pros Cons Best Use Case For-loop – Very clear and beginner-friendly– Easy to add custom logic (filters, transformations) – Verbose– More lines of code When you need readability or conditional flattening List comprehension – Concise & expressive– Considered the most “Pythonic”– Readable for experienced developers – Harder to read with complex conditions– Can get messy in long one-liners Everyday use for simple flattening itertools.chain.from_iterable() – Very fast– Memory-efficient (iterator-based)– Scales well to large datasets – Requires import– Less obvious for beginners Large datasets or performance-critical tasks Recursive function (deep flatten) – Handles arbitrarily nested lists– Flexible (can adapt to skip/transform items) – More complex to implement– Slightly slower than shallow methods– Recursion depth limit in Python For most situations, the list comprehension is the recommended choice. It’s a perfect but when it comes to multiple conditions, then use append because the code will become messy, you can’t figure it out later. So next time you find yourself with a nested list, don’t unpack it manually, let Python do the heavy lifting and flatten it with ease Comment below if you like or have any queries

How to Flatten a List of Lists in Python Read More »

merging-dictionaries-Python

How to Merge Dictionaries Efficiently in Python

Hello Python enthusiasts! Today we will deep dive into one of the most common operations in Python programming: merging dictionaries. Whether you’re working with configuration settings, API responses, or data processing, you should know how to efficiently combine dictionaries. Why Dictionary Merging Matters Dictionaries are fundamental data structures in Python that store key-value pairs. In real-world applications, you often need to combine data from multiple sources. For example: Let’s explore the various ways to merge dictionaries, from traditional methods to modern Pythonic approaches. Method 1: The Update() Method (In-Place Modification) The most straightforward way to merge dictionaries is using the update() method: # Basic dictionary merging with update() dict1 = {‘a’: 1, ‘b’: 2} dict2 = {‘c’: 3, ‘d’: 4} dict1.update(dict2) print(dict1) # Output: {‘a’: 1, ‘b’: 2, ‘c’: 3, ‘d’: 4} Important Note: This method adds value in the first dictionary but does not return a new dictionary. Real-world Example: User Settings # Default application settings default_settings = { ‘theme’: ‘light’, ‘language’: ‘en’, ‘notifications’: True } # User-specific settings user_settings = { ‘theme’: ‘dark’, ‘timezone’: ‘UTC+1’ } # Merge user settings with defaults default_settings.update(user_settings) print(default_settings) # Output: {‘theme’: ‘dark’, ‘language’: ‘en’, ‘notifications’: True, ‘timezone’: ‘UTC+1’} Method 2: Dictionary Unpacking (Python 3.5+) Python 3.5 introduced a clean, expressive way to merge dictionaries using the ** unpacking operator: dict1 = {‘a’: 1, ‘b’: 2} dict2 = {‘c’: 3, ‘d’: 4} merged_dict = {**dict1, **dict2} print(merged_dict) # Output: {‘a’: 1, ‘b’: 2, ‘c’: 3, ‘d’: 4} Handling Key Conflicts When dictionaries have overlapping keys, the last dictionary’s values take precedence: dict1 = {‘a’: 1, ‘b’: 2} dict2 = {‘b’: 20, ‘c’: 3} merged_dict = {**dict1, **dict2} print(merged_dict) # Output: {‘a’: 1, ‘b’: 20, ‘c’: 3} Real-world Example: Configuration Management # Base configuration base_config = { ‘database_host’: ‘localhost’, ‘database_port’: 5432, ‘debug_mode’: False } # Environment-specific configuration production_config = { ‘database_host’: ‘db.production.com’, ‘debug_mode’: False } # Development overrides dev_overrides = { ‘debug_mode’: True, ‘log_level’: ‘DEBUG’ } # Merge configurations (later dictionaries override earlier ones) final_config = {**base_config, **production_config, **dev_overrides} print(final_config) # Output: {‘database_host’: ‘db.production.com’, ‘database_port’: 5432, # ‘debug_mode’: True, ‘log_level’: ‘DEBUG’} Method 3: The Union Operator (Python 3.9+) Python 3.9 introduced the most intuitive way to merge dictionaries using the | operator: dict1 = {‘a’: 1, ‘b’: 2} dict2 = {‘c’: 3, ‘d’: 4} # Merge using union operator merged_dict = dict1 | dict2 print(merged_dict) # Output: {‘a’: 1, ‘b’: 2, ‘c’: 3, ‘d’: 4} # You can also use the |= operator for in-place merging dict1 |= dict2 print(dict1) # Output: {‘a’: 1, ‘b’: 2, ‘c’: 3, ‘d’: 4} Data Aggregation Method # Here is an example of Sales data from different regions north_sales = {‘january’: 5000, ‘february’: 6000, ‘march’: 5500} south_sales = {‘march’: 7000, ‘april’: 8000, ‘may’: 7500} east_sales = {‘may’: 9000, ‘june’: 8500, ‘july’: 9200} # Aggregate all sales data all_sales = north_sales | south_sales | east_sales print(all_sales) # Output: {‘january’: 5000, ‘february’: 6000, ‘march’: 7000, # ‘april’: 8000, ‘may’: 9000, ‘june’: 8500, ‘july’: 9200} Method 4: Using dict() Constructor You can also use the dict() constructor with unpacking: dict1 = {‘a’: 1, ‘b’: 2} dict2 = {‘c’: 3, ‘d’: 4} merged_dict = dict(dict1, **dict2) print(merged_dict) # Output: {‘a’: 1, ‘b’: 2, ‘c’: 3, ‘d’: 4} Advanced Merging with Custom Function For dictionaries containing other dictionaries, you might need a deep merge: def deep_merge(dict1, dict2): result = dict1.copy() for key, value in dict2.items(): if (key in result and isinstance(result[key], dict) and isinstance(value, dict)): result[key] = deep_merge(result[key], value) else: result[key] = value return result # Example usage user_profile = { ‘personal’: {‘name’: ‘Alice’, ‘age’: 30}, ‘preferences’: {‘theme’: ‘dark’} } user_updates = { ‘personal’: {‘age’: 31, ‘city’: ‘New York’}, ‘preferences’: {‘language’: ‘en’} } merged_profile = deep_merge(user_profile, user_updates) print(merged_profile) # Output: {‘personal’: {‘name’: ‘Alice’, ‘age’: 31, ‘city’: ‘New York’}, # ‘preferences’: {‘theme’: ‘dark’, ‘language’: ‘en’}} Performance Considerations Best Practices Conclusion Merging dictionaries in Python has evolved significantly, with each new Python version bringing more elegant solutions. Here’s a quick summary: Choose the method that best fits your Python version and specific use case. I hope this guide helps you improve dictionary merging in Python. Practice these techniques with your own projects, and you’ll find them becoming second nature in no time!

How to Merge Dictionaries Efficiently in Python Read More »

Python yield keyword concept illustration with generator function

Python’s yield Keyword: From Theory to Real-World Magic

Today, we’re going to break down yield into simple, digestible pieces. By the end of this article, you’ll not only understand what it does but also why it’s such a powerful tool for writing efficient and elegant Python code. The Problem: Why Not Just Use return? Let’s start with what we know. The return statement is straightforward: a function runs, computes a value, and return sends that value back to the caller. The function’s state is then completely wiped out. If you call it again, it starts from scratch. But what if you’re working with a massive dataset—like a file with millions of lines, or a continuous stream of data from a sensor? Using return to get all the data at once would mean loading everything into your computer’s memory. This can be slow, or worse, it can crash your program if the data is too large. We need a way to produce a sequence of results one at a time, on the fly, without storing the entire sequence in memory first. This is exactly the problem that generators and the yield keyword solve. The Simple Analogy: A Book vs. A Librarian Think of a function with return as printing a book. Now, think of a function with yield a helpful librarian who reads the book to you, one line at a time. This “lazy” or “on-demand” production of values is the core idea behind generators. Let’s see the example, Look at a traditional function using return: def create_squares_list(n): result = [] for i in range(n): result.append(i*i) return result # Using the function my_list = create_squares_list(5) # The ENTIRE list is built in memory here for num in my_list: print(num) # Output: 0, 1, 4, 9, 16 This works fine for n=5, but if n were 10 million, the result The list would consume a massive amount of memory. Now, let’s rewrite this as a generator function using yield: def generate_squares(n): for i in range(n): yield i*i # <– The magic keyword! # Using the generator function my_generator = generate_squares(5) # Nothing is calculated yet! print(my_generator) # Prints: <generator object generate_squares at 0x…> What’s happening here? The key takeaway is state suspension. The function doesn’t die after yield; it simply goes to sleep, waiting to be woken up again. This makes it incredibly memory-efficient. If you are Reading Large Files This is perhaps the most common and critical use case for generators. Imagine you have a massive server log file that is 50 GB in size. You can’t possibly load it all into memory. The Inefficient Way (Avoid this!): with open(‘huge_log_file.log’, ‘r’) as file: lines = file.readlines() # Loads all 50 GB into RAM! for line in lines: if ‘ERROR’ in line: print(line) The Efficient Generator Way (The Pythonic Way): def read_large_file(file_path): with open(file_path, ‘r’) as file: for line in file: # file objects are already generators! yield line # Now, we can process the file line by line for line in read_large_file(‘huge_log_file.log’): if ‘ERROR’ in line: print(line) In this efficient version, only one line is ever in memory at a time, no matter how big the file is. The for line in file idiom itself uses a generator under the hood, and our function just wraps it for clarity. While Generating an Infinite Sequence You can’t create an infinite list in memory—it’s impossible! But you can create a generator that produces values from an infinite sequence forever. Need a simple ID generator? def generate_user_ids(): id = 1000 while True: # This loop runs forever… but it’s a generator! yield id id += 1 id_generator = generate_user_ids() print(next(id_generator)) # 1000 print(next(id_generator)) # 1001 print(next(id_generator)) # 1002 # This can go on indefinitely, using almost no memory. Need a stream of Fibonacci numbers? def fibonacci(): a, b = 0, 1 while True: yield a a, b = b, a + b fib_gen = fibonacci() for i, num in enumerate(fib_gen): if i > 10: # Let’s not loop forever in this example! break print(num) # Output Key Takeaways Remember the helpful librarian the next time you face a memory-heavy task in Python. Don’t print the whole book—just yield one page at a time! Comment below if you like

Python’s yield Keyword: From Theory to Real-World Magic Read More »

Feature image showing the Python logo and a command-line terminal with the title ‘Create CLI Tool with Python: From Zero to Hero

Create a CLI Tool with Python: From Zero to Hero

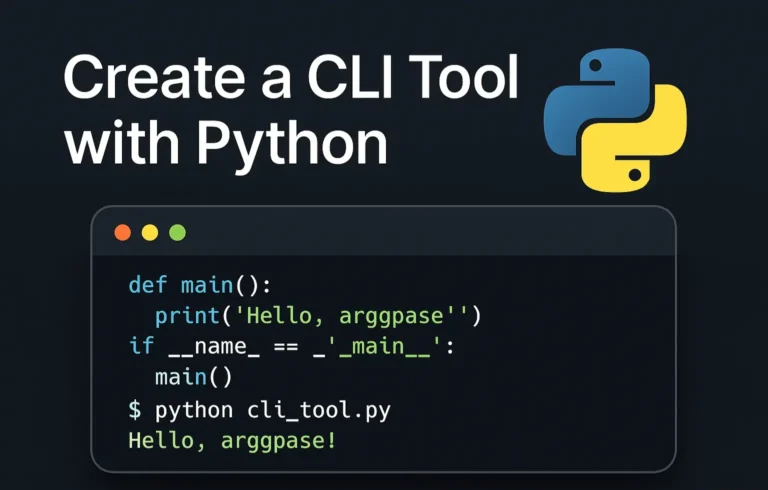
Command-line tools are essential for developers—they’re fast, lightweight, and automate repetitive tasks. In this tutorial, we’ll build a File Organizer CLI tool in Python from scratch. By the end, you’ll have a working CLI tool that organizes files by type and is ready to share or package for others. Why Build CLI Tools with Python? Before we dive into the code, it’s important to understand why Python is an excellent choice for building command-line tools. 1. Simplicity and Readability Python’s clean and intuitive syntax allows you to focus on functionality, rather than worrying about complex language constructs. You can write concise, readable code that’s easy to maintain—perfect for small utilities or large projects alike. 2. Rich Ecosystem Python comes with a powerful standard library for file handling, argument parsing, and more. On top of that, third-party packages like Click, Rich, and argparse make building robust and user-friendly CLI tools even easier. 3. Cross-Platform Compatibility Python runs seamlessly on Windows, macOS, and Linux. The same CLI tool you develop on your local machine can be deployed anywhere without major changes—saving you time and headaches. 4. Rapid Development Python is an interpreted language, which means you can write, test, and iterate on your code quickly. This rapid feedback loop is ideal when building CLI tools where functionality and usability matter. Setting Up Your Development Environment First, let’s prepare our folder. I recommend creating a virtual environment to keep dependencies isolated: mkdir my-cli-tool cd my-cli-tool python -m venv venv source venv/bin/activate # On Windows: venv\Scripts\activate Install the essential rich-click we’ll use: pip install click rich I am using click for argument parsing and rich for beautiful terminal output. While Python’s built-in argparse is powerful, click offers a more intuitive approach for complex CLI applications. Building Your First CLI Tool: A File Organizer Let’s create something practical – a tool that organizes files in a directory by their extensions. This example will demonstrate core CLI concepts while solving a real problem. Create a file called file_organizer.py: import os import shutil from pathlib import Path import click from rich.console import Console from rich.table import Table from rich.progress import Progress console = Console() @click.command() @click.argument(‘directory’, type=click.Path(exists=True, file_okay=False, dir_okay=True)) @click.option(‘–dry-run’, is_flag=True, help=’Show what would be done without making changes’) @click.option(‘–verbose’, ‘-v’, is_flag=True, help=’Show detailed output’) def organize_files(directory, dry_run, verbose): “”” Organize files in DIRECTORY by their extensions. Creates subdirectories for each file type and moves files accordingly. “”” directory = Path(directory) if dry_run: console.print(“[yellow]Running in dry-run mode – no changes will be made[/yellow]”) # Scan directory and group files by extension file_groups = {} total_files = 0 for file_path in directory.iterdir(): if file_path.is_file(): extension = file_path.suffix.lower() or ‘no_extension’ if extension not in file_groups: file_groups[extension] = [] file_groups[extension].append(file_path) total_files += 1 if total_files == 0: console.print(“[red]No files found in the specified directory[/red]”) return # Display summary table if verbose or dry_run: table = Table(title=f”Files to organize in {directory}”) table.add_column(“Extension”, style=”cyan”) table.add_column(“Count”, style=”green”) table.add_column(“Files”, style=”white”) for ext, files in file_groups.items(): file_names = “, “.join([f.name for f in files[:3]]) if len(files) > 3: file_names += f” … and {len(files) – 3} more” table.add_row(ext, str(len(files)), file_names) console.print(table) if dry_run: return # Create directories and move files with Progress() as progress: task = progress.add_task(“[green]Organizing files…”, total=total_files) for extension, files in file_groups.items(): # Create directory for this extension ext_dir = directory / extension.lstrip(‘.’) ext_dir.mkdir(exist_ok=True) for file_path in files: destination = ext_dir / file_path.name # Handle naming conflicts counter = 1 while destination.exists(): name_parts = file_path.stem, counter, file_path.suffix destination = ext_dir / f”{name_parts[0]}_{name_parts[1]}{name_parts[2]}” counter += 1 shutil.move(str(file_path), str(destination)) if verbose: console.print(f”[green]Moved[/green] {file_path.name} → {destination}”) progress.advance(task) console.print(f”[bold green]Successfully organized {total_files} files![/bold green]”) if __name__ == ‘__main__’: organize_files() Understanding the Code Structure Let’s break down the key components: my-cli-tool/ │── file_organizer.py # Main CLI code │── text.py # Test file generator │── README.md # Documentation │── setup.py # Installation script │── assets/ │ └── banner.png # Optional banner for README │── venv/ # Local virtual environment Making Your Tool Installable To make your CLI tool easily installable and distributable, create a setup.py file: from setuptools import setup setup( name=”file-organizer”, version=”0.1.0″, py_modules=[“file_organizer”], # because you have file_organizer.py install_requires=[ “click”, “rich”, ], entry_points={ “console_scripts”: [ “file-organizer=file_organizer:organize_files”, ], }, author=”Tarun Kumar”, description=”A Python CLI tool to organize files by extension”, long_description=open(“README.md”).read() if open(“README.md”, “r”, encoding=”utf-8″) else “”, long_description_content_type=”text/markdown”, python_requires=”>=3.8″, ) Install your tool in development mode: pip install -e . Now you can run your tool from anywhere using the organize command! Testing Your CLI Tool Testing CLI applications is more important because it requires special consideration. Here’s how to test your file organizer: import os # Folder where test files will be created TEST_DIR = “test_files” # Make the directory if it doesn’t exist os.makedirs(TEST_DIR, exist_ok=True) # List of test files with different extensions files = [ “document1.pdf”, “document2.pdf”, “image1.jpg”, “image2.jpg”, “image3.png”, “script1.py”, “script2.py”, “archive1.zip”, “archive2.zip”, “notes.txt”, “readme.md” ] # Create empty files for file_name in files: file_path = os.path.join(TEST_DIR, file_name) with open(file_path, “w”) as f: f.write(f”Test content for {file_name}\n”) print(f”Created {len(files)} test files in ‘{TEST_DIR}’ folder.”) Run your tests with: python text.py Best Practices for CLI Development Clear Documentation: Always provide helpful docstrings and command descriptions. Users should understand your tool’s purpose at a glance. Graceful Error Handling: Anticipate common errors and provide meaningful error messages. Never let users see raw Python stack traces. Progress Feedback: For long-running operations, show progress bars or status updates. Silent tools feel broken. Configurable Behavior: Allow users to customize your tool’s behavior through configuration files or environment variables. Follow Unix Philosophy: Make tools that do one thing well and can be easily combined with other tools. Deployment and Distribution Once your CLI tool is ready, you have several distribution options: PyPI Publication: Upload your package to the Python Package Index for easy installation via pip. GitHub Releases: Distribute your tool through GitHub with pre-built executables using PyInstaller. Docker Container: Package your tool in a Docker container for consistent deployment across environments. Download code Advanced Topics to Explore As you become more comfortable with CLI development, consider exploring: Conclusion Building CLI

Create a CLI Tool with Python: From Zero to Hero Read More »

Scroll to Top