Illustration of Python virtual environments with Python logo, terminal, and folder icons, representing project isolation and dependency management.

Everything You Need to Know About Python Virtual Environments

When I first started coding in Python, I kept running into this frustrating problem. I’d install a package for one project, then start another project that needed a different version of the same package, and suddenly nothing worked anymore. Sound familiar? That’s when I discovered virtual environments, and honestly, they changed everything about how I work with Python. What Exactly Is a Virtual Environment? Think of a virtual environment as a separate, isolated workspace for each of your Python projects. It’s like having different toolboxes for different jobs – you wouldn’t use the same tools to fix a bike and bake a cake, right? Each virtual environment has its own Python interpreter and its own set of installed packages, completely independent from your system Python and other environments. Before I understood this, I was installing everything globally on my system. Big mistake. I once spent an entire afternoon trying to figure out why my Django app suddenly broke, only to realize I’d updated a package for a completely different project. Never again. Why You Actually Need Virtual Environments Let me paint you a picture. You’re working on Project A that needs Django 3.2, and everything’s running smoothly. Then you start Project B that requires Django 4.0. Without virtual environments, you’d have to constantly uninstall and reinstall different versions, or worse, try to make both projects work with the same version. It’s a nightmare I wouldn’t wish on anyone. Here’s what virtual environments solve: Dependency conflicts: Each project gets exactly the versions it needs. No more “but it works on my machine” situations. Clean development: You know exactly what packages each project uses. No mysterious dependencies floating around from old projects you forgot about. Reproducibility: When you share your project, others can recreate your exact environment. This has saved me countless hours of debugging with teammates. System protection: You’re not messing with your system Python. I learned this the hard way when I accidentally broke my system package manager by upgrading pip globally. Creating Your First Virtual Environment Python makes this surprisingly easy. Since Python 3.3, the venv module comes built-in, so you don’t need to install anything extra. Here’s how I typically set up a new project: First, navigate to your project directory and run: python -m venv myenv This creates a new folder called myenv (you can name it whatever you want) containing your virtual environment. I usually stick with venv or .venv As the name suggests, the dot makes it hidden on Unix systems, which keeps things tidy. Activating and Using Your Environment Creating the environment is just the first step. You need to activate it to actually use it. This part confused me at first because the command differs depending on your operating system. On Windows: myenv\Scripts\activate On macOS and Linux: source myenv/bin/activate Once activated, you’ll usually see the environment name in parentheses at the beginning of your command prompt, like (myenv). This is your confirmation that you’re working in the virtual environment. Everything you install with pip now goes into this environment only. To deactivate when you’re done: deactivate Simple as that. The environment still exists; you’re just not using it anymore. Managing Packages Like a Pro Here’s something that took me way too long to learn: always create a requirements file. Seriously, do this from day one of your project. After installing your packages, run: pip freeze > requirements.txt This creates a file listing all installed packages and their versions. When someone else (or future you) needs to recreate the environment, they just run: pip install -r requirements.txt I can’t tell you how many times this has saved me when moving projects between computers or deploying to production. Alternative Tools Worth Knowing While venv It’s great for most cases, but other tools might suit your workflow better: virtualenv: The original virtual environment tool. It works with older Python versions and has a few more features than venv. I still use this for legacy projects. conda: Popular in data science circles. It can manage non-Python dependencies too, which is handy for packages like NumPy that rely on C libraries. pipenv: Combines pip and virtualenv, and adds some nice features like automatic loading of environment variables. Some people love it; I find it a bit slow for my taste. poetry: My current favorite for serious projects. It handles dependency resolution better than pip and makes packaging your project much easier. Common Pitfalls and How to Avoid Them After years of using virtual environments, here are the mistakes I see people make most often: Forgetting to activate: I still do this sometimes. You create the environment, get excited to start coding, and forget to activate it. Then you wonder why your imports aren’t working. Committing the environment to Git: Please don’t do this. Add your environment folder to .gitignore. The requirements.txt file is all you need to recreate it. Using the wrong Python version: When creating an environment, it uses whatever Python version you call it with. Make sure you’re using the right one from the start. Not updating pip: First thing I do in a new environment is run pip install –upgrade pip. An outdated pip can cause weird installation issues. Copy-pasting a venv folder between projects usually breaks because: Instead, you should always recreate a new virtual environment for each project and install dependencies from requirements.txt or a lock file. Real-World Workflow Here’s my typical workflow when starting a new project: For existing projects, I clone the repo, create a fresh environment, and install from requirements.txt. Clean and simple. When Things Go Wrong Sometimes virtual environments get messy. Maybe you installed the wrong package, or something got corrupted. The beautiful thing is, you can just delete the environment folder and start fresh. Your code is safe, and recreating the environment from requirements.txt takes just minutes. If you’re getting permission errors on Mac or Linux, avoid using sudo it with pip. If you need to use sudo, you’re probably trying to install globally by mistake. Check

Everything You Need to Know About Python Virtual Environments Read More »

Unlocking the Power of Python Collections Library – feature image with Python logo and data structures

Unlocking the Power of Python Collections Library

As a Python developer, I’ve always been fascinated by how the language provides elegant solutions to common programming challenges. One library that consistently amazes me is the collections module. It’s like having a Swiss Army knife for data structures – packed with specialized tools that can make your code cleaner, more efficient, and surprisingly readable. Today, I want to share my journey of discovering the hidden gems in Python’s collections library and show you how these powerful data structures can transform your code. The best part? You don’t need to install anything extra — collections is a built-in Python module, ready to use out of the box. Why Collections Matter Before we dive in, let me ask you something: How many times have you written code to count occurrences of items in a list? Or struggled with creating a dictionary that has default values? I’ve been there too, and that’s exactly where the collections library shines. The collections module provides specialized container datatypes that are alternatives to Python’s general-purpose built-in containers like dict, list, set, and tuple. These aren’t just fancy alternatives – they solve real problems that we encounter in everyday programming. Counter: The Item Counting Superhero Let’s start with my personal favorite – Counter. This little gem has saved me countless lines of code. The Old Way vs The Counter Way Here’s how I used to count items: # The tedious way words = [‘apple’, ‘banana’, ‘apple’, ‘cherry’, ‘banana’, ‘apple’] word_count = {} for word in words: if word in word_count: word_count[word] += 1 else: word_count[word] = 1 Now, with Counter: from collections import Counter words = [‘apple’, ‘banana’, ‘apple’, ‘cherry’, ‘banana’, ‘apple’] word_count = Counter(words) print(word_count) # Counter({‘apple’: 3, ‘banana’: 2, ‘cherry’: 1}) The difference is night and day! But Counter isn’t just about counting – it’s packed with useful methods. Counter’s Hidden Powers from collections import Counter # Most common items sales_data = Counter({‘product_A’: 150, ‘product_B’: 89, ‘product_C’: 200, ‘product_D’: 45}) top_products = sales_data.most_common(2) print(top_products) # [(‘product_C’, 200), (‘product_A’, 150)] # Mathematical operations counter1 = Counter([‘a’, ‘b’, ‘c’, ‘a’]) counter2 = Counter([‘a’, ‘b’, ‘b’, ‘d’]) print(counter1 + counter2) # Addition print(counter1 – counter2) # Subtraction print(counter1 & counter2) # Intersection print(counter1 | counter2) # Union I use Counter extensively in data analysis projects. It’s incredibly handy for generating quick frequency distributions and finding patterns in datasets. defaultdict: Say Goodbye to KeyError How many times have you written code like this? # Grouping items by category items = [(‘fruit’, ‘apple’), (‘vegetable’, ‘carrot’), (‘fruit’, ‘banana’), (‘vegetable’, ‘broccoli’)] groups = {} for category, item in items: if category not in groups: groups[category] = [] groups[category].append(item) With defaultdict, it becomes elegant: from collections import defaultdict items = [(‘fruit’, ‘apple’), (‘vegetable’, ‘carrot’), (‘fruit’, ‘banana’), (‘vegetable’, ‘broccoli’)] groups = defaultdict(list) for category, item in items: groups[category].append(item) print(dict(groups)) # {‘fruit’: [‘apple’, ‘banana’], ‘vegetable’: [‘carrot’, ‘broccoli’]} Real-World defaultdict Magic I recently used defaultdict to build a simple caching system: from collections import defaultdict import time # Simple cache with automatic list creation cache = defaultdict(list) def log_access(user_id, action): timestamp = time.time() cache[user_id].append((action, timestamp)) log_access(‘user123’, ‘login’) log_access(‘user123’, ‘view_page’) log_access(‘user456’, ‘login’) print(dict(cache)) No more checking if keys exist – defaultdict handles it automatically! namedtuple: Structured Data Made Simple Regular tuples are great, but they lack readability. What does person[1] represent? Is it age? Name? namedtuple solves this beautifully. from collections import namedtuple # Define a Person structure Person = namedtuple(‘Person’, [‘name’, ‘age’, ‘city’]) # Create instances alice = Person(‘Alice’, 30, ‘New York’) bob = Person(‘Bob’, 25, ‘San Francisco’) # Access data meaningfully print(f”{alice.name} is {alice.age} years old and lives in {alice.city}”) # namedtuples are still tuples! name, age, city = alice print(f”Unpacked: {name}, {age}, {city}”) Why I Love namedtuple I use namedtuple for representing database records, API responses, and configuration objects. deque: The Double-Ended Queue Champion When you need efficient appends and pops from both ends of a sequence, deque (pronounced “deck”) is your friend. from collections import deque # Creating a deque queue = deque([‘a’, ‘b’, ‘c’]) # Efficient operations at both ends queue.appendleft(‘z’) # Add to left queue.append(‘d’) # Add to right print(queue) # deque([‘z’, ‘a’, ‘b’, ‘c’, ‘d’]) queue.popleft() # Remove from left queue.pop() # Remove from right print(queue) # deque([‘a’, ‘b’, ‘c’]) Real-World deque Usage I’ve used a deque for implementing sliding window algorithms: from collections import deque def sliding_window_max(arr, window_size): “””Find maximum in each sliding window””” result = [] window = deque() for i, num in enumerate(arr): # Remove elements outside current window while window and window[0] <= i – window_size: window.popleft() # Remove smaller elements from rear while window and arr[window[-1]] <= num: window.pop() window.append(i) # Add to result if window is complete if i >= window_size – 1: result.append(arr[window[0]]) return result numbers = [1, 3, -1, -3, 5, 3, 6, 7] print(sliding_window_max(numbers, 3)) # [3, 3, 5, 5, 6, 7] OrderedDict: When Order Matters While modern Python dictionaries maintain insertion order, OrderedDict provides additional functionality when you need fine-grained control over ordering. from collections import OrderedDict # LRU Cache implementation using OrderedDict class LRUCache: def __init__(self, capacity): self.capacity = capacity self.cache = OrderedDict() def get(self, key): if key in self.cache: # Move to end (most recently used) self.cache.move_to_end(key) return self.cache[key] return None def put(self, key, value): if key in self.cache: self.cache.move_to_end(key) elif len(self.cache) >= self.capacity: # Remove least recently used (first item) self.cache.popitem(last=False) self.cache[key] = value # Usage cache = LRUCache(3) cache.put(‘a’, 1) cache.put(‘b’, 2) cache.put(‘c’, 3) print(cache.get(‘a’)) # 1, moves ‘a’ to end cache.put(‘d’, 4) # Removes ‘b’ (least recently used) ChainMap: Combining Multiple Mappings ChainMap It is perfect when you need to work with multiple dictionaries as a single mapping: from collections import ChainMap # Configuration hierarchy defaults = {‘timeout’: 30, ‘retries’: 3, ‘debug’: False} user_config = {‘timeout’: 60, ‘debug’: True} environment = {‘debug’: False} # Chain them together (first match wins) config = ChainMap(environment, user_config, defaults) print(config[‘timeout’]) # 60 (from user_config) print(config[‘retries’]) # 3 (from defaults) print(config[‘debug’]) # False (from environment) # Add new mapping to front config = config.new_child({‘timeout’: 10}) print(config[‘timeout’]) # 10 (from

Unlocking the Power of Python Collections Library Read More »

Python Django job scraper workflow with BeautifulSoup, TimesJobs, and Google Sheets integration.

How I Built a Django Job Scraper that Saves to Google Sheets

Last month, I got stuck in the usual routine: job boards were checked by hand, listings were copied into spreadsheets, and the best opportunities were always missed. After too many hours were spent on this boring work, a thought came up – why not have the whole process automated? So, I started thinking about creating a Django project that could scrape and automate job listings from websites like LinkedIn and Indeed. However, after trying multiple ways to scrape data from sites like Indeed, I got stuck because most big websites have bot protections that prevent scraping. I even tried using Selenium, but it didn’t work reliably. Ultimately, I used BeautifulSoup4 and the requests library to extract the data. I scraped data from the TimesJobs website and saved it both in a Google Sheet and in a Django SQLite database. The Problem That Drove Me Crazy Every morning, I would open 5–6 different job boards, search for the same keywords, scroll through hundreds of listings, and manually copy the good ones into my tracking spreadsheet. By the time I was done, I was already mentally exhausted—before even starting to write cover letters. The worst part? I kept missing jobs that were posted while I was sleeping or busy with other tasks. Some great opportunities would disappear before I even got a chance to see them. I knew there had to be a better way. What I Built (And Why It Actually Works) My solution is pretty straightforward: a Python script, built with Django, that automatically scrapes job listings from multiple sources and saves everything into a Google Sheet and a SQLite database. But here’s what makes it actually useful: The Tech Stack (Nothing Too Fancy) I kept things simple because, honestly, I wanted something I could maintain without pulling my hair out: Lessons I Learned the Hard Way Rate limiting is real: I got blocked from a few sites in the first week because I was being too aggressive with requests. Had to add delays and retry logic. Websites change their structure: What worked perfectly in January broke in February when one site redesigned its job listing pages. Now I build in more flexibility from the start. Google Sheets API has quotas: You can’t just hammer their API endlessly. I learned to batch my updates and cache data locally. Job descriptions are messy: The amount of inconsistent HTML and weird formatting in job posts is honestly astounding. Cleaning this data took way more time than I expected. Want to Build Your Own? Here’s a step-by-step guide to building a Django project that scrapes job listings using BeautifulSoup4 and requests, and saves the data in both Google Sheets and your Django models: 1. Set Up Your Django Project pip install django django-admin startproject jobscraper cd jobscraper python manage.py startapp jobs 2. Create Your Job Model Define a model to store job listings in jobs/models.py: from django.db import models class Job(models.Model): title = models.CharField(max_length=255) company = models.CharField(max_length=255, blank=True, null=True) location = models.CharField(max_length=255, blank=True, null=True) experience = models.CharField(max_length=100, blank=True, null=True) salary = models.CharField(max_length=100, blank=True, null=True) posted = models.CharField(max_length=100, blank=True, null=True) description = models.TextField(blank=True, null=True) skills = models.TextField(blank=True, null=True) # store as comma-separated string link = models.URLField(unique=True) # prevent duplicates created_at = models.DateTimeField(auto_now_add=True) def __str__(self): return f”{self.title} at {self.company}” python manage.py makemigrations python manage.py migrate 3. Scrape Job Listings with BeautifulSoup4 and Requests pip install beautifulsoup4 requests gspread oauth2client def scrape_jobs(): url = “https://www.timesjobs.com/candidate/job-search.html?searchType=personalizedSearch&from=submit&txtKeywords=Python+developer&txtLocation=India” response = requests.get(url, headers={“User-Agent”: “Mozilla/5.0”}) soup = BeautifulSoup(response.text, “html.parser”) container = soup.find(“ul”, class_=”new-joblist”) if not container: print(“No job list found!”) return [] cards = container.find_all(“li”, class_=”clearfix job-bx wht-shd-bx”) print(f”Found {len(cards)} jobs”) jobs = [] for card in cards: job_data = parse_job_card(card) # Save if not exists if not Job.objects.filter(link=job_data[“link”]).exists(): Job.objects.create( title=job_data[“title”], company=job_data[“company”], location=job_data[“location”], experience=job_data[“experience”], salary=job_data[“salary”], posted=job_data[“posted”], description=job_data[“description”], skills=”, “.join(job_data[“skills”]), # convert list to string link=job_data[“link”], ) jobs.append(job_data) return jobs 4. Save Data to Google Sheets Log in to your Gmail and open Google Cloud. Create a New Project and Enable Google Sheets API and Google Drive API. Create Service Account Credentials. Generate a JSON Key File. Share your Google Sheet with the Service Account email as editor. import gspread from oauth2client.service_account import ServiceAccountCredentials from django.conf import settings def get_google_sheet(): scope = [“https://spreadsheets.google.com/feeds”, “https://www.googleapis.com/auth/drive”] creds = ServiceAccountCredentials.from_json_keyfile_name( settings.GOOGLE_SHEET_CREDENTIALS, scope ) client = gspread.authorize(creds) sheet = client.open(settings.GOOGLE_SHEET_NAME).sheet1 return sheet def update_sheet(job_data): sheet = get_google_sheet() existing = sheet.get_all_values() existing_links = {row[3] for row in existing[1:]} if len(existing) > 1 else set() # Add header if sheet is empty if not existing: sheet.append_row([“Title”, “Company”, “Location”, “Link”]) for job in job_data: if job[“link”] not in existing_links: # avoid duplicates sheet.append_row([job[“title”], job[“company”], job[“location”], job[“link”]]) 5. Automate It You can run the scraper periodically using Django management commands or a cron job. See the full code I have shared my full code download here: Final Thoughts Building this scraper turned out to be one of those projects that felt much more complicated at the start than it actually was. The hardest part was simply taking the first step. If you’re spending hours manually tracking job postings, I’d strongly recommend automating the process. Your future self will thank you—and you’ll have more energy to focus on what truly matters: writing strong applications and preparing for interviews. Have you automated any part of your job search? I’d love to hear about your experiences in the comments below.

How I Built a Django Job Scraper that Saves to Google Sheets Read More »

Top Django, SQL, and AWS Interview Questions and Answers

Top Django, SQL, and AWS Interview Questions and Answers

If you are preparing for Python/Django backend interviews, then you’ll not only face questions on Django itself but also on SQL, APIs, caching, and cloud (AWS). Therefore, in this blog, I’ve compiled some of the most frequently asked questions along with clear and concise answers. However, these examples will help you understand the concepts better and prepare more effectively for your next interview. My advice is to prepare more questions in SQL because, for Django developers, it is often difficult to learn SQL due to relying heavily on the ORM. Therefore, practicing SQL separately will strengthen your backend fundamentals and give you more confidence in interviews. 1. What is the Longest Substring Problem? The longest substring problem usually refers to finding the longest substring without repeating characters. def longest_substring(s): seen = set() left = 0 start = 0 max_len = 0 for right in range(len(s)): while s[right] in seen: # shrink window if duplicate found seen.remove(s[left]) left += 1 seen.add(s[right]) if (right – left + 1) > max_len: max_len = right – left + 1 start = left # track start index of longest substring return s[start:start + max_len] # Example print(longest_substring(“abcabcbb”)) # Output: “abc” 2. What are the Types of Indexing in Databases? A database technique that speeds up query performance by creating data pointers: 3. How Do I Write the Longest SQL Query? This is a trick question — instead of “long queries,” interviewers expect optimized queries. 4. How Do You Make Fast APIs in Django Rest Framework (DRF)? Ways to optimize DRF APIs: 5. Can an Anonymous User Store Cart Items? An anonymous user’s cart items can be stored using sessions or cookies. The cart data (like product IDs and quantities) is kept in the session or browser storage until the user logs in. Once they log in, the session/cart data is merged into the user’s permanent cart stored in the database. 6. How Do You Store Frequently Accessed Product Images Efficiently? 7. What is Middleware in Django? Middleware is a layer between the request and the response. These are predefined in django: Authentication, Session, CSRF, and Security headers. Custom Middleware Example: class SimpleMiddleware: def __init__(self, get_response): self.get_response = get_response def __call__(self, request): print(“Before View:”, request.path) response = self.get_response(request) print(“After View:”, response.status_code) return response register in settings like settings.py → MIDDLEWARE = [‘myapp.middleware.SimpleMiddleware’, …] 8. How Do You Optimize Django ORM Queries? 9. How Do You Write Raw SQL Queries in Django? Two main ways of user raw or user cursor connection: users = UserProfile.objects.raw(“SELECT * FROM user WHERE active = %s”, [True]) from django.db import connection with connection.cursor() as cursor: cursor.execute(“SELECT id, name FROM user WHERE active = %s”, [True]) rows = cursor.fetchall() 10. What AWS Services Have You Used? 11. What is Load Balancing in AWS? Load balancing distributes incoming traffic across multiple servers. AWS provides Elastic Load Balancer (ELB): 12. What are the Types of JOIN Queries in SQL? In SQL, JOINs combine rows from two or more tables based on related columns. They allow you to fetch meaningful data by linking multiple tables together. Different types of JOINs define how records from one table are matched with records from another. 13. How Does LEFT JOIN Work? LEFT JOIN returns all rows from the left table and matching rows from the right. Non-matching → NULL. Example: SELECT e.name, d.dept_name FROM Employees e LEFT JOIN Departments d ON e.dept_id = d.id; 14. How Do You Implement Push Notifications in Django? 15. What is Redis, and How Did You Use It? Redis serves as a high-performance caching and message broker.Use cases in Django: Example (Django cache): from django.core.cache import cache def get_product(pid): key = f”product:{pid}” product = cache.get(key) if not product: product = Product.objects.get(id=pid) cache.set(key, product, 3600) return product Preparing for Python/Django backend interviews requires a balance of theory and practical knowledge. While Django and its ORM simplify a lot of work, interviewers often test your understanding of SQL, system design, caching, and cloud services like AWS. Therefore, practice coding problems, revisit core SQL queries, and explore concepts like load balancing, middleware, and caching. With consistent preparation, you’ll not only perform well in interviews but also become a more confident backend developer. See my previous Python Interview question.

Top Django, SQL, and AWS Interview Questions and Answers Read More »

FastAPI Python web framework for high-performance API development

Exploring FastAPI: The Future of Python Web Frameworks

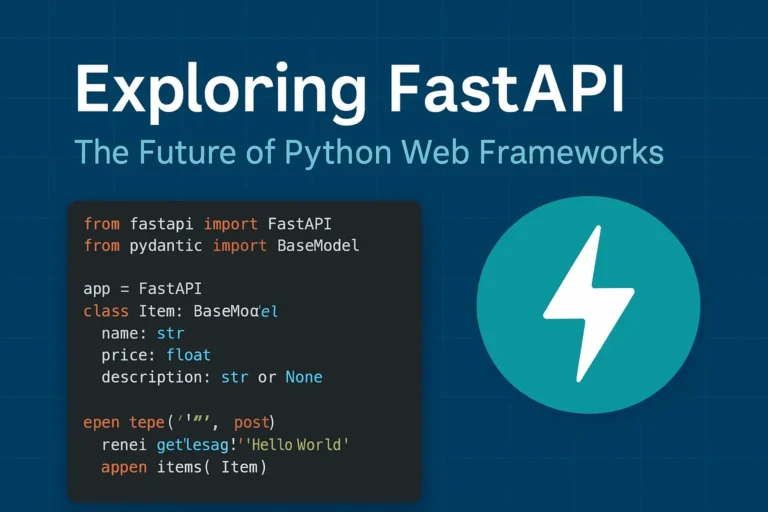
Why FastAPI is Taking the Python World by Storm In the rapidly evolving of Python web development, FastAPI has emerged as a game changing framework that’s reshaping how developers build modern APIs. Since its release in 2018, this innovative framework has gained massive adoption among developers worldwide, and for good reason. FastAPI combines the best of modern Python features with exceptional performance, making it an ideal choice for building production-ready APIs. Whether you’re a seasoned Python developer or just starting your web development journey, understanding FastAPI’s capabilities is crucial for staying ahead in today’s competitive development environment. What Makes FastAPI Special? Lightning-Fast Performance FastAPI lives up to its name by delivering exceptional speed that rivals frameworks written in Go and Node.js. Built on top of Starlette and Pydantic, FastAPI leverages Python’s async capabilities to handle thousands of concurrent requests efficiently. Performance benchmarks consistently show FastAPI outperforming traditional Python frameworks like Django and Flask by significant margins, making it perfect for high-traffic applications and microservices architectures. Automatic API Documentation One of FastAPI’s most beloved features is its automatic generation of interactive API documentation. Using the OpenAPI standard, FastAPI creates beautiful, interactive documentation that developers can use to test endpoints directly in the browser. This feature eliminates the tedious task of manually maintaining API documentation and ensures your documentation is always up-to-date with your code. Type Hints and Validation FastAPI leverages Python’s type hints to provide automatic request and response validation. This means fewer bugs, better IDE support, and more maintainable code. The framework uses Pydantic models to ensure data integrity and provide clear error messages when validation fails. Key Features That Set FastAPI Apart Modern Python Standards FastAPI is built with modern Python in mind, fully supporting: Built-in Security Features Security is paramount in modern web applications, and FastAPI provides robust built-in security features including: Developer Experience FastAPI prioritizes developer productivity with features like: Real-World Use Cases Microservices Architecture FastAPI excels in microservices environments due to its lightweight nature and fast startup times. Companies like Uber, Netflix, and Microsoft have adopted FastAPI for various microservices in their architecture. Machine Learning APIs The data science community has embraced FastAPI for deploying machine learning models as APIs. Its async capabilities and performance make it ideal for handling ML inference requests at scale. Traditional Web APIs From simple CRUD operations to complex business logic, FastAPI handles traditional web API development with elegance and efficiency. Getting Started with FastAPI Here’s a simple example of a FastAPI application: from fastapi import FastAPI from pydantic import BaseModel app = FastAPI() class Item(BaseModel): name: str price: float description: str = None @app.get(“/”) async def root(): return {“message”: “Hello World”} @app.post(“/items/”) async def create_item(item: Item): return {“item”: item} This simple example demonstrates FastAPI’s clean syntax and automatic validation through Pydantic models. FastAPI vs. Other Python Frameworks FastAPI vs. Django While Django remains excellent for full-stack web applications, FastAPI shines in API-first development with superior performance and modern async support. FastAPI vs. Flask Flask’s simplicity is appealing, but FastAPI offers better performance, automatic documentation, and built-in validation without sacrificing ease of use. FastAPI vs. Django REST Framework For pure API development, FastAPI provides better performance and developer experience compared to Django REST Framework, though DRF remains strong for Django-integrated projects. Best Practices for FastAPI Development Structure Your Project Organize your FastAPI project with clear separation of concerns: Performance Optimization Maximize your FastAPI application’s performance by: Testing and Documentation Ensure robust applications by: The Future of FastAPI FastAPI continues to evolve with regular updates and new features. The framework’s roadmap includes enhanced WebSocket support, improved performance optimizations, and better integration with modern deployment platforms. The growing ecosystem around FastAPI, including tools like FastAPI Users for authentication and FastAPI Cache for caching, demonstrates the framework’s bright future in Python web development. Conclusion: Is FastAPI Right for Your Next Project? FastAPI represents a significant leap forward in Python web development, combining high performance with developer-friendly features. If you’re building APIs that require speed, scalability, and maintainability, FastAPI should be at the top of your consideration list. The framework’s modern approach to Python development, combined with its excellent documentation and growing community support, makes it an excellent choice for both new projects and migrating existing applications. Whether you’re building microservices, machine learning APIs, or traditional web services, FastAPI provides the tools and performance needed to succeed in today’s competitive development landscape. If you like, please comment below for FastAPI’s more blogs:

Exploring FastAPI: The Future of Python Web Frameworks Read More »

The Power of Python: Real-World Project Ideas illustrated with laptop, Python logo, and project icons.

The Power of Python: Real-World Project Ideas

When people ask why I love Python, my answer is simple: it’s not just a programming language, it’s a toolbox for turning my ideas into reality. Python is beginner-friendly, versatile, and powerful enough to run everything from a tiny script on your laptop to large-scale systems powering global companies. But here’s the catch: learning Python by just reading syntax or following tutorials can feel… incomplete. The real magic happens when you build real-time projects, things you can see, use, and maybe even share with others. Projects push you to connect concepts, face real challenges, and gain the confidence that you’re not just “learning Python,” you’re using it. So, let’s talk about some real-world project ideas you can start with, depending on your interests. Use FastAPI for real-time chat, and django is the best framework for other projects. 1. Email and file automation Repetitive tasks are the enemy of productivity. Luckily, Python is perfect for automating them. You’ll be surprised at how empowering it feels when your code saves you time in the real world. 2. Blog Website Every developer needs a place to share their thoughts, projects, and journey. Why not build your own blog? The bonus? You learn backend logic and how to make something visually appealing. Plus, it doubles as your portfolio. 3. E-Commerce with Payment Integration Imagine running your mini Amazon-style site built with Python! This type of project will expose you to real-world concepts like authentication, databases, and secure transactions, things every serious developer should know. 4. Social Media App Social media powers our world. Building even a simplified version teaches you so much. You don’t need to reinvent Instagram or Twitter. Even a basic version is a fantastic learning experience in how large-scale platforms actually work. 5. Real-Time Chat App with WebSockets Chat apps are a perfect introduction to real-time communication. It’s one of those projects that feels “alive” because you’re building something interactive. 6. Data Analysis & Visualization Python shines when it comes to working with data. This isn’t just coding—it’s storytelling with data. Use streamlit for data visualization. 7. Movie Recommendation System This one’s always a crowd pleaser. It’s a cool project because people can actually interact with it, and it’s a great intro to AI without being overwhelming. 8. Fun & Creative Projects Not every project has to be “serious.” Some of the best learning happens when you’re just having fun. Quirky projects often keep you motivated when the “serious” ones get too heavy. Final Thoughts Python is powerful not because it’s the fastest or most complex language, but because it’s accessible and opens doors to so many areas of automation, web, data, AI, and even fun side projects. The best advice I can give is this: start small, but start today. Pick one idea from the list above and build it. It doesn’t have to be perfect; in fact, it won’t be perfect. And that’s the point. Every project teaches you something new. Before long, you’ll have a portfolio that doesn’t just show code, it shows creativity, problem-solving. Let me know which project you’re creating.

The Power of Python: Real-World Project Ideas Read More »

Infographic comparing Deep Learning and Machine Learning with icons of a brain and a gear, highlighting the differences between the two AI approaches

Deep Learning vs Machine Learning: Key Differences You Must Know

Are you usually confused about the difference between deep learning and machine learning? You’re not alone! These terms are frequently used interchangeably, but they are not the same. Understanding the distinctions is essential whether you’re a beginner stepping into AI or a professional aiming to sharpen your expertise. Let’s break it down everything you need to know about deep learning vs machine learning in clear, simple terms. What is Machine Learning? Machine learning is essentially about teaching a computer to recognize patterns in data without explicitly coding every rule. Think of it as showing a child hundreds of pictures of cats and dogs until they can figure out which is which on their own. Key characteristics of machine learning: Types of Machine Learning What is Deep Learning? Deep learning is a subset of machine learning, but it takes inspiration from how the human brain works. It uses artificial neural networks with many layers (hence the word “deep”) to process information. Imagine how your brain processes visual input. It passes through multiple layers of neurons, each detecting different features. Deep learning functions in a very similar way. Key characteristics of deep learning: Deep Learning vs Machine Learning: The Core Differences 1. Data Requirements 2. Feature Engineering 3. Hardware Requirements 4. Interpretability 5. Training Time When to Use Machine Learning vs Deep Learning Choose Machine Learning When: Choose Deep Learning When: Real-World Applications Machine Learning Examples: Deep Learning Examples: The Performance Factor Here’s an important insight: machine learning often outperforms deep learning on smaller datasets. But as the data gets bigger, deep learning tends to take the lead. Think of it like this: Getting Started: Which Path Should You Take? If you’re just beginning your journey in AI, start with machine learning first. Here’s why: Once you’re comfortable, you can dive into deep learning with confidence. Future Trends: What’s Next? The boundary between machine learning and deep learning continues to blur. Some exciting trends include: Conclusion Both machine learning and deep learning play vital roles in the AI landscape. The right choice depends on your data, resources, and goals. The key is to define your problem clearly before picking a tool. Don’t fall into the trap of using deep learning just because it’s trendy sometimes the simplest machine learning algorithm is exactly what you need. So, what’s your experience with machine learning vs deep learning? Have you found one more effective in your projects? Share your thoughts, I’d love to hear them!

Deep Learning vs Machine Learning: Key Differences You Must Know Read More »

100 linux command for vps setup

Learn 100+ Essential Linux Commands to Set Up a Fresh VPS with Python, PostgreSQL, MySQL, and MongoDB

For a developer, setting up a VPS for production can be one of the most challenging tasks. Here’s a basic setup guide to get your server ready for deployment. Whether you’re hosting a Django app, Node.js API, or Laravel website, you’ll need a reliable set of Linux commands to prepare your environment. In this post, I’m sharing 100+ essential Linux commands that I personally use when setting up a fresh VPS. These commands cover everything from server access and file management to firewall configuration, database installation, and much more—making your VPS deployment smooth and production-ready. 1. Server Access & Session Management 2. System Info & Monitoring 3. User & Permission Management 4. File & Directory Management 5. Networking & Firewall 6. Package Management (Debian/Ubuntu) 7. Git & Code Deployment 8. Web Server Setup 9. Process & Service Management Bonus command This is for running the development server only. If you want to run a production server, use Gunicorn or uWSGI. View my previous blog on how to deploy Django on AWS. Here’s a step-by-step guide on how to run a Django project on a server in the background using screen: 1. Install screen (if not already installed) sudo apt updatesudo apt install screen -y On CentOS/RHEL: sudo yum install screen -y 2. Start a new screen session django_server Just name whatever you want; you can make it. screen -S django_server 3. Activate your virtual environment source venv/bin/activate Create your virtual environment folder 4. Navigate to your Django project cd /path/to/your/project 5. Run the Django development server python3 manage.py runserver 0.0.0.0:8000 6. Detach from the screen session Press this command: CTRL + A then D 7. List all screen sessions screen -ls 8. Reattach to the session screen -r django_server 9. Kill the screen session (stop the server) screen -X -S django_server quit Please comment below if you guys like my post.

Learn 100+ Essential Linux Commands to Set Up a Fresh VPS with Python, PostgreSQL, MySQL, and MongoDB Read More »

Mastering Python: 17 Tips, Tricks, and Best Practices That Will Transform Your Code.

Mastering Python: 17 Tips, Tricks & Best Practices

After five years of wrestling with Python code, debugging countless scripts, and building everything from web scrapers to machine learning models, I’ve learned that mastering Python isn’t just about memorizing syntax—it’s about developing the right mindset and knowing which tools to reach for when. Today, I’m sharing the practical tips, clever tricks, and battle-tested best practices that transformed me from a struggling beginner into a confident Python developer. Whether you’re just starting or looking to level up your existing skills, these insights will save you hours of frustration and help you write cleaner, more efficient code. Why Python Mastery Matters More Than Ever Python has become the Swiss Army Knife of programming languages. Python powers some of the world’s most innovative companies, from data science and web development to automation and AI. But here’s the thing I wish someone had told me earlier: knowing Python syntax is just the beginning. The real magic happens when you understand how to write Pythonic code that’s readable, maintainable, and efficient. Understanding Pythonic Thinking 1. Embrace the Zen of Python Remember when you first discovered import this? Those 19 lines aren’t just philosophy—they’re your roadmap to better code. “Simple is better than complex” and “Readability counts” have saved me from countless over-engineered solutions. My favorite principle in action: # Don’t do this result = [] for item in my_list: if item > 5: result.append(item * 2) # Do this instead result = [item * 2 for item in my_list if item > 5] 2. Master List Comprehensions (But Don’t Overdo It) List comprehensions are Python’s secret weapon for writing concise, readable code. But I learned the hard way that complex nested comprehensions can become unreadable nightmares. List comprehensions make it slightly faster than the normal append function. The sweet spot: # Perfect for simple transformations squares = [x**2 for x in range(10)] # Great with conditions even_squares = [x**2 for x in range(10) if x % 2 == 0] # But avoid this complexity nested_mess = [[y for y in x if condition(y)] for x in matrix if filter_func(x)] Game-Changing Python Tricks I Wish I’d Known Earlier 3. The Power of Enumerate and Zip Stop using range(len(list))! This was one of my biggest early mistakes. Python gives you better tools. # Instead of this amateur hour code for i in range(len(items)): print(f”{i}: {items[i]}”) # Write this like a pro for i, item in enumerate(items): print(f”{i}: {item}”) # And combine lists elegantly be careful while using zip both list lenght should be same. names = [‘Alice’, ‘Bob’, ‘Charlie’] ages = [25, 30, 35] for name, age in zip(names, ages): print(f”{name} is {age} years old”) 4. Context Managers: Your New Best Friend Context managers changed how I handle resources. No more forgotten file handles or database connections! # The old way (prone to errors) file = open(‘data.txt’, ‘r’) content = file.read() file.close() # Easy to forget! # The Pythonic way with open(‘data.txt’, ‘r’) as file: content = file.read() # File automatically closed, even if an exception occurs 5. Dictionary Magic with get() and setdefault() Dictionaries are Python’s crown jewel, but I spent too long writing clunky if-statements before discovering these gems. # Avoid KeyError headaches user_data = {‘name’: ‘John’, ‘age’: 30} email = user_data.get(’email’, ‘No email provided’) # Build dictionaries dynamically word_count = {} for word in text.split(): word_count.setdefault(word, 0) word_count[word] += 1 # Or use defaultdict for even cleaner code from collections import defaultdict word_count = defaultdict(int) for word in text.split(): word_count[word] += 1 Best Practices That Will Make Your Code Shine 6. Write Self-Documenting Code with Descriptive Names I used to write code like this: def calc(x, y). Don’t be past me. Your future self will thank you for clear, descriptive names. # Vague and confusing def process(data): result = [] for item in data: if item > threshold: result.append(item * factor) return result # Clear and self-documenting def filter_and_scale_values(measurements, min_threshold=10, scale_factor=1.5): “””Filter measurements above threshold and apply scaling factor.””” scaled_values = [] for measurement in measurements: if measurement > min_threshold: scaled_values.append(measurement * scale_factor) return scaled_values 7. Exception Handling: Be Specific, Not Lazy Generic except: Statements are a code smell. Be specific about what you’re catching and why. # Too broad – hides important errors try: result = risky_operation() except: print(“Something went wrong”) # Better – handle specific exceptions try: result = divide_numbers(a, b) except ZeroDivisionError: print(“Cannot divide by zero”) result = None except TypeError: print(“Invalid input types for division”) result = None 8. Use Type Hints for Better Code Documentation Type hints transformed how I write and maintain Python code. They’re not just for the compiler—they’re documentation for humans. from typing import List, Optional, Dict def calculate_average(numbers: List[float]) -> Optional[float]: “””Calculate the average of a list of numbers.””” if not numbers: return None return sum(numbers) / len(numbers) def group_by_category(items: List[Dict[str, str]]) -> Dict[str, List[str]]: “””Group items by their category field.””” groups = {} for item in items: category = item.get(‘category’, ‘uncategorized’) groups.setdefault(category, []).append(item[‘name’]) return groups Advanced Techniques for Python Mastery 9. Generators: Memory-Efficient Data Processing Generators were a revelation when I started working with large datasets. They process data lazily, using minimal memory. # Memory-heavy approach def read_large_file_bad(filename): with open(filename) as f: return [line.strip() for line in f] # Memory-efficient approach def read_large_file_good(filename): with open(filename) as f: for line in f: yield line.strip() # Use it like any iterable for line in read_large_file_good(‘huge_file.txt’): process_line(line) # Process one line at a time 10. Decorators: Clean and Reusable Code Enhancement Decorators seemed like magic when I first encountered them. Now they’re essential tools in my Python toolkit. wraps is a decorator from Python’s functools module that preserves the original function’s name, docstring, and other metadata when it’s wrapped by another function (like in a decorator). Below is a simple example. import time from functools import wraps def timing_decorator(func): “””Measure and print the execution time of a function.””” @wraps(func) def wrapper(*args, **kwargs): start_time = time.time() result = func(*args, **kwargs) end_time = time.time() print(f”{func.__name__} took {end_time – start_time:.4f} seconds”) return result return wrapper @timing_decorator def slow_function(): time.sleep(2) return “Done!”

Mastering Python: 17 Tips, Tricks & Best Practices Read More »

top 5 best AI coding tools in 2025

Top 5 Best AI Coding Tools in 2025

The world of software development is changing faster than ever, and AI coding tools are leading the charge in 2025. These powerful assistants can help you write cleaner code, debug faster, and even plan entire architectures. Whether you’re a beginner learning your first language or a senior developer managing complex projects, the right AI tool can supercharge your productivity. Here are my top picks after years of hands-on use. 1. Claude AI – Best for Frontend Design Why it’s great for developers: Claude’s latest models (Claude 4) are exceptional at understanding project context and producing elegant, maintainable code. This is my favorite AI. It has some limits on the free plan, but it’s excellent for front-end design — incredibly creative when building UI layouts. Another thing I like is that it can generate longer content than ChatGPT. Key Features: Real-world use: I use Claude to refactor old codebases — it spots inefficiencies I’d probably miss. In recent benchmark tests, Claude 3.7 ranked among the top performers for implementation quality. Best for: Large projects, architecture design, deep code reviews. 2. ChatGPT 5 – Best for complex logic Why it’s essential: ChatGPT is one of the most popular AI tools, and with the launch of ChatGPT 5, it’s even more powerful. Trained on a massive dataset, it supports multiple languages and provides up-to-date information across various fields. It can help with everything from quick code snippets to full project prototypes. Key Features: Real-world use: I rely on ChatGPT daily for writing unit tests, explaining APIs, and exploring new frameworks. Best for: Rapid prototyping, learning new languages, brainstorming solutions. 3. Cursor AI Code IDE Nowadays, Cursor is a game-changing IDE that can transform a developer’s coding skills. Even with just basic knowledge, you can create your software or website because it can read all your project files and understand your logic. This makes it incredibly helpful for development. In the background, it uses ChatGPT (I believe), which powers its smart suggestions and assistance. Key Features: Real-world use: With Cursor, I can make project-wide changes in seconds and fix issues before they even hit the compiler. Best for: Full-stack development, managing large codebases, and AI-assisted pair programming. 4. Gemini (Google) – Best for Research & Documentation Gemini combines coding assistance with Google’s research power, making it perfect for exploring new technologies. It includes a guided-learning feature that helps you work through complex problems—you just need to provide information step by step. Plus, Gemini is integrated into the Android ecosystem, making it easily accessible on many devices. Key Features: Real-world use: I often turn to Gemini when learning a brand-new framework — it simplifies the docs and shows examples I can use right away. Best for: API integration, documentation, learning cutting-edge technologies. 5. DeepSeek R1 – Free & Open-Source Option Why it’s impressive: DeepSeek delivers GPT-level coding power for free — no sign-up, no limits, fully open-source. It has better reasoning and can create complex logic. Most importantly, you can download and install it on your local system; it will work the same as its online version. Key Features: Real-world use: While not as polished as paid tools, DeepSeek’s raw power makes it perfect for quick experiments or personal projects. Best for: Students, budget-conscious developers, open-source projects. Pro Tips to Get the Most Out of AI Coding Tools Final Thoughts This is for every developer: don’t lose your skills by depending entirely on AI. Sometimes, build your logic. AI is only as good as what we have trained it on, and it doesn’t think like we do. It’s best used for repetitive tasks where it truly excels. Use AI to Enhance Your Skills, Not Habit. AI is not replacing developers — it’s empowering us. Claude 4 Opus is already setting performance records (72.5% on SWE-Bench), and tools like Cursor are changing how we interact with code. Try them, experiment, and build your AI-powered workflow. The developers who embrace these tools now will be the ones building the future. Your turn: Which AI coding tool has made the biggest difference in your projects? Share your experience in the comments!

Top 5 Best AI Coding Tools in 2025 Read More »

Scroll to Top